
The GIT Beebox extension allows to translate GIT repositories with a Beebox project.
Download and install GIT connector
Download the extension from this page: Downloads The file name is Wordbee.Beebox.Extensions.Git.BeeboxPackage.zip.
Login to the Beebox user interface and click Administration, then the Extensions tab and finally upload the zip file. Once uploaded the extension should appear as shown below:

Once uploaded, you are ready to link any Beebox project into a GIT repository.
Note that the source code is available from the download link. Feel free to amend to your specific requirements.
Configure a project
Connect to GIT repository
Select an existing Beebox project or create a new one.
Go to Settings and click the Edit link. Now scroll down to the bottom of the page and you will see the GIT connector parameters:

Tick the connector and fill in the JSON formatted configuration. A minimal configuration looks as follows:
{
	"url": "https://bitbucket.org/myrepo/demogit",
	"username": "acme@acme.com",
	"password": "mypassword",
	"branch": "mybranch"
}
Mandatory parameters are:
-
url: The GIT repo URL
-
username: User to connect to repository
-
password: User’s password
-
branch: The branch to which the project will connect. It is recommended to create a dedicated branch for localization, although you could link to master directly if you so wished.
Optional parameters are:
-
signatureName: A signature included with commits. If not specified then connector uses “Wordbee”
-
signatureEmail: The email included with commits. If not specified then connector uses “noreply@wordbee.com”
To translate additional branches in the repository, then activate the “multi-branch” properties in the next chapter:
-
multibranch: { … } See next chapter
Each Beebox project can have its own configuration.
Configure localization of multiple branches
With this feature you can localize (inside a single Beebox project) any number of branches in your repository. For example, any changes to translatable files in all your feature branches or all your release branches.
Simply add to your configuration a node similar to this:
 ...
 "multibranch": {
    "enabled": true,
    "staticBranches": [
		"master",
		"develop",
		"release"
	],
    "regexBranches": [
      "^feature.+"
    ]
  }
-
enabled: Set to true to activate this feature.
-
staticBranches: A list of branch names to localize. You should include here the branch name you set on the branch property.
-
regexBranches: A list of regular expressions to dynamically capture branch names such as all branches prefixed with “feature/”.
How does it work?
-
With each “Auto run”, Beebox will first fetch the latest list of branches and clone any new branches to its “in” directory.
-
It will then pull changes from all listed branches. Note that all branches are cloned to the “in” directory and to subdirectories according to the branch names.
-
Pulled changes trigger translation workflows as any Beebox project would do with new or changed files showing up in the “in” directory.
-
Any finished translations (see below how to automatically transfer and rename in the “in” directory) will be pushed and committed to the respective target branch.
-
The commit history and the Beebox logs show each individual action.
Configure location of translated files
Now you need to define how translated files are pushed back into the repository.
In a nutshell, we will specify that translated files are deposited in the “in” directory (since it is this folder that is synced).
In the project, click Settings and then Hot folders.
In the upper part we specify that the .git/ folder shall not be translated. This is an important step. Note: You can also exclude other folders for translation and even define which folder content needs to be translated into which languages.
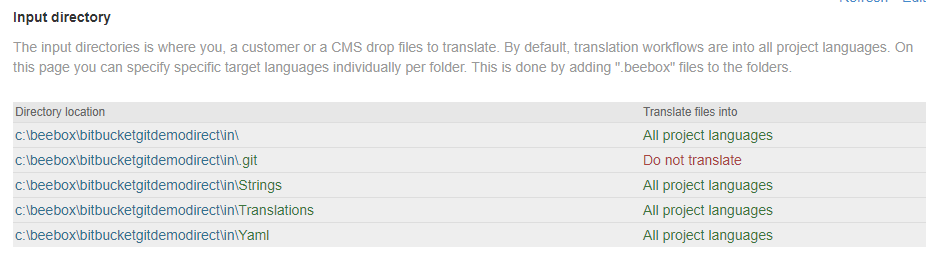
In the lower part you define where the translated files are to be stored and how they are named:
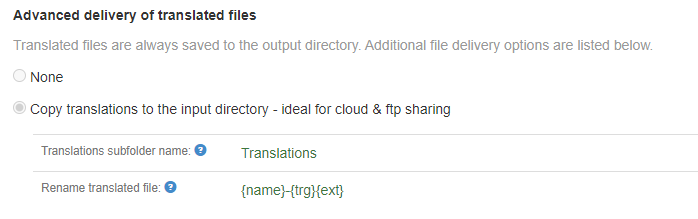
Specify a sub folder in the GIT repository (it will be created if it does not yet exist).
Optionally, you can have the translated files be renamed. In the example above we translate “myfile.html” into “myfile-es.html” etc.
Operations
Once the project is configured and linked to a repository, the system will synchronize content with the repository when clicking Autorun.
Or, automatically and every so often as per the Project > Automation configuration.
The very first time, the connector will clone the GIT repository to the project’s “in” directory. A number of git-specific files will appear:
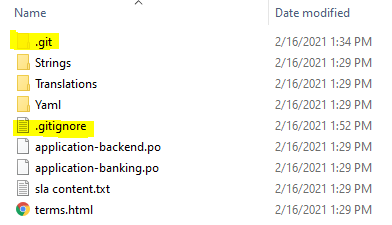
All the other files were pulled from the repository branch.
Inside your GIT (here with GitBucket) you can see all commits as usual.
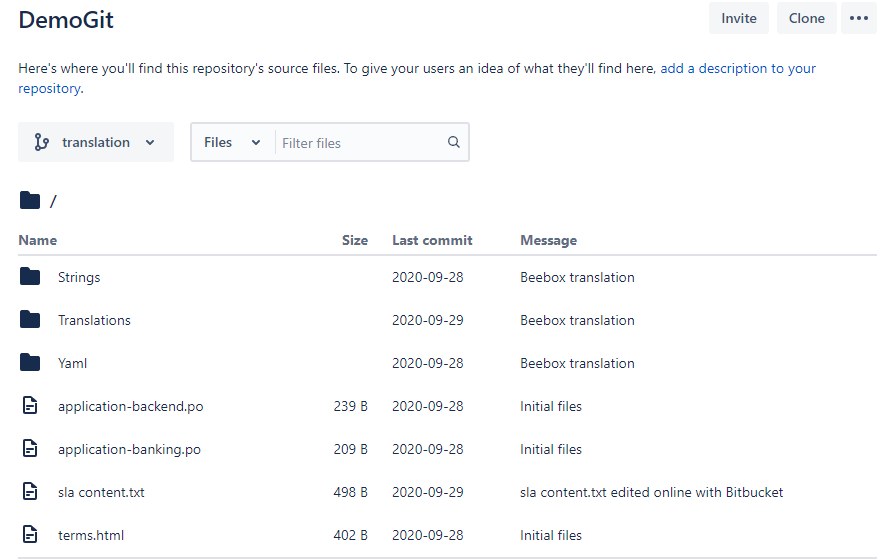
As with any GIT process, you will see individual differential changes:

As with any Beebox process, the exact changed “segments” or text blocks will be identified by Beebox and sent into a translation workflow. This cost and time saving feature is not different here than with any of the Beebox workflows!
Logs and error discovery
The GIT connector logs every single action and every single error for your convenience.
Open the Beebox directory on the server and navigate to the project subfolder and then to temp:
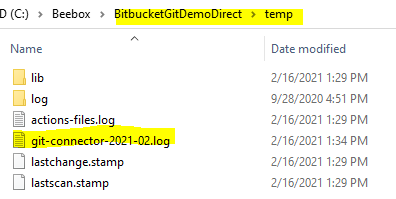
This is the GIT connector’s log file. It creates one per month.
If you do not have direct access to the Beebox server, ask for FTP access to this folder.
The contents show one line per event. For our newly created project, we have just a few lines so far:
