
A translation work is never free! You need to send quotes/invoices to your clients, and you also have to pay the supplier(s).
-
For a Standard project:
Whenever you choose a supplier to do a job, the cost is automatically calculated based on theprice/word of the supplier and the number of words translated/revised...
-
Select the project.
-
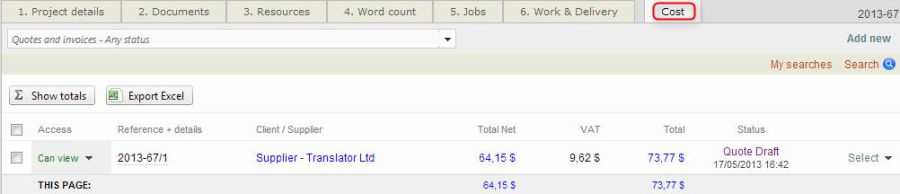
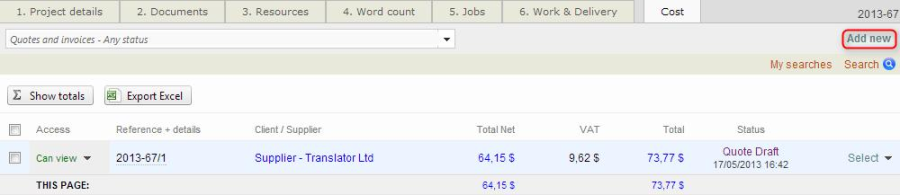
Click on Cost.
-
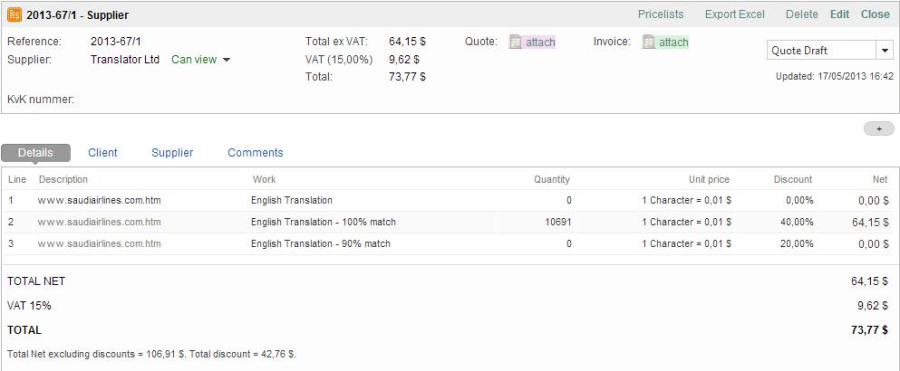
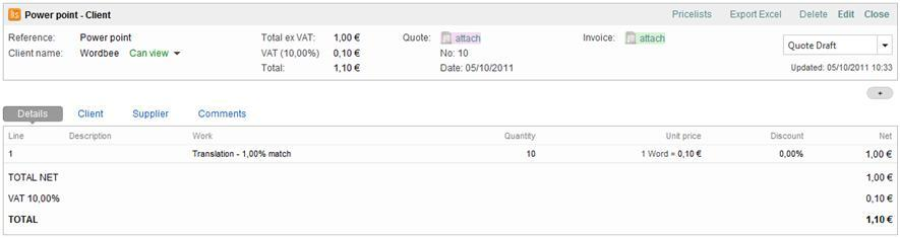
If you want to display the details of the quote/invoice, click on Select and you will see this page in a new window:
-
Click on attach, next to Quote or Invoice to upload a file from your computer or click on Create file to upload an Excel sheet already containing the quote/invoice already
pre-completed:
You can customize the layout of the Excel sheet below by going to Settings - Invoicing and client processes - Invoices layout.
-
If you need to create a new invoice/quote, go back to the Cost tab of the project and then, click on Add new:
The Create new quote or invoice window opens:
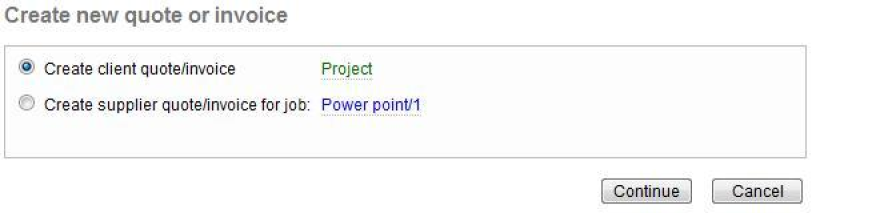
Choose between creating an invoice/quote for a client or for a supplier.
Note: If you click on Project (in green), you will see a pop up window with the summary of the project for which you are doing an invoice/quote (name, client, manager, deadline...). By clicking on go to page, you will reach the Project details page.
If you click on Job reference (in blue), you will see a summary of the job for which you are doing an invoice/quote. By clicking on go to page, you will reach the Job details page.
-
Click on Continue.
-
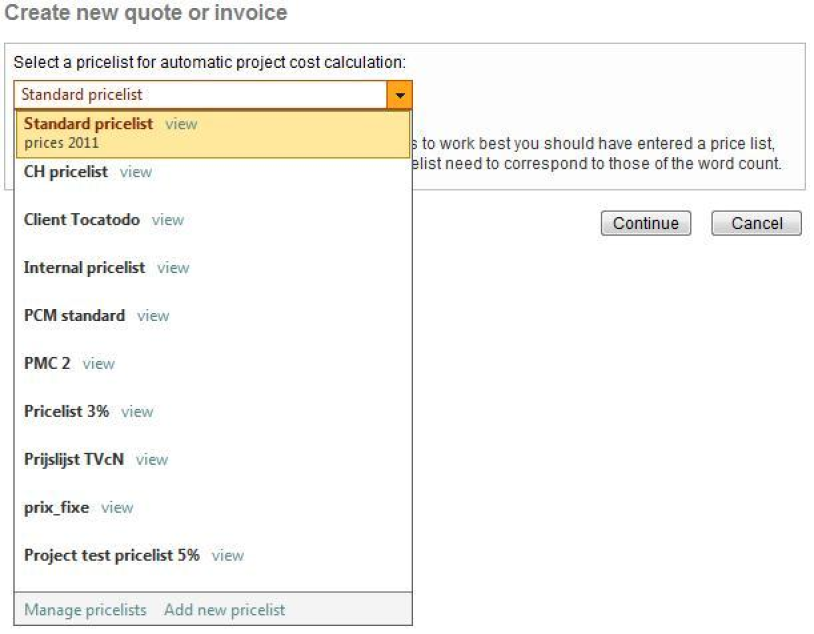
Choose your price list and click on Continue.
-
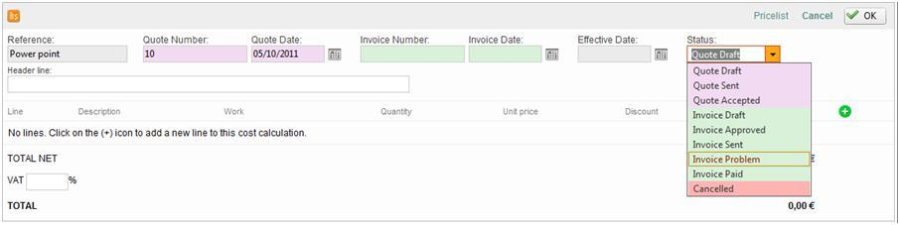
You will reach a page in which you can give a number to your quote/invoice and also a title (in Header line), set the status, the date, the Effective date as well as the VAT rate.
-
You can make the software calculate the number of the quote/invoice depending on the date by clicking on

. Configure this option in Settings - Invoicing processes - Client invoices - Auto assign invoice number/date upon user click.
-
If you click on Price list (at the top of the page), it will open a new window in which you will find the price list of your client/ supplier in details.
-
You can delete (

), edit (

) a line or create a new one (

).
-
Click on OK when you are finished. You will reach the following step:
-
If you click on Client, you will see a summary of the client's data (including the Debtor No which is an accounting number). Click on the email address to send the client an email. Click on view full details to reach the client's page.
-
If you click on Supplier, you will see a summary of the supplier's data (including The Creditor No which is an accounting number). Click on the email address to send an email to the supplier. Click on view full details to reach the supplier's page.
-
If you click on Comments, you can edit a Comment only visible to internal users.
-
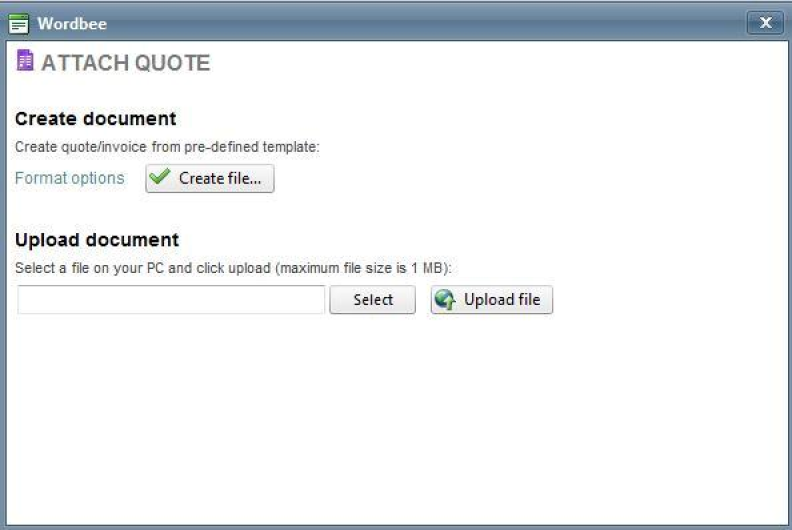
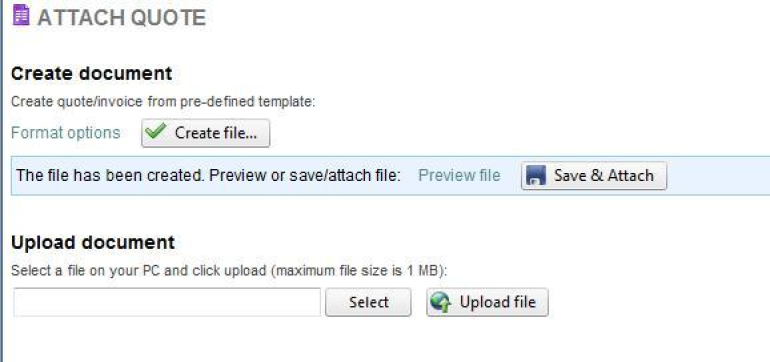
Now, click on Attach next to Quote or invoice to either upload a document you have in your computer (Upload document sub-section) or to insert a professional quote/invoice created by Wordbee (Create document sub-section).
-
We choose to let Wordbee do the job for us.
-
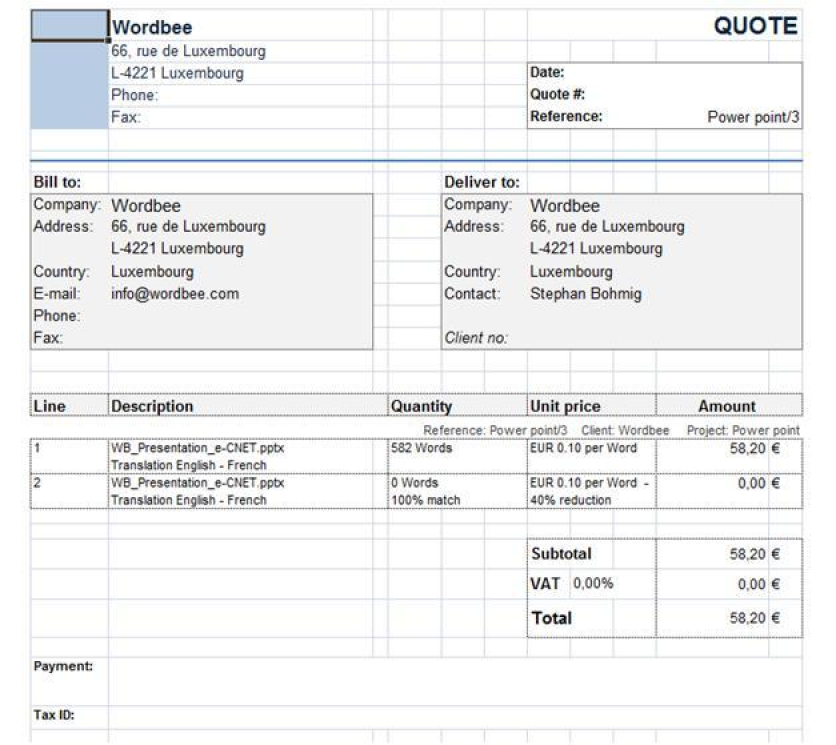
Click on Format options to choose the language in which will be written the quote/invoice (6 languages available: English, German, Spanish, French, Portuguese and Dutch) and choose the format you want for your quote/invoice.
-
Then, click on Create file:
-
If you click on Preview file, you will download the document in the format you have chosen.
-
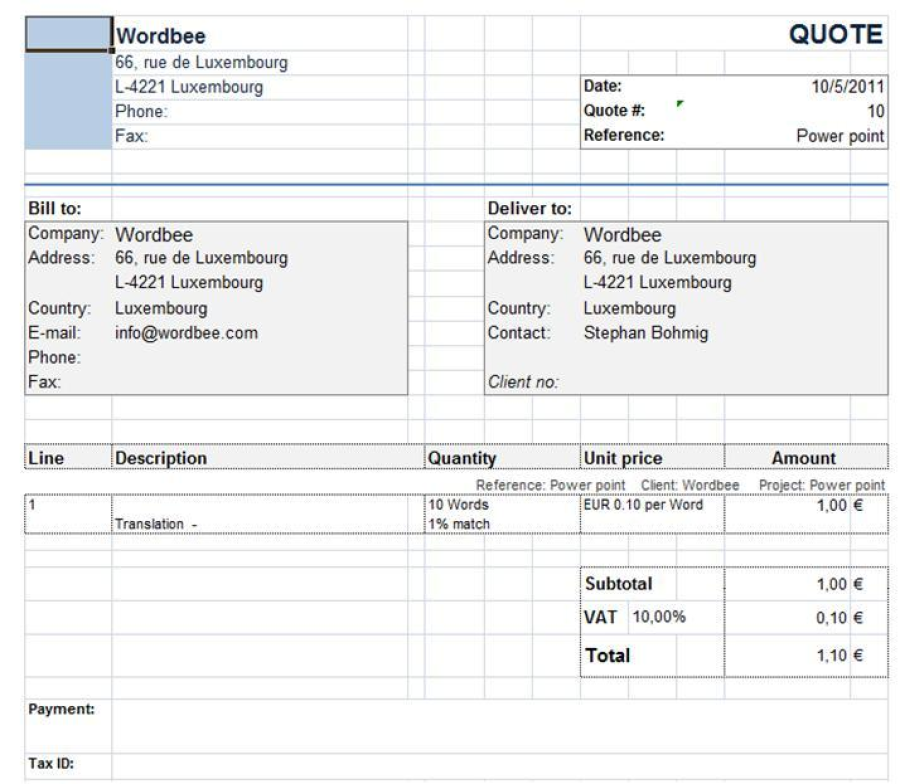
By clicking on Save & Attach, your client/ supplier will receive this document:
-
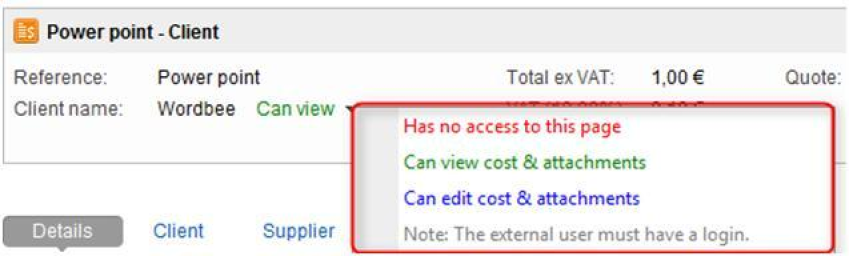
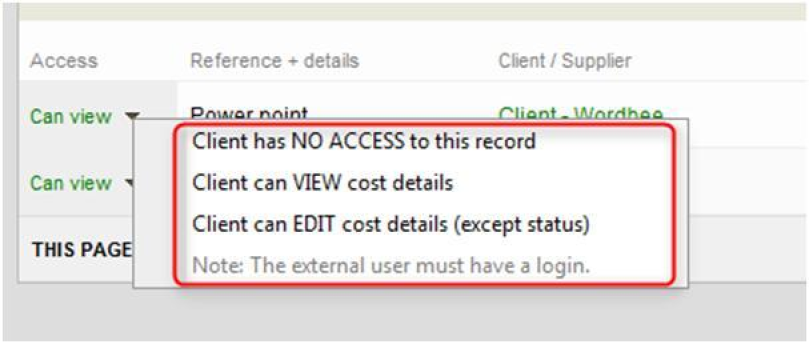
On this page, you can also change the degree of accessibility of your client/supplier: Next to Client Wordbee (screenshot below), you have a pointing down arrow. Click on it and choose between different options:
-
When everything is set up, click on Close (right top of the page) and go back to the Cost page of the project. You will see that a new invoice/ quote have been created.

-
The total is useful if you create several quotes and invoices and you want to see how much it is going to cost you. Everything is automatically calculated based on the number of words and the prices of the different clients and suppliers.
-
Click on Select to go back to the quote/invoice page.
-
If you click on the pointing down arrow next to Can view (in green), you can choose between several options:
B) For a CoDyt Project
-
Select the project
-
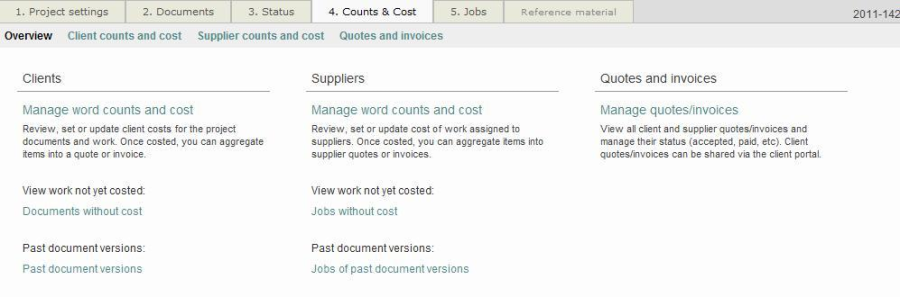
Click on the tab: Counts and Cost
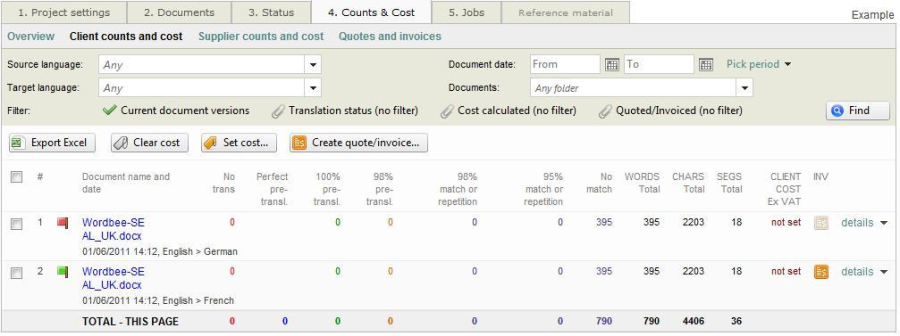
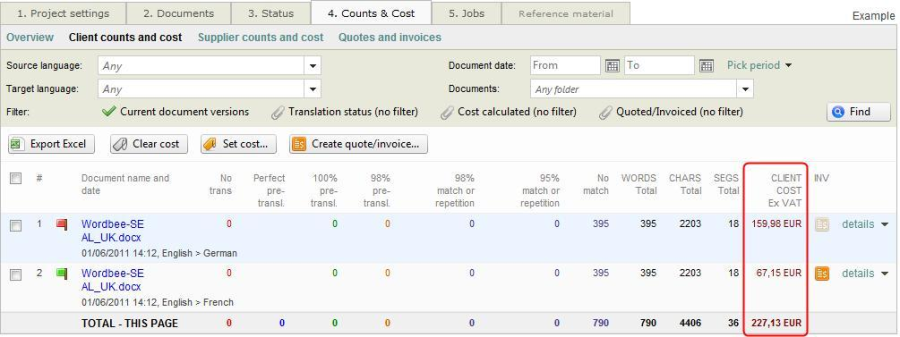
1. Client counts and cost
-
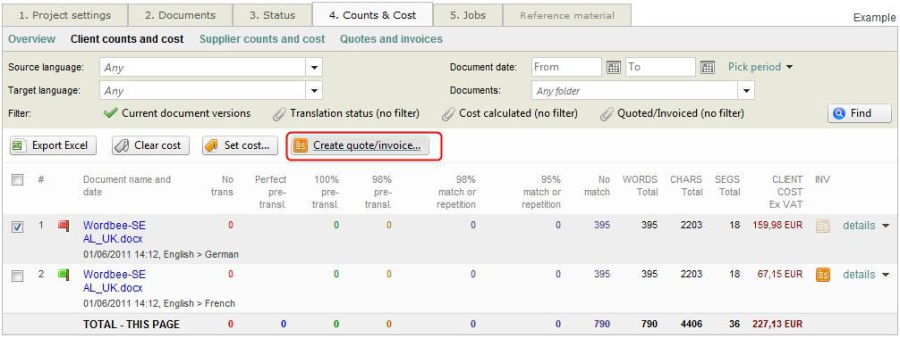
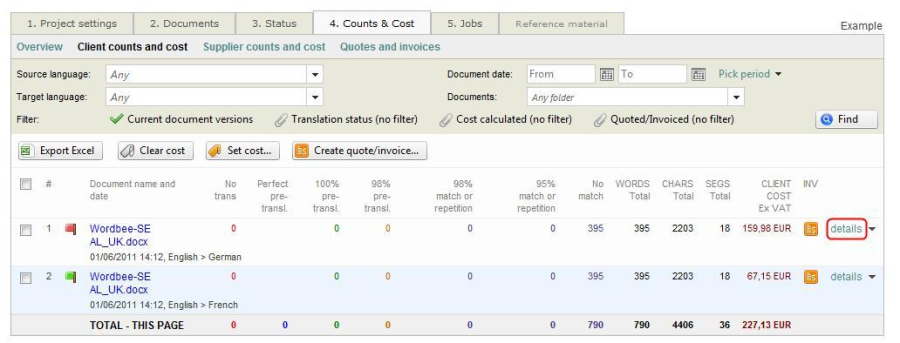
If you click on Client counts and cost you will reach this page:
-
Click on Set cost (see screenshot above) , after having selected the task for which you want to establish a cost by ticking the box situated at the left of the document's name (if you want to set the cost for all the jobs, do not select any of them and click directly on Set cost).
-
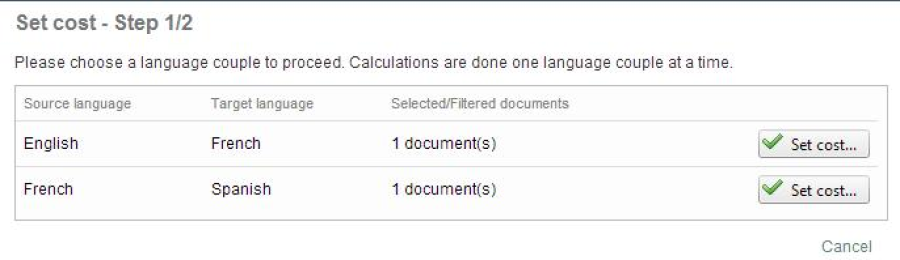
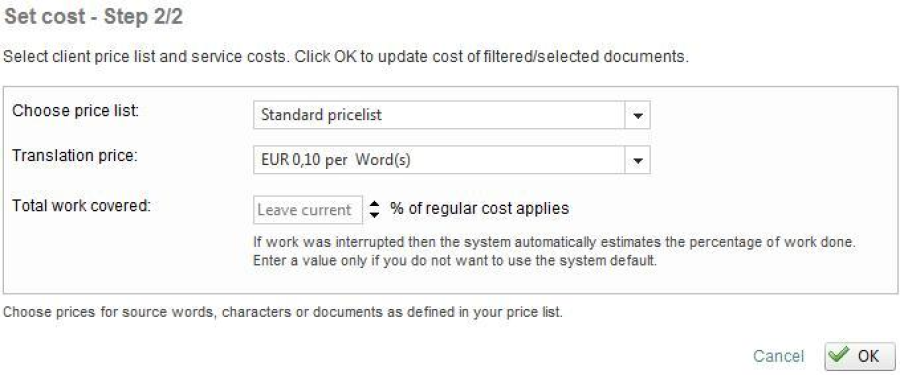
Click on Set cost in the Set cost - Step 1/2:
-
Complete the fields you need for your project and then, click on OK:
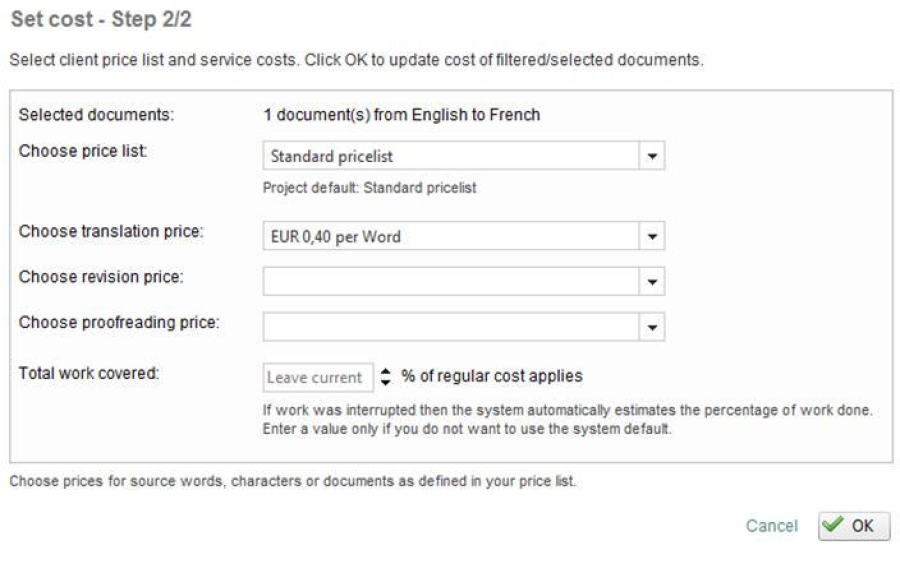
-
Wordbee automatically calculates the total cost based on the number of words, the price per word...
2. Supplier counts and cost
-
Click on Supplier counts and cost in the Counts and cost tab:
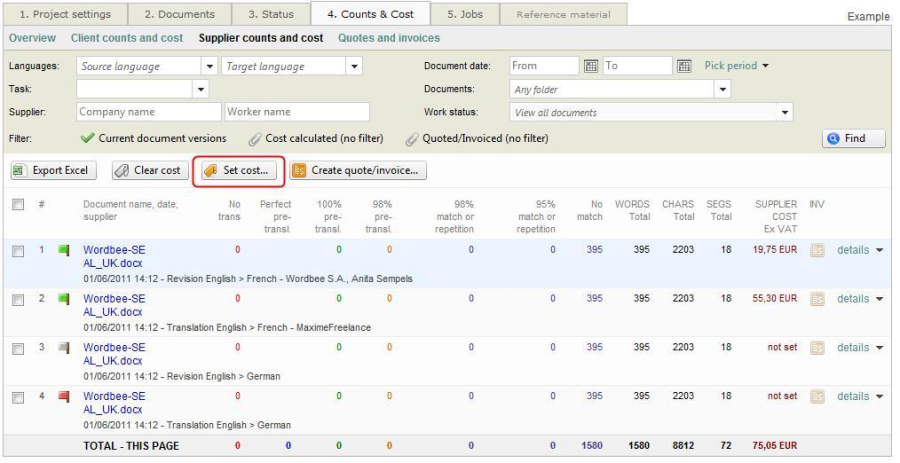
-
Select the task for which you want to set the cost by ticking the corresponding checkbox and click on Set cost.
-
Click on choose cost in the Set cost-Step 1/2:
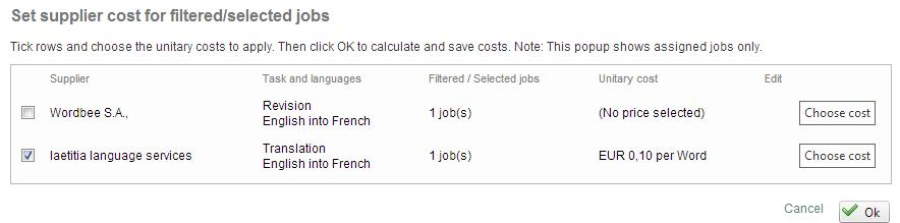
-
Check that the information is correct and then click on OK in the Set cost-Step 2/2.
3. Following section for both 'Client counts and cost' and 'Supplier counts and cost'
-
When you have finished, click on Create quote/invoice selected:
-
You will reach a new window called Create new client quote/invoice (or supplier if you are in Supplier counts and cost):
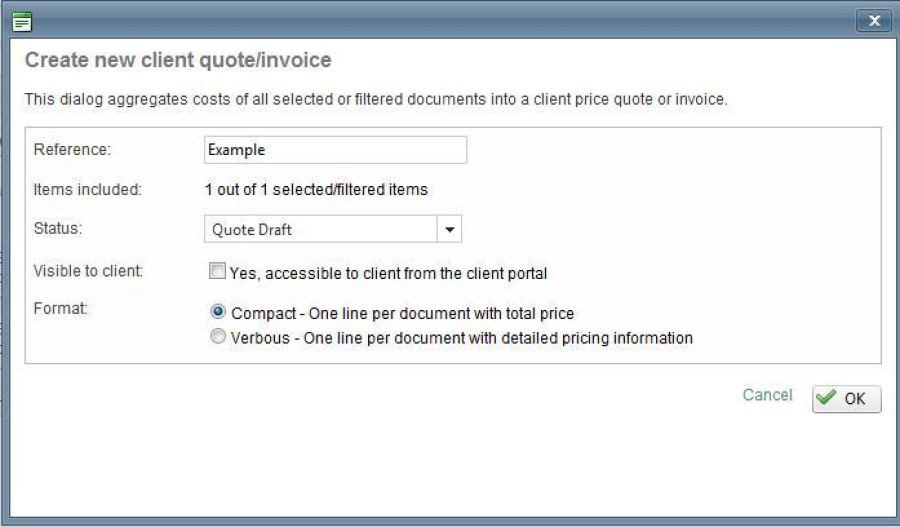
-
Choose the status and the format.
-
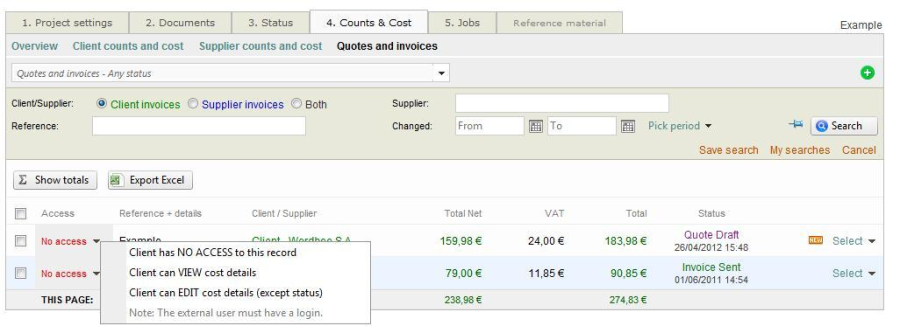
You will be redirected to the sub-menu Quotes and invoices of the Counts and Cost tab where you will see the list of the different quotes or invoices created for either your clients or your suppliers.
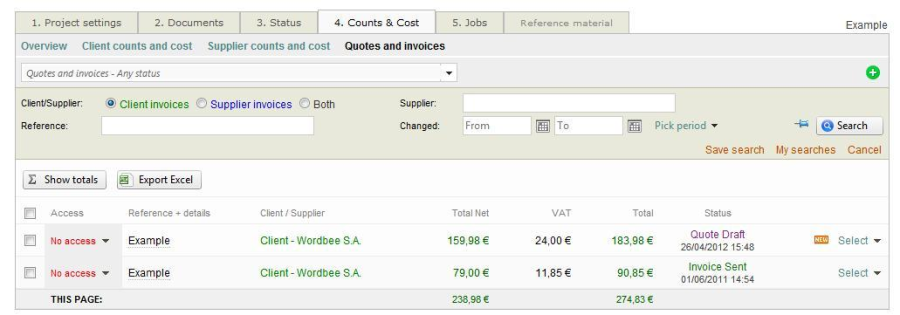
-
You can see that in the example shown in the screenshot above: the client has no right access to the cost details. You can change this feature by clicking on the arrow next to No
access
and choose among the three options shown in the screenshot below:
-
Go back to either Client counts and cost or Supplier counts and cost, depending on for whom you have sent the recently invoice/quote created. The

icon will give you some information about the quote you created.
-
Click on details:
-
You will see this window:
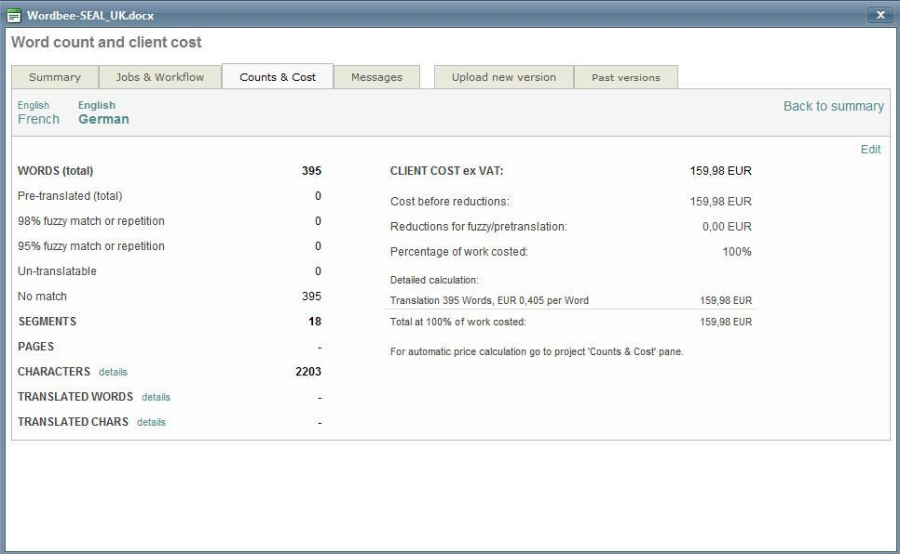
-
On this page, you can see the Word count on the left and the Supplier/Client cost on the right.
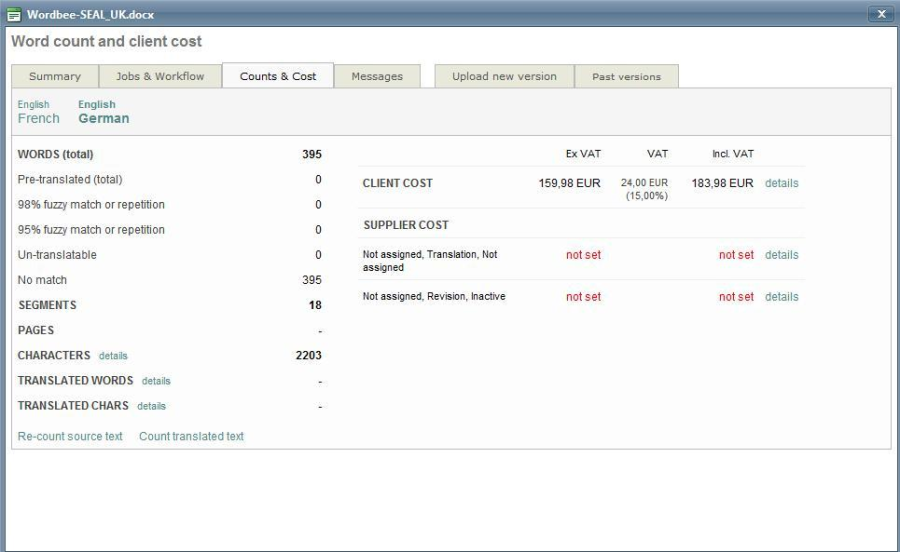
-
If you click a second time on Counts and Cost, it will show you both the Client and the Supplier cost: