
Synchronization in Google Sheets
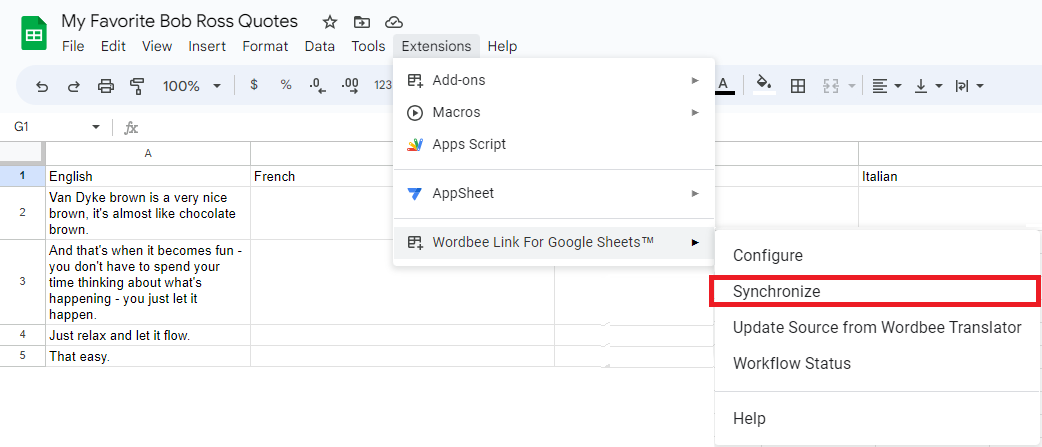
After you have successfully mapped your columns, you can now synchronize the sheet content with Wordbee Translator. You can start the synchronization process by selecting “Synchronize” in the Wordbee Link extension.
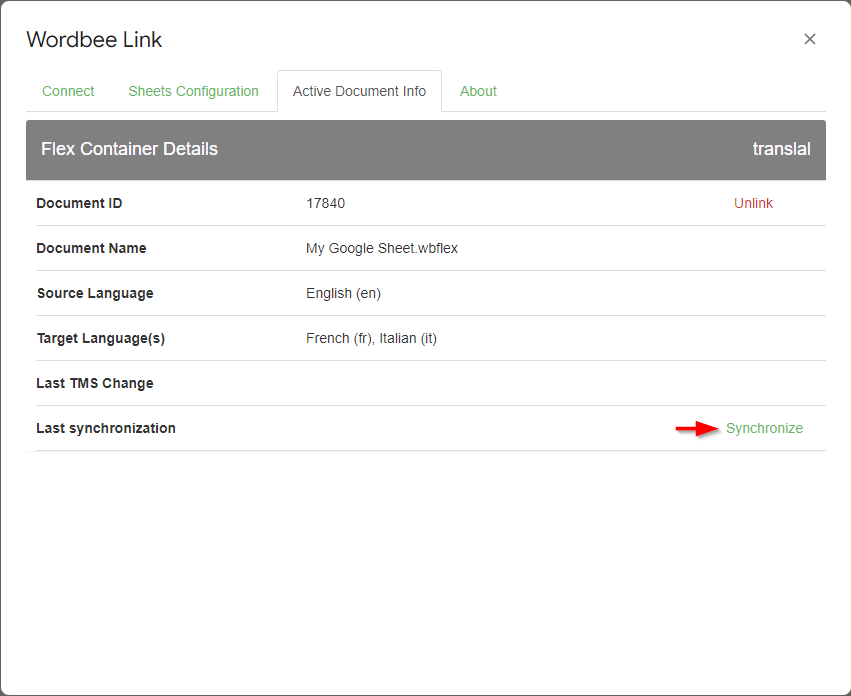
Alternatively, you can find a Synchronize button in the Active Document Info tab of the configuration screen. Here you can also find information about the connected Flex document as well as timestamps for past synchronization operations.
By clicking on “Synchronize” the updates are getting pushed and pulled between Wordbee Translator and Google Sheets.
Pulling Updates from Wordbee Translator
In a first step information from Wordbee Translator is pulled into the Google Sheet. This information includes target text, last change dates and custom fields.
Pushing Updates to Wordbee Translator
Afterwards, content is pushed from your Google Sheets to Wordbee Translator. This includes source text, custom fields and segment lengths.
A Note on Custom Field Synchronization
Custom fields are the only properties that you can pull and push in both directions. If there are differences in the custom field information in Wordbee Translator and Google Sheets, the information from Wordbee Translator will be pulled first and overwrite the information in Google Sheets.
Accessing Information in Wordbee Translator
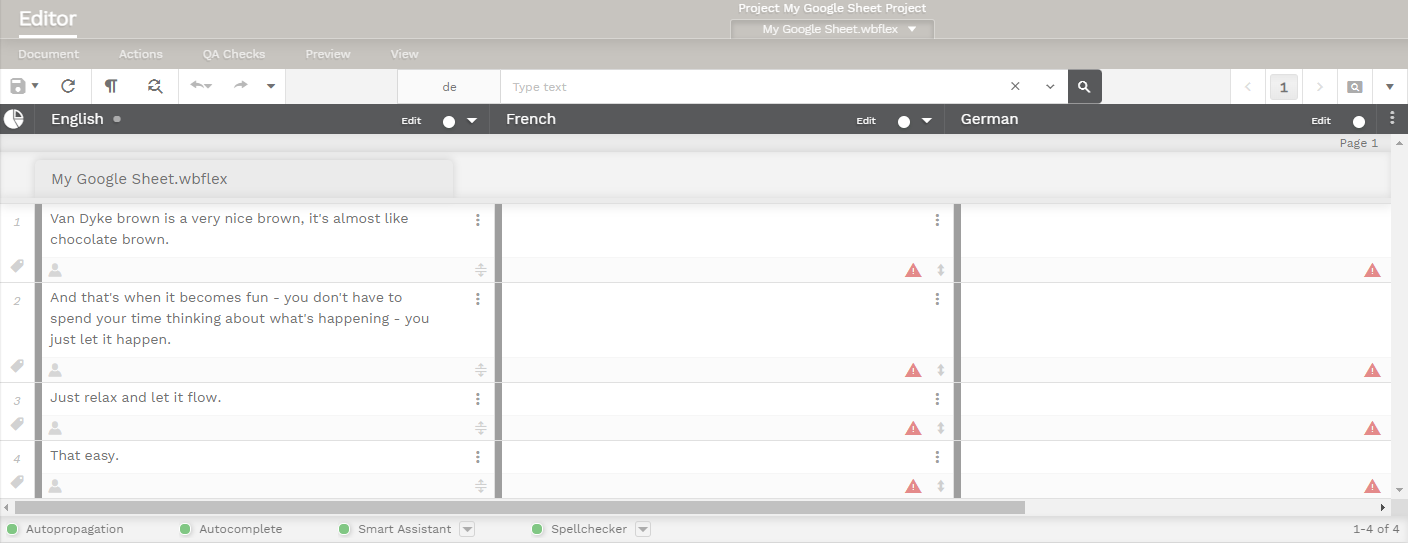
To view your pushed information, go to the CAT Editor in Wordbee Translator. Here you will see all the information that has been pushed. Translators can now start working.
Google Sheet users can synchronize the content again at any time to push new or changed source texts and check the current status of the translation. Depending on the workflow and Flex parser settings, linguistic workers will be notified of these updates and invoices will be created accordingly.
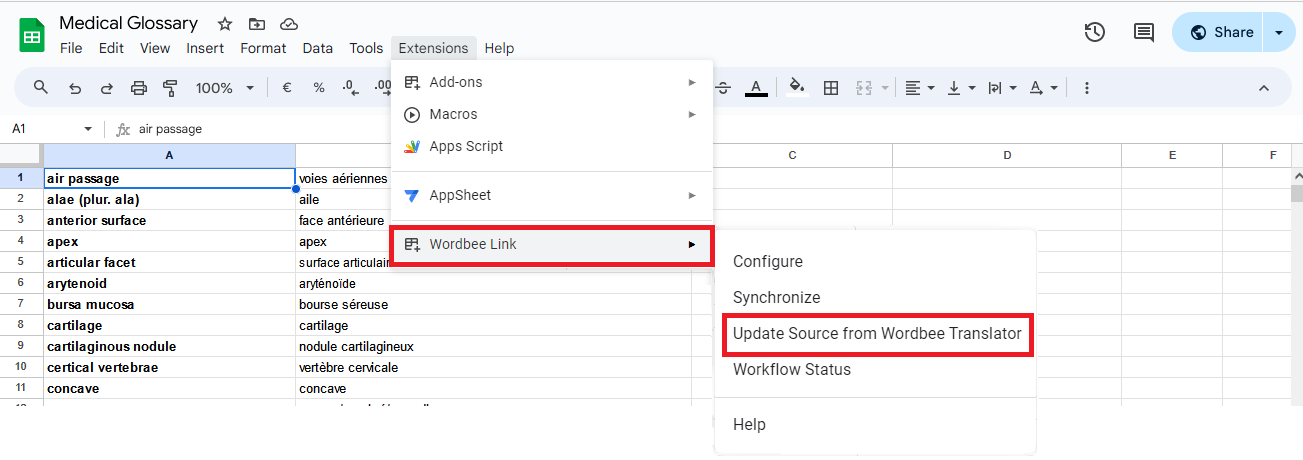
Update Source from Wordbee Translator
If your workflow involves tasks like proofreading, reviewing, or editing the source language, the Wordbee Link for Google Sheets extension offers a streamlined solution.
This feature enables you to conduct these essential tasks directly within the Wordbee Translator Editor. By utilizing this integrated approach, you can efficiently manage and execute source language refinement processes in a single, unified environment, enhancing both accuracy and productivity in your language-related projects.
In this innovative workflow, translation professionals work directly within Wordbee Translator to edit and refine the source language content of a Google Sheet.
Once the editing of the source language is complete, the process involves a seamless synchronization mechanism, where the revised content is updated back to the original Google Sheet.
This option can be found in the Wordbee Link for Google Sheets menu > Update Source from Wordbee Translator.
This feature ensures that the following translation tasks are immediately reflected in the Google Sheet and Wordbee Translator, maintaining data consistency and significantly improving the efficiency of the translation process.
Workflow Status
Clicking on the Workflow Status menu item opens a modal window, providing users with a comprehensive overview of workflow statuses for each language within their project.
The workflow status is marked as "Translation Completed" once all tasks within a language-specific workflow have been finished, prompting the user to synchronize the content.
Below is a table with all possible workflow statuses and their corresponding description.
|
Workflow Status |
Description |
|---|---|
|
Pending Assignment |
The workflow is waiting for the project manager to assign specific resources. This status highlights a preparatory phase where tasks are being allocated for execution. |
|
Awaiting Acceptance |
The workflow is pending confirmation from the supplier(s). This status indicates that further progress is contingent upon the supplier's approval. |
|
In Translation |
Tasks are currently being executed within the workflow. This status indicates that the workflow is active and not all tasks have been completed. |
|
Translation Completed |
All tasks within the specific workflow have been successfully finished, indicating that the workflow has reached its end. This status prompts users to proceed with content synchronization or any subsequent steps. |