
What is Wordbee Flex?
Wordbee Flex is a technology developed by Wordbee S.A. to support continuous localization processes.
The localization of digital products (apps, games, software, websites) has become a continuous, agile process. Continuous localization workflows are characterized by a high frequency of projects and quick turnaround. Developers of a new software game, for example, may push content changes on a daily basis, which may need to be localized and translated over longer periods of time. To avoid creating new translation jobs every time strings of software are updated, you can set up automated Flex workflows that support continuous content production, translation, and delivery. With Wordbee Flex, the collaboration between developers, content producers, and translation teams has become easier than ever!
This article shows users with a project manager role in Wordbee Translator how to set up a Flex Translation Workflow and automatically invoice their clients and suppliers.
Prerequisites
Before you start setting up Flex translation workflows:
-
Make sure you have access to the Wordbee API.
To be able to manage Flex workflows, the administrator of your Wordbee platform needs to give you access to the API. See How-to article: Creating API Keys. The key is linked to a specific user in Wordbee Translator, and the key gives the same access rights that the user has.
2. Customize the settings for Wordbee Flex files (.wbflex). This file type is an empty “container,” with no segments. The developer pushes and pulls content to and from the .wbflex container with the help of the Flex API.
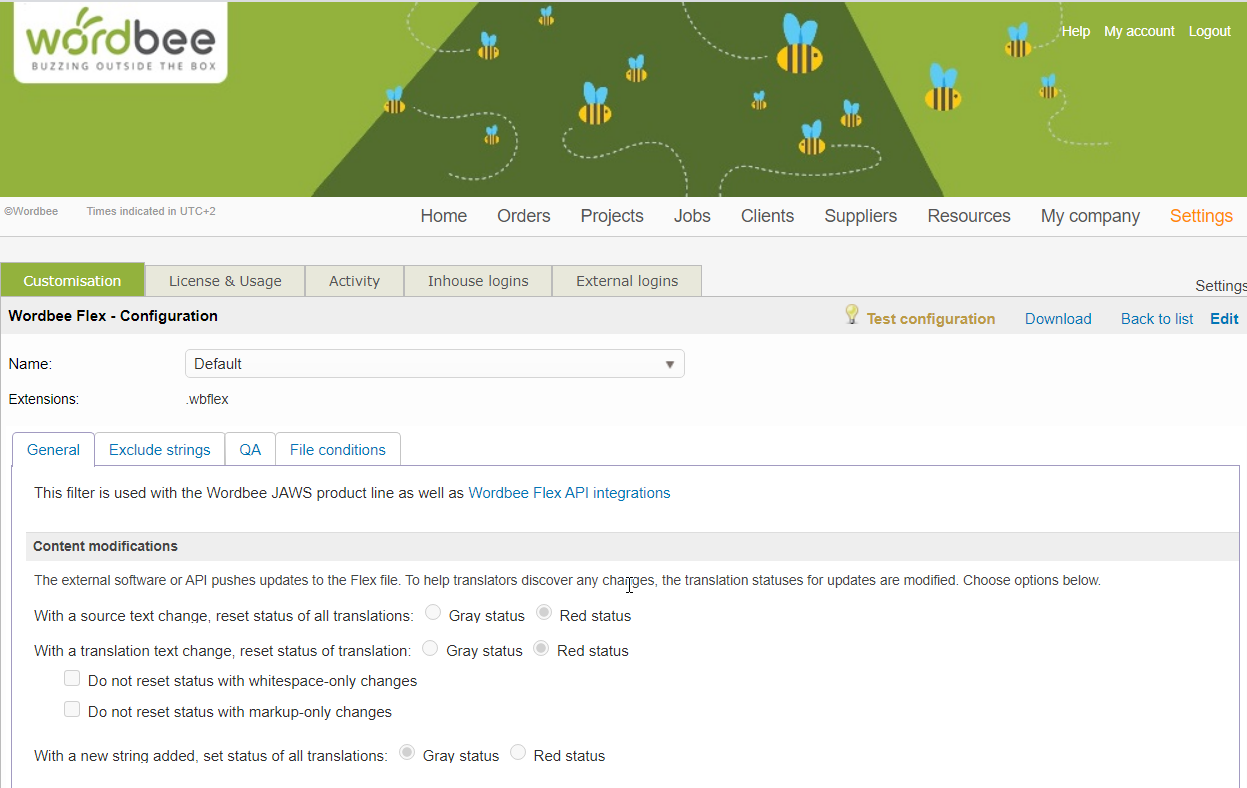
Before you set up a Flex workflow, go to Wordbee Translation Settings > Document Formats, and customize the Wordbee Flex configuration to suit your project:
-
Indicate how the system should highlight modifications in the source document, for example, Gray status or Red status. This will help translators quickly spot the changes in the source and translate them.
-
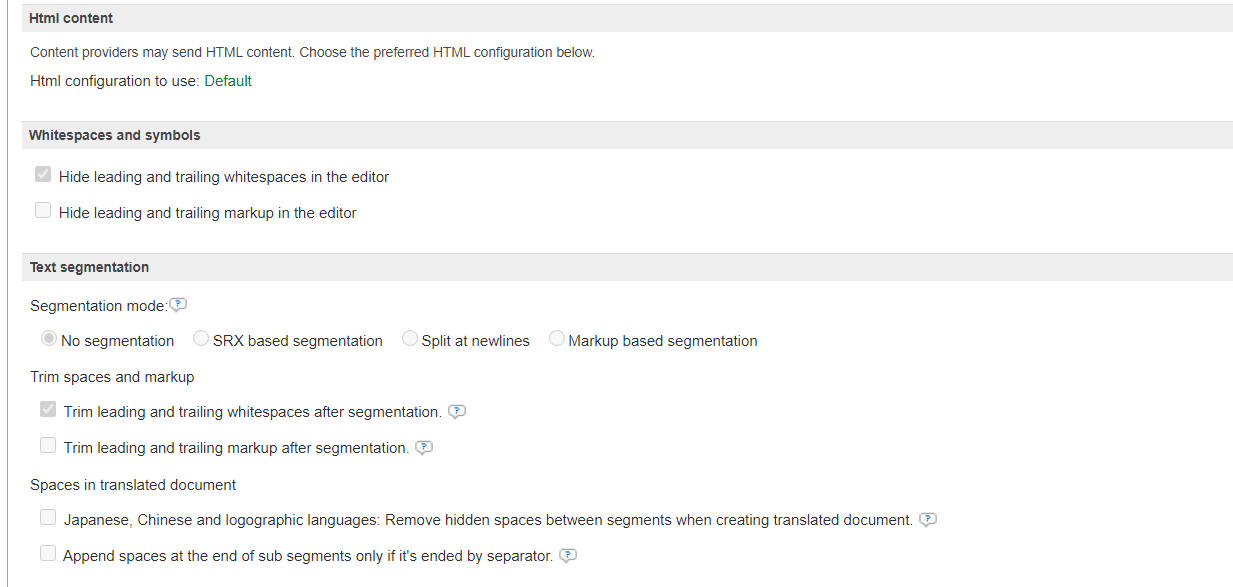
Adjust the text segmentation, if needed:
-
Segmentation mode
-
Trim space and markup
-
How the system should treat spaces in the translated document
-
Create a new project
-
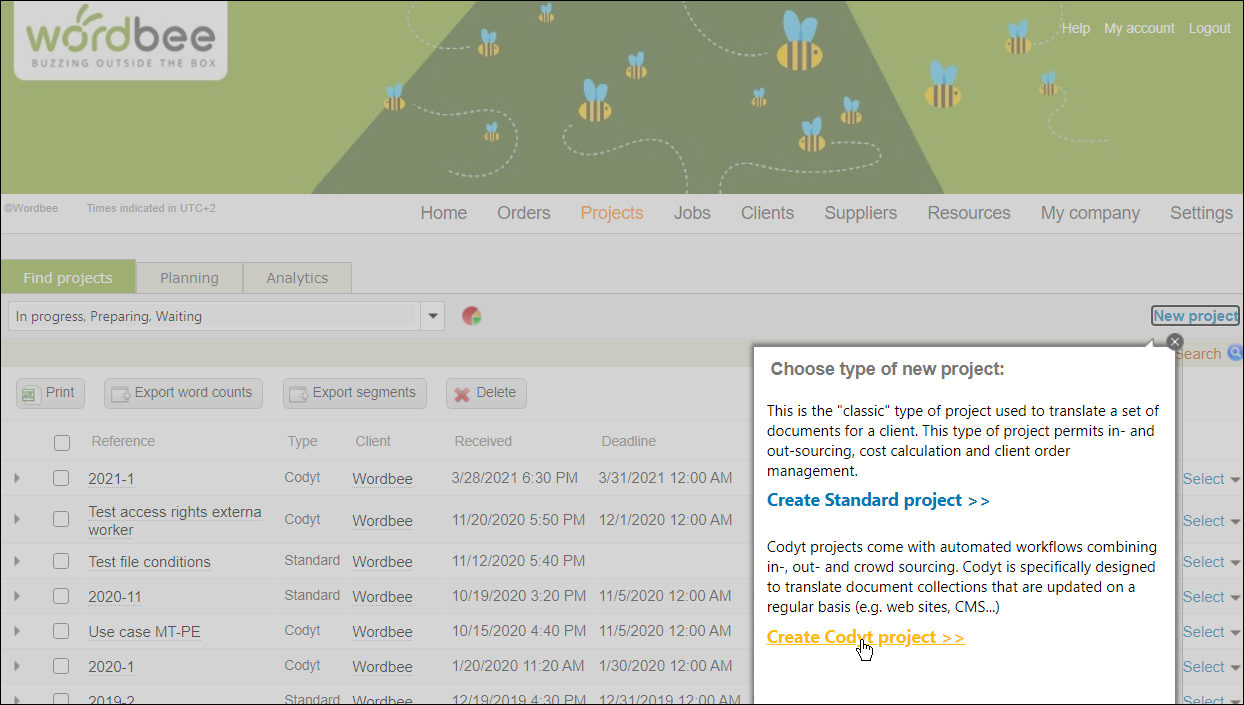
Navigate to the Projects section and create a New Project.
-
Select your project type.
-
Note: Any project type works, but we are using Codyt for this example.
-
-
Enter the Project Name and add the required Languages.
-
Click Save Changes.
Set up the translation workflow
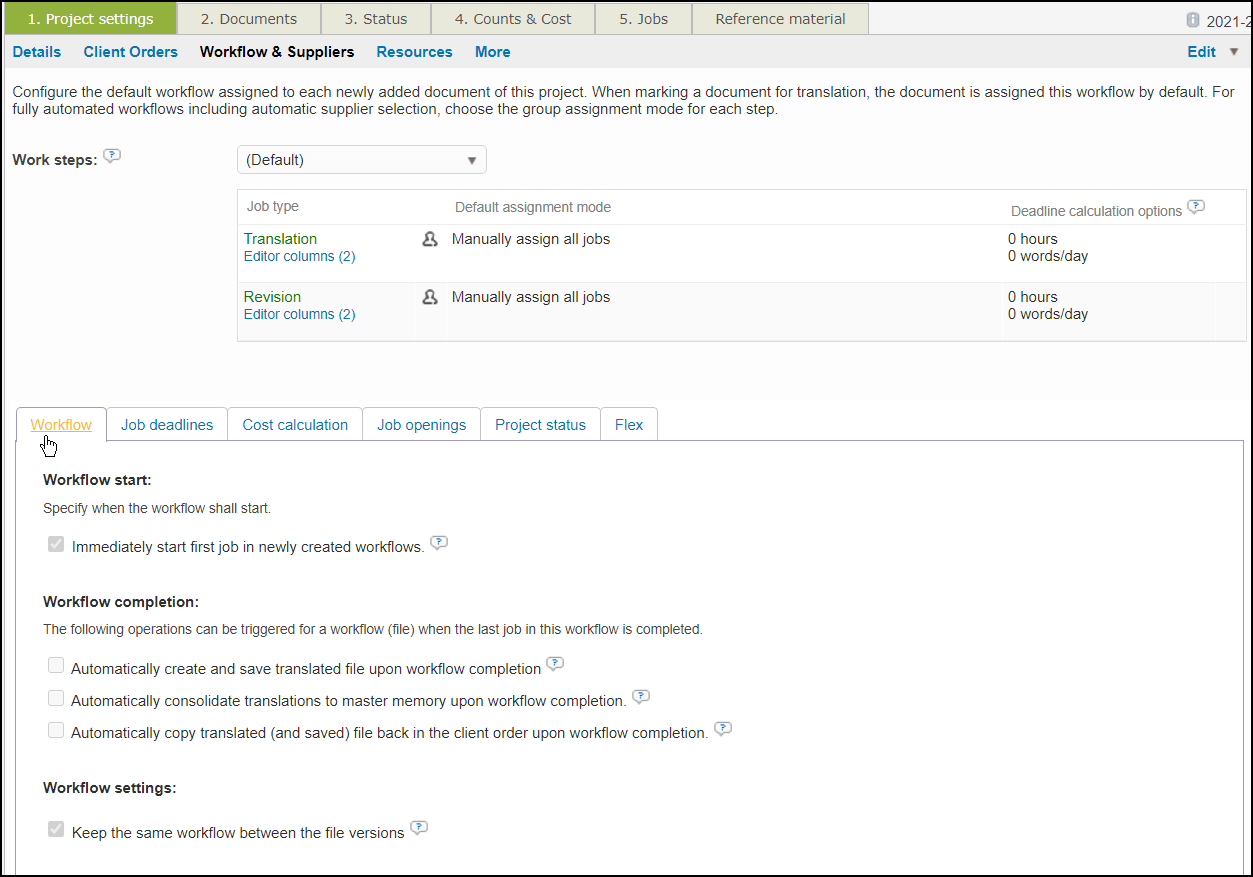
Go to Project settings > Workflow & Suppliers, and configure your workflow:
-
On the Workflow tab, specify when the workflow starts and what kind of operations are triggered when the last job in the workflow is completed.
-
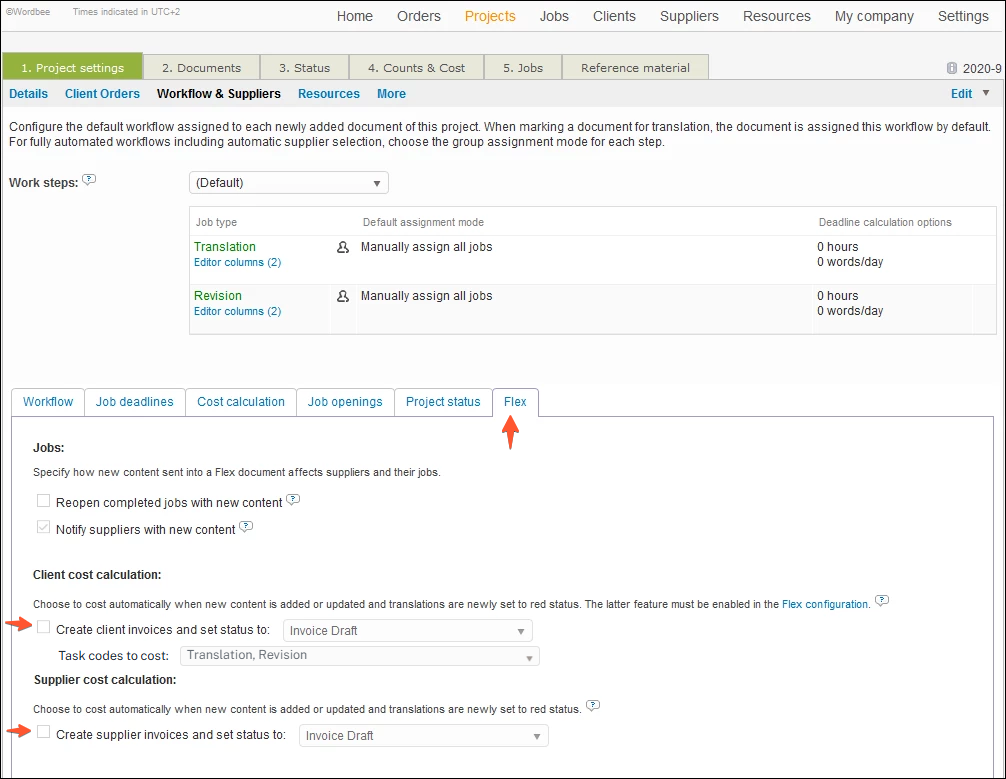
Open the Flex tab to configure the cost calculation options:
-
Specify how new content pushed to a Flex document affects the cost calculations of clients and suppliers. For client invoices, please more sure to select the appropriate task codes.
-
Choose to generate invoices automatically for both clients and suppliers every time new content is pushed to translators.
-
Add Flex containers
When your project is ready, go to Documents and add the .wbflex files. There are two options in which you can create the Flex files:
-
Create them manually in the project.
-
Create them with the Flex API.
See Prerequisites in Wordbee Translator Flex to learn how to create and add the Flex containers.
The .wbflex file type is an empty “container.” It does not have any segments. The developer pushes and pulls content to and from the .wbflex container with the help of the Flex API. Every time new segments are pushed to Flex, the translators assigned to your project are notified automatically, and they can open and translate the new strings in the Translation Editor. Hence, you do not have to create a new job every time the source content is changed.
If you are a developer, check the API documentation to learn how to set up Wordbee Flex workflows.
Once a paragraph is deleted or moved in a push of source segments, previous translation and revision history might disappear. Therefore, project managers are advised to consolidate the project translation memories with the master memory after each job completion. See Consolidation of Project Memories to Master.
Mark the files for translation
After you add the .wbflex containers, mark them for translation and configure the settings.
-
Mark the .wbflex files for translation.
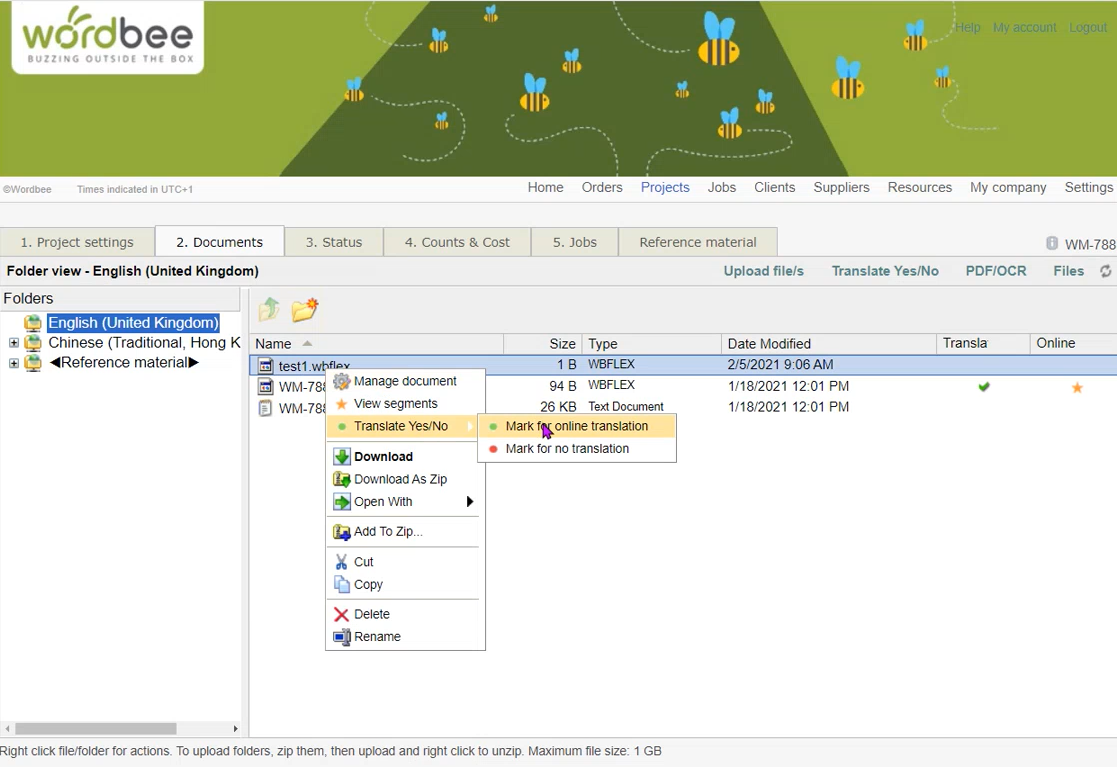
-
Select the text extraction rules for Wordbee Flex.

Assign jobs to translators
-
Go to Jobs and assign them to the translators if the jobs must be manually assigned, as defined in the workflow.
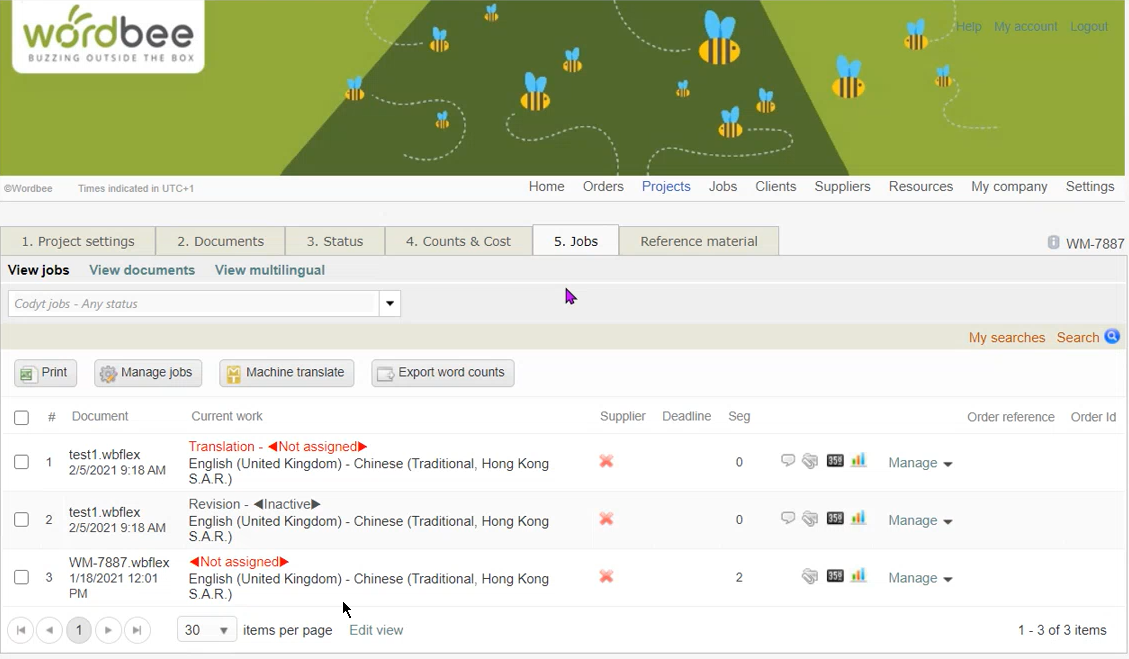
-
Select Job > Manage > translator/reviser. Set a deadline and change the job status.

The workflow in a nutshell
-
Jobs reopen automatically when new or modified strings arrive for translation.
-
A draft invoice is created automatically for the vendor (and for “client,” if needed).
-
Translators open the files in the Translation Editor and filter the segments by their red/gray status. The color of the modified source content is already defined in the Flex configuration.
-
The translated confirmed segments change their status to green, and they are pushed back to the .wbflex container.
In general, all changes and revisions can be tracked in the Revision History. However, in Flex projects, when a source segment is deleted or moved in a push workflow, the revision history might disappear. Therefore, it is important to consolidate the project translation memories with the master memory after each job completion. See Consolidation of Project Memories to Master.
How to invoice
The API methods are optimized to enable the use of Flex in real-world workflows, making costing and invoicing of Flex translation work much easier. Suppliers are immediately notified of any changes in the source or target segments, and invoices are automatically generated for the additional work.
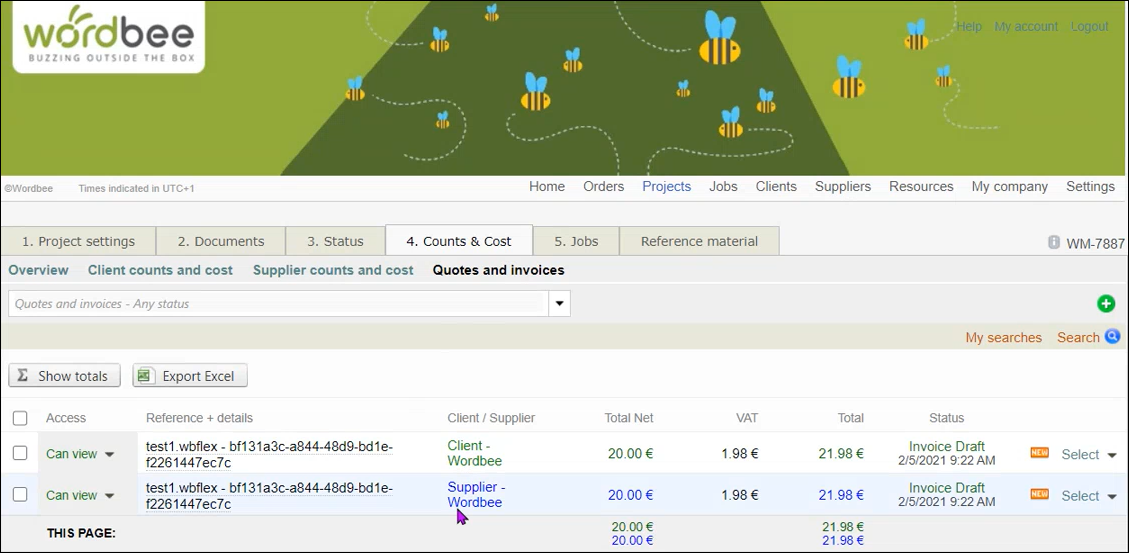
Click on Select to view the client’s invoice:
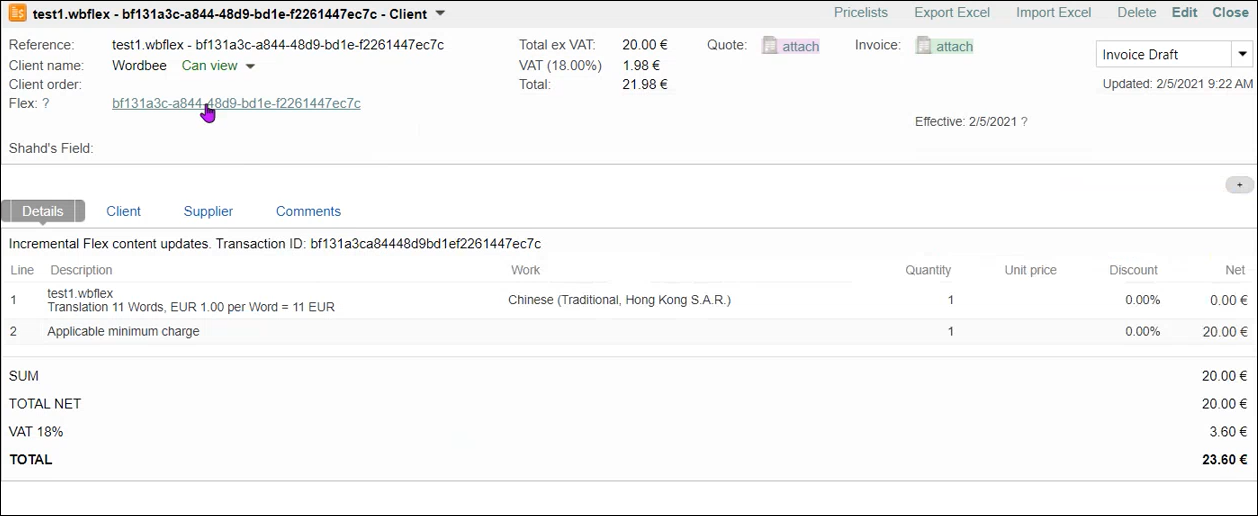
Unlike on the invoices produced in other project types, here you can see the unique Flex file ID number. If you click on the ID link, you access the log file with all the details of the transaction, including the number of new or modified words.
What is different from other projects
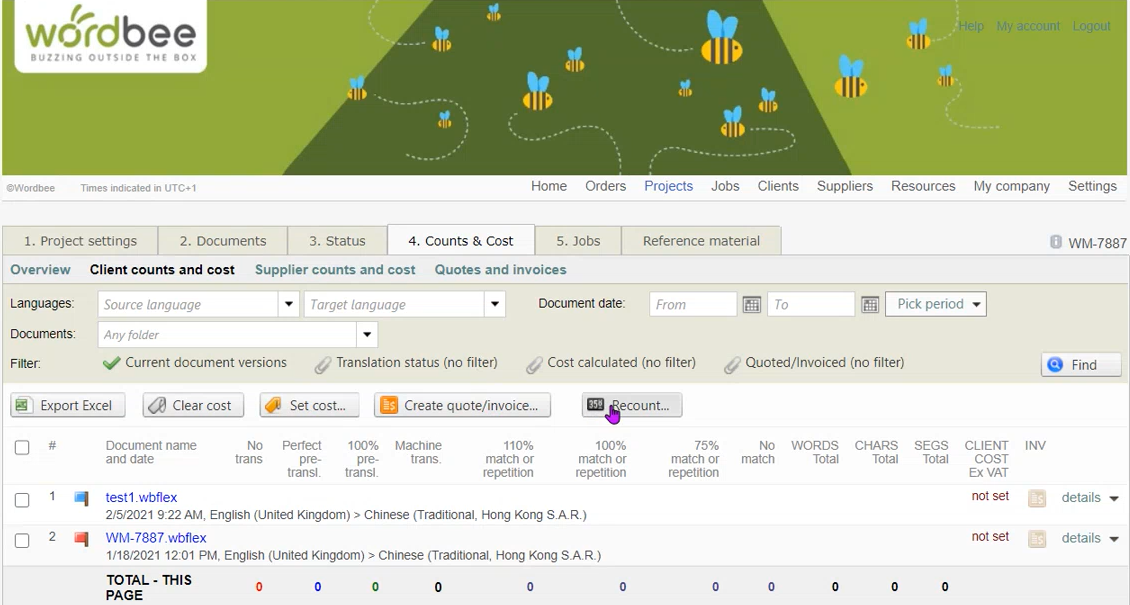
In Flex projects, do not use the Recount feature for invoicing purposes because the invoices are created automatically every time new or modified content is pushed to the .wbflex container. The corresponding word counts, price calculations, quotes, and invoices are on the Counts & Cost page of the project.
Another difference is that the Fuzzy matches word count is disabled in Flex projects.
When new content is pushed to the .wbflex container, the existing translations are automatically counted as pretranslations.
Invoice aggregation
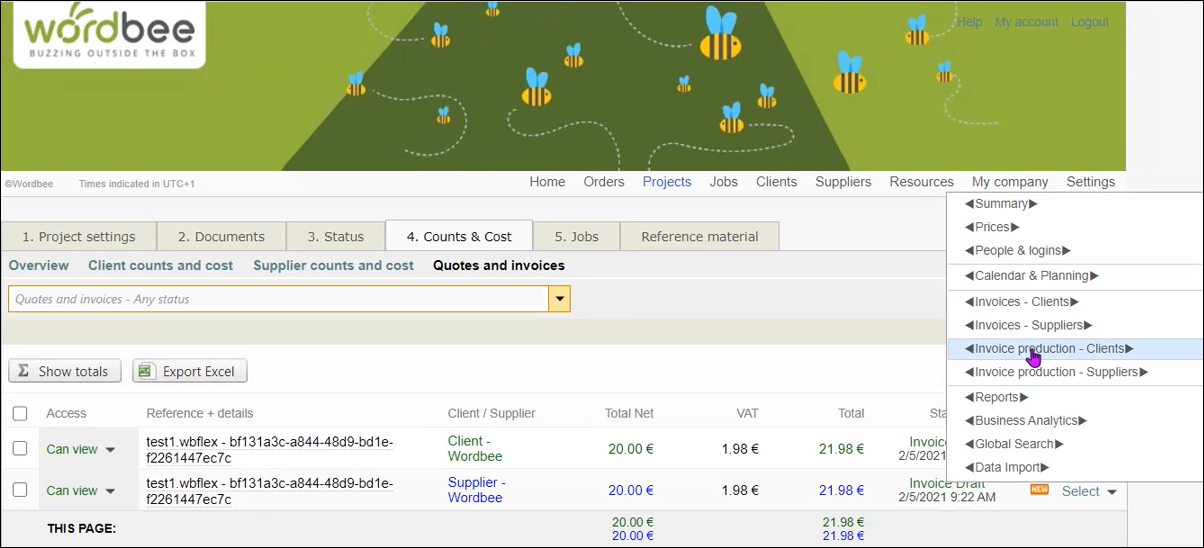
With the Invoice production tool, it is possible to aggregate all the invoices produced for each transaction into one monthly invoice.
-
Go to My company and select Invoice production - Clients.
-
Pick the period for which you want to aggregate the invoices, and go through all the steps: Aggregate, Approve, and Distribute the invoice.

What’s New
Recent changes in API2:
-
There are new Flex API 2 methods for downloading transactions in JSON and HTML formats. See Transactions in the API 2 documentation.
-
Both logs and API push methods now include details regarding "post-operations": re-opening jobs, notifications, client and supplier costing.
-
The options to reopen completed jobs with new content and to notify suppliers with updates to Flex containers have been moved from the Flex configuration page to the workflow profile page. This change improves the overall usability.
Learn more