
Meta information can be included with source files for the destination of translation teams. Translators have access to meta data in the XLIFF files or from within a TMS such as Wordbee Translator.
The most commonly used meta information is the URL of a page that you send for translation. By giving translators the URL, they can navigate to the page to view the content they are about to translate. This is only possible of course, if the page URL is accessible from a translator's PC. This may not always be the case.
Add meta data with instructions files
This is done by including "instructions" JSON with the original content to translate. Click here for details,
The limitation of this approach is that all text segments in the source content will be assigned the same meta data.
If each segment may have its own meta data, you need to look at the alternative option below.
Add meta data using text extraction rules
The Beebox can be configured to automatically extract meta information from XML and JSON formats, individually per segment.
Example: Your XML contains translatable text nodes and each node has a “reference” attribute. You would now like to include the reference attribute value with each individual text node.
To create a text extraction rule, you need to log into a Wordbee Translator platform and create a new text extraction rule (“Settings” > “XML files” > “Add new rule”. You will see the possibility to fill in xpath expression for Wordbee custom fields. These xpath expressions must be relative to the text node xpath expression.
With this option you DO NOT need to add a "metadata" node to the instructions file.
View meta data in the Beebox user interface
Meta-information is fully accessible from the Beebox UI.
File-level properties are viewed with the info icon. If there are no file-level properties the icon is not visible.

Segment-level properties are viewed in the Beebox translation editor just below the source text:

View meta data in Wordbee Translator
Meta-data are inserted as simple comments in Wordbee Translator. These are instantly visible in the comments panel of the translation editor:
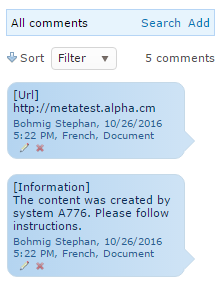
One comment is added per meta data. The comment shows the property title in square brackets.
Note that pass through projects support file level meta data only. With regular projects both file and segment level meta data are supported.
Click here for technical details on how to configure and submit meta information in Beebox.
Populate Wordbee Translator custom fields from meta data
If your Beebox project is connected to Wordbee Translator, translators can view the meta-information if you follow some rules. Meta-information maps to “custom fields” in Wordbee Translator.
If you are administering the Wordbee Translator platform, then you now need to define custom fields in the Wordbee Translator platform:
-
Log in as administrator, click the “Settings” top navigation link and choose “Custom fields”.
-
In the page click the “Segments” tab to configure segment level fields.
-
Add your custom fields, such as a URL, a product name or anything else. For URLs make sure to choose the “Hyperlink” field type. This ensures that your hyperlinks are clickable.
-
Note down the custom field ids (these are shown in the popup when editing a custom field). The ids are always formatted like: CustomStr1, CustomStr2….
-
Place the ids into your instructions files, as described further up.
If you are not administering the Wordbee Translator yourself:
-
Provide the owner of the platform with the list of meta-information fields. Indicate which fields are strings or hyperlinks, and indicate the maximum length (between 100 to 300 characters).
-
Receive from the owner the ids of the custom fields. For example: CustomStr2, CustomStr15…
-
Place the ids into your instruction files, as described further up.
Translators can now see all your meta-information in the “Segment information” panel. Please note that the Wordbee Translator administrator can hide all or certain fields for selected user profiles.
Making meta data available in XLIFF jobs
Xliff jobs will include all your meta-information. For example, if you use segment-level field ids “url” and “product”, then the fields are inserted with a namespace prefix like below:
<trans-unit id="0" translate="yes" approved="no" wb:url="http://mycompany.com/1123" wb:product="Steam pump 1">
	<source xml:space="preserve">...
</trans-unit>
For a full description, please read: Beebox XLIFF Format
Explicitly exclude specific meta data from jobs
By default all meta data is included with jobs.
In the project settings page you have the possibility to choose the fields you want to include.