Creating quotes and invoices for clients is a 2 step process. Once the cost for the different activities is set, invoices can be created. Learn here how to handle each of these phases.
Creating a client invoice
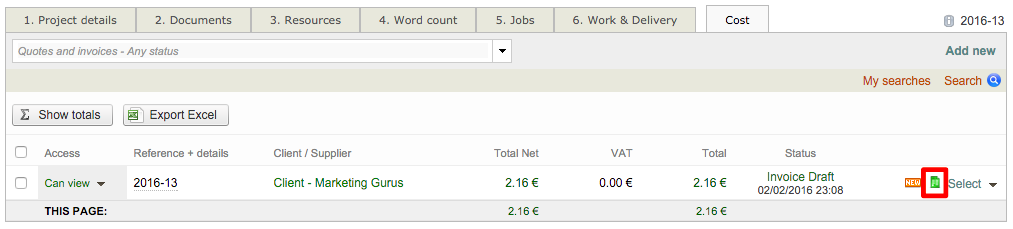
First, access the Costs Tab for the project. If no invoices exist for the standard project, the screen will appear as shown below. To create an invoice for a client, click on Add New in the upper right corner of the screen.

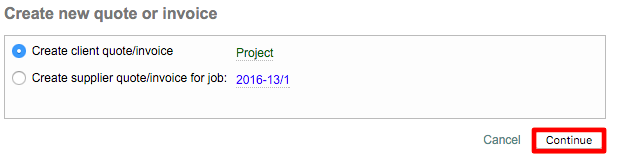
A pop-up window will appear. Choose Create client quote/invoice and then click on Continue.
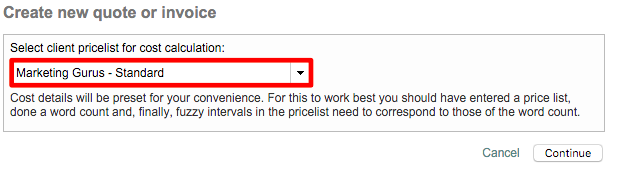
Next, choose a pricelist from the drop-down menu and then click on Continue. The pricelist will be used to generate the costs for the invoice based on discounts, rates, and so on. Make certain the appropriate pricelist is selected. Note that the information can be modified at a later time if needed.
Set the status of the invoice
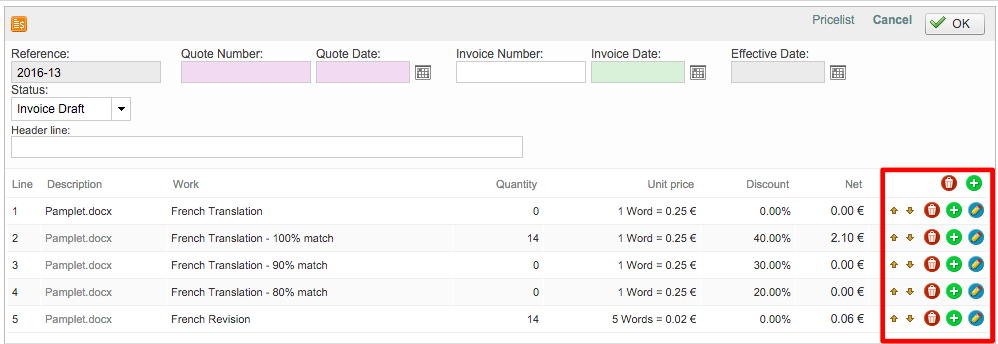
The invoice information will appear as shown below. First, change the Status to Invoice Draft by clicking on the drop-down menu and making a selection. Then review the pricing information to ensure it is correct.
The drafted invoice will show each performed task and the discounts for translation fuzzy matches. The total cost is displayed at the bottom of the invoice.
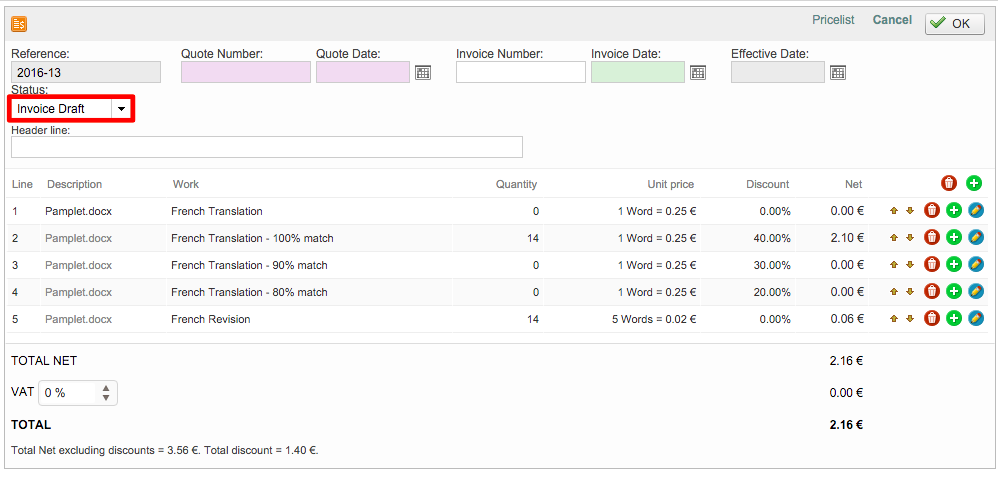
To the right of each displayed line, additional options are provided for managing each line in the invoice. Click on the Trash Can to remove the line or the Add ![]()
Edit the details of an invoice or add new charges/discounts
It is possible to edit the details of an invoice to adjust the description of a given item or include additional fees/discounts on the spot.
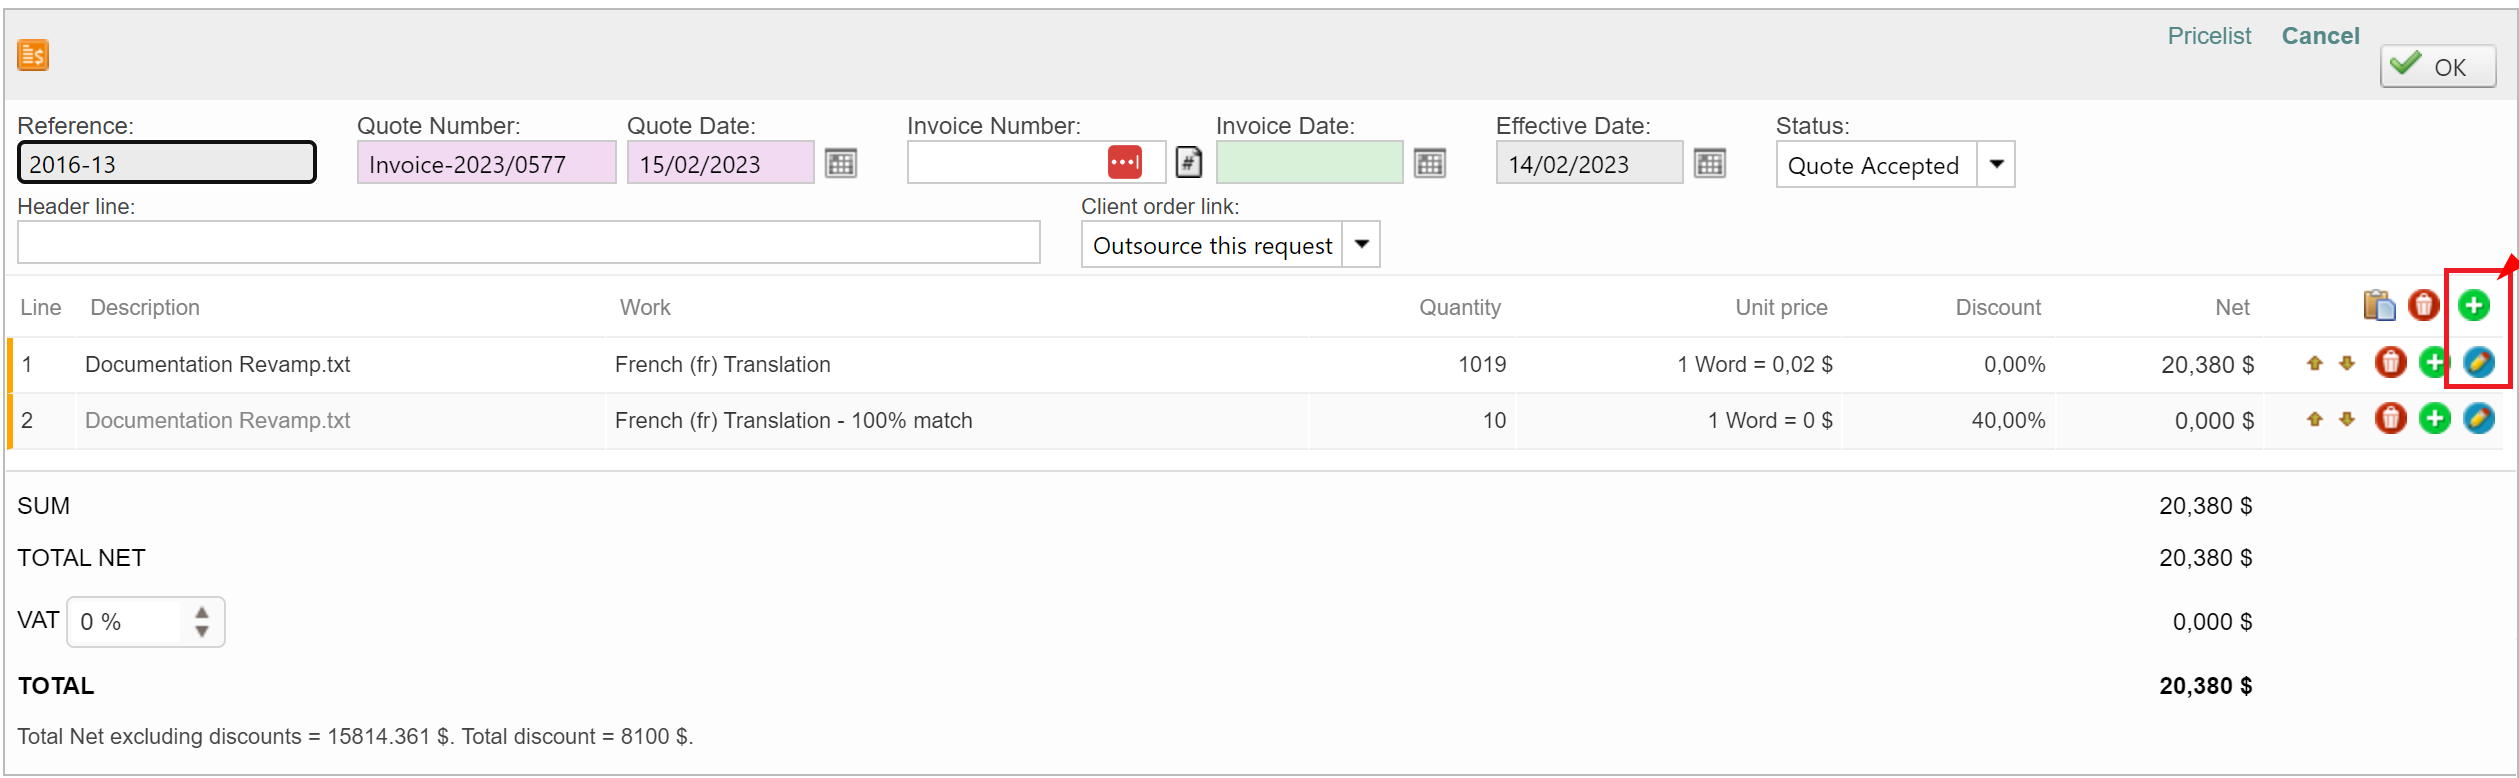
Just open the invoice you want to update, click on the pencil icon to edit an existing line, or add a new one to accommodate the new charges/discounts.
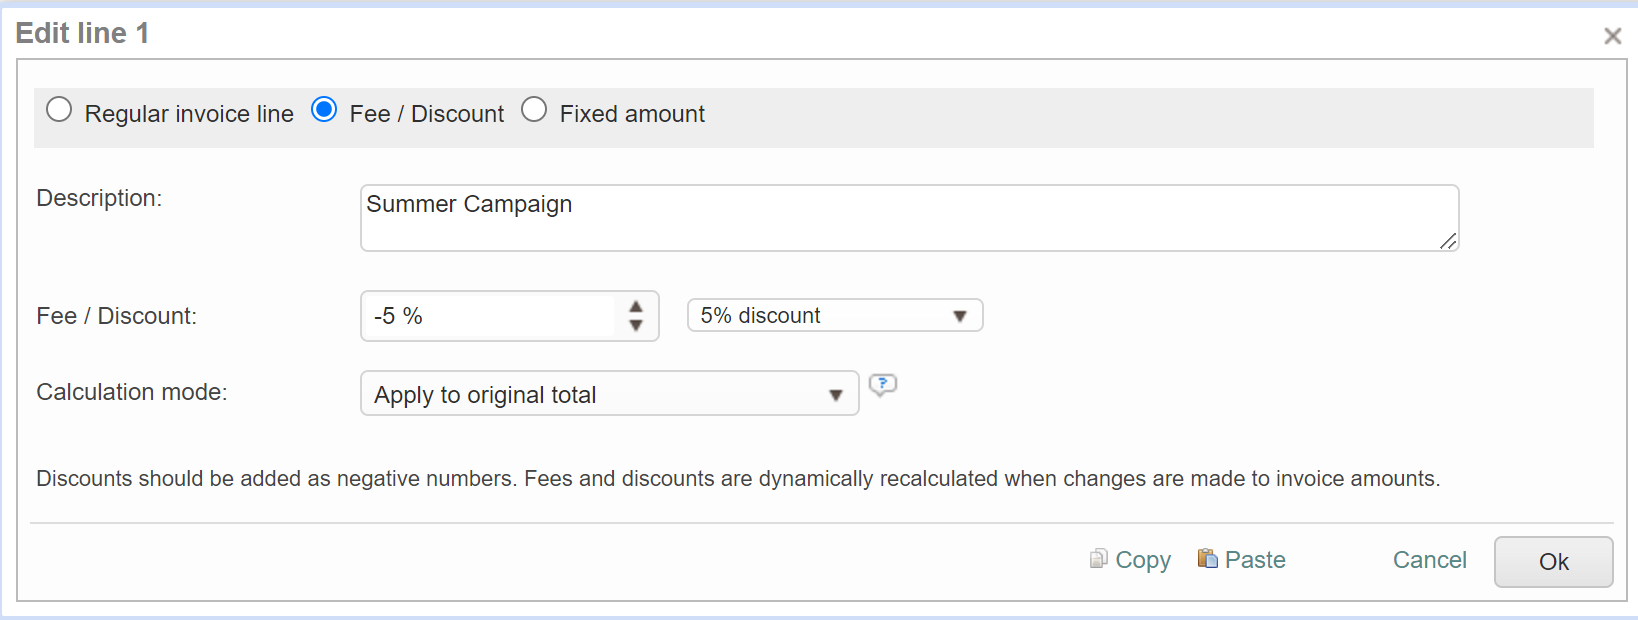
Once the screen with more details opens, enter the information related to the new charges/discount to be applied.
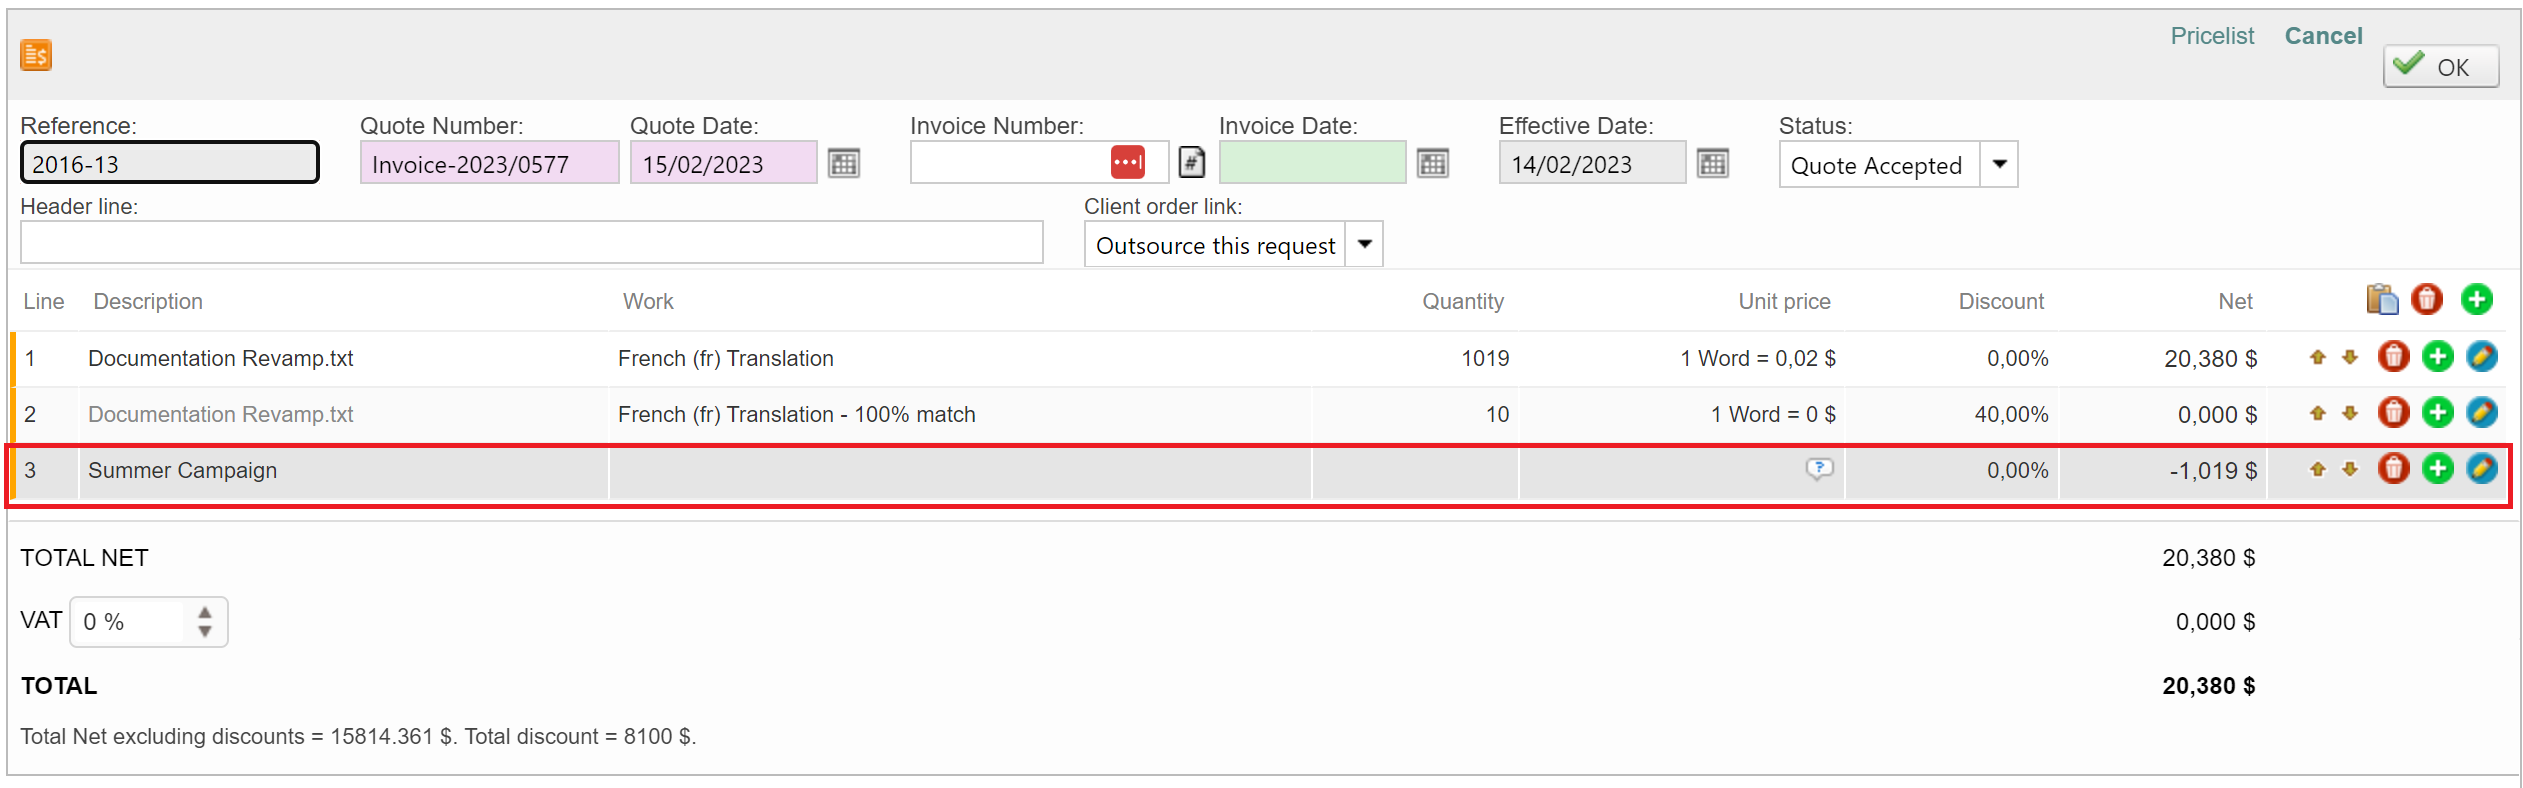
As a result, a new line will be added with the charges updated.
Edit the effective date and Invoice Number
You may also enter an Invoice Number, select an Invoice Date, and configure an Effective Date for the drafted invoice. If an effective date is not configured, then the current date will be used.
A section is also provided for entering an optional Header Line. When finished with any needed changes, click on OK in the upper right corner of the pop-up window.

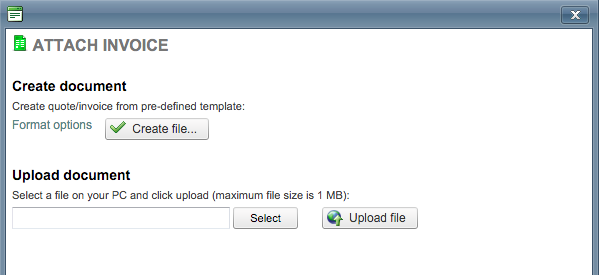
Create an attachment with all invoice details
If everything is correct, click on Attach next to Invoice.

An invoice may either be created using the default template provided by Wordbee Translator or from one that is specific to your company. In the pop-up window, you can either:
-
Create File... - This option will populate the draft information into a pre-configured invoice template provided by Wordbee. (The example below will show this option.)
-
Upload A Company Template - Browse to and select a template file for your company. Then click on Upload File and the invoice draft information will be populated into the template automatically.
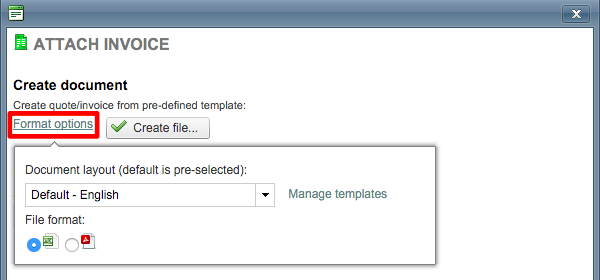
To the left of the Create File... option, you can click on Format Options for the new invoice being generated with the template. Here you may choose the document layout (language) and file format (Excel or PDF) for the invoice.
The default selections are English and Excel. Click on Create File... to continue after all needed changes have been made.
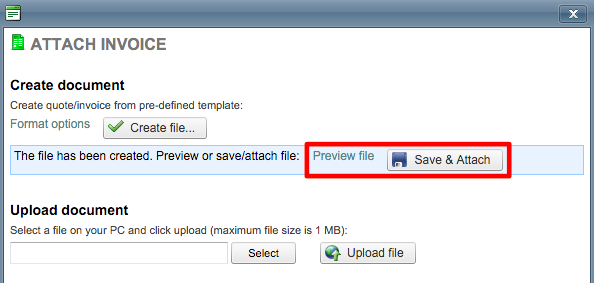
After the invoice has been created with either the default Wordbee template or one that has been uploaded, you will be able to preview the invoice prior to attaching it by clicking on Preview File. The file will be downloaded to the computer for viewing. Click on Save & Attach to save the invoice and attach it to the project.
Once this is finished, you will see a download option appear next to Invoice in the pop-up window. This option may be used at any time to download the new invoice for the project. Click on Close to exit the pop-up window.

The Invoice will appear as shown below when viewing the Cost Tab for the project. You can download the document by clicking on the Green Document Icon.