
When you initially use and set up Wordbee Translator, you have the option to add internal users to the system. An internal user is anyone who works for your company or that you supply work to who needs access to resources, documents, and other items to review or conduct work.
By creating a login, the user will be able to access the client portal and perform actions based on an assigned user profile and set of access rights.
For example, it is beneficial to configure an internal manager for project management and generic or user-specific accounts for conducting work, communicating with clients, and so on.
To create an internal user, perform the following steps:
Step 1: Add an Internal User
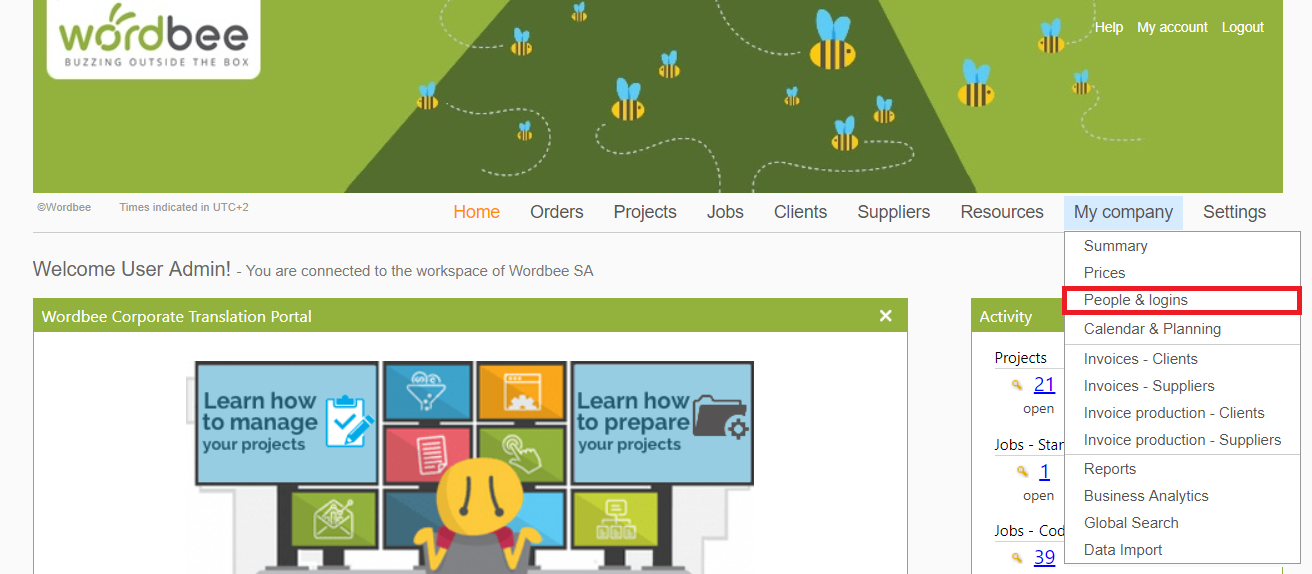
Pass your mouse over My company in the toolbar and then click on People & logins.
Click on Add new to begin adding a user to the system:

A screen will appear for entering the user's details. This could be a login for the project manager, a basic user, etc. Begin by entering the user's details in the top portion of the screen:
-
First and Last Name (Required) - Enter the last and first name of the user or the primary contact.
-
Email Address (Required) - Enter the email address of the user or primary contact.
You may also enter a title, initials or an ID, contact information, comments, etc. if desired, but this information is not necessary to add an internal user to the system.
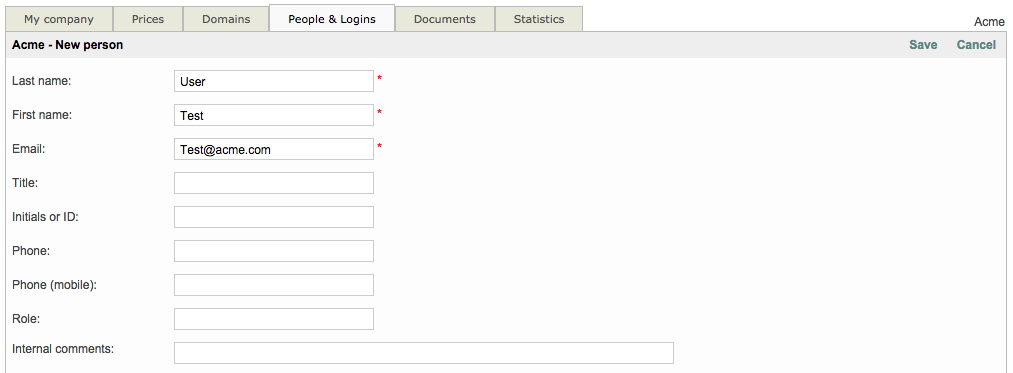
Items with an asterisk are required entries and all others are optional.
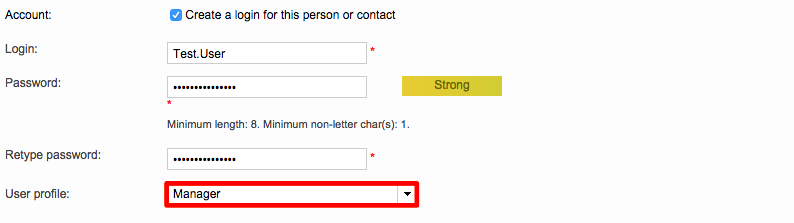
In order for the user to have access to the system via the client portal, you will need to tick the checkbox next to 'create a login for this person or contact'.
This allows the user to log into the system, view jobs, conduct work, and perform other actions based on their assigned user profile, which determines the individuals access rights (chosen in next step).

Creating a login is optional and this step can be skipped if users do not need to log into the system.
Step 2: Configure Login Information
Next, you will need to create a login and password for the internal user.
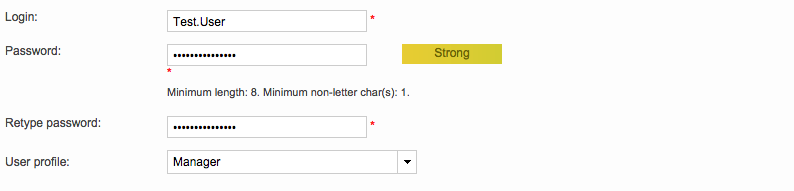
As part of this step, you will also need to select a user profile. This profile determines what the user will be allowed to do when logged into Wordbee Translator. To make a selection, click on the User Profile Menu and then click on the desired selection.
You will be able to choose between 5 different profiles:
-
Manager: The Manager can add, delete and edit all data without limitation. This includes projects, jobs, clients, suppliers, orders, invoices, logins and translation memories.
-
Team Leader: The Team Leader manages translation projects with in-house or external teams. He/She has full access to all projects, jobs, orders and translation memories but cannot add/delete users or companies.
-
Worker: The Worker's main role is to translate or revise. The Worker can further access jobs of all other workers and read the related project and client information.
-
Worker (limited): The Limited Worker has access to his/her own jobs only. No other information, such as project or client information, is accessible.
-
Inhouse Client: The Inhouse Client can submit translation requests, communicate with the team and ultimately download the finished translations. No other data is accessible.
Step 3: Add Language qualifications to perform jobs (Optional)
You may also enter the user's languages and tasks so they can participate in the project workflows. This allows the system to know about which language pairs, tasks, and pricing apply to the user when he is part of a job proposal or when a job needs to be directly assigned to them.
Only three entries may be configured when adding a user. As soon as the user is registered in the system, you may include as many as needed. Learn how to update the service portfolio of inhouse users here.
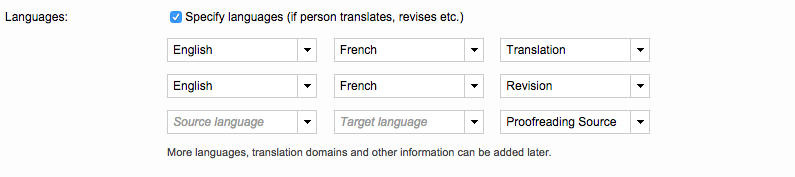
To add these qualifications when creating the user, tick the checkbox next to 'Specify languages' and then select a source, target, and task for each pair the supplier is able to perform.
Step 4: Save the User
Once you have finished configuring all information for the new user, click on Save in the upper right corner of the screen.

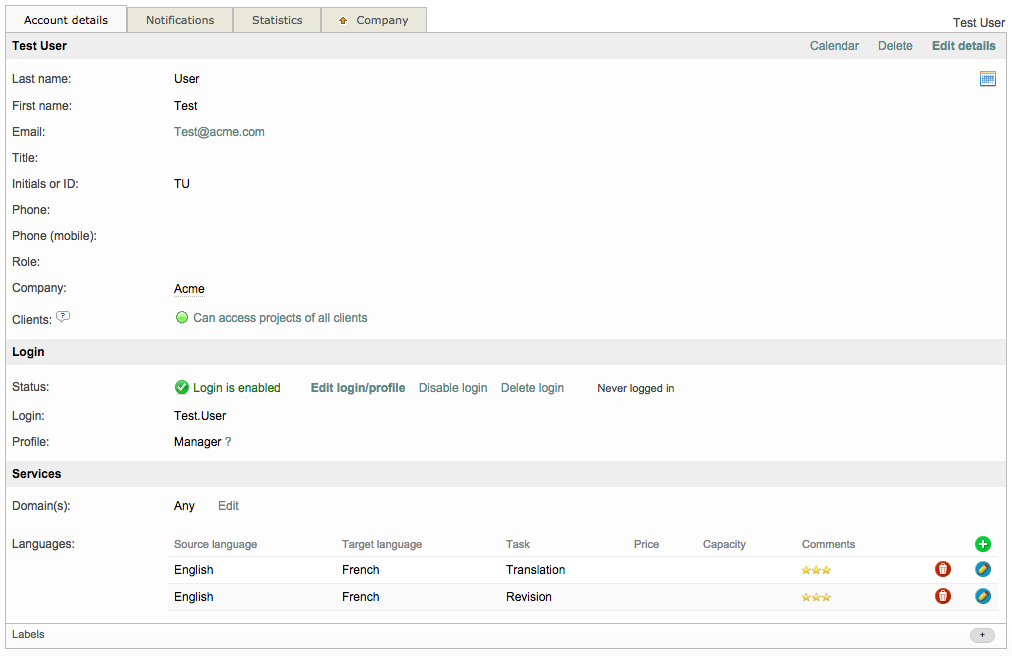
The Account Details Tab will be displayed with all the information you entered. Here you may do the following:
-
Make Changes
-
Remove the User
-
Enable/Disable their Login
-
Remove the Login
-
Change Login Information
-
Add, Change, or Remove Pricing and Language Information
Step 5: Add Pricing Information (Optional)
If you want to add the price per word practiced by the internal user, simply click on the Pen Icon. Additionally, you can remove a language service by clicking on the Trash Can Icon or use the Plus ![]()

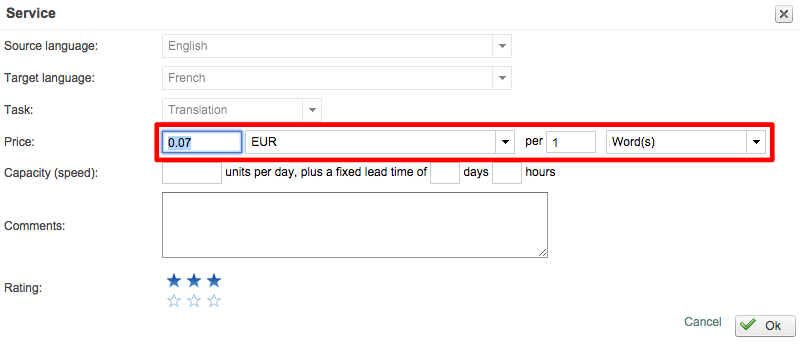
The following pop-up window will appear after clicking on the Pen Icon. Enter the user's price per word (or character, line, page, etc.) and then click on Ok to finalize.
Notifications:
In this section, you will find a list of all the events that are triggered in the system, for which an email notification could be sent. Of course, you may want to subscribe just to particular events so you will be able here if you want to be notified or not, following up the activity of the whole platform, of your own company or of your colleagues.
Here you can find an example of the notifications available for internal users. When you click on edit, each category will display the full list of events.
You can read more about these events in the following section:
You will also have the possibility to add a backup email at the end of the page in case you want to get the emails sent to somebody else. Only three entries may be configured when adding a user; however, you may add as many as needed after adding the user to the system.