
You may want to import your own databases to the system for further use or create empty ones to start gathering and reusing the content of your projects during your platform work.
Both things are possible and the steps to achieve it are described below:
Creating new linguistic resources
To create a new linguistic resource:
-
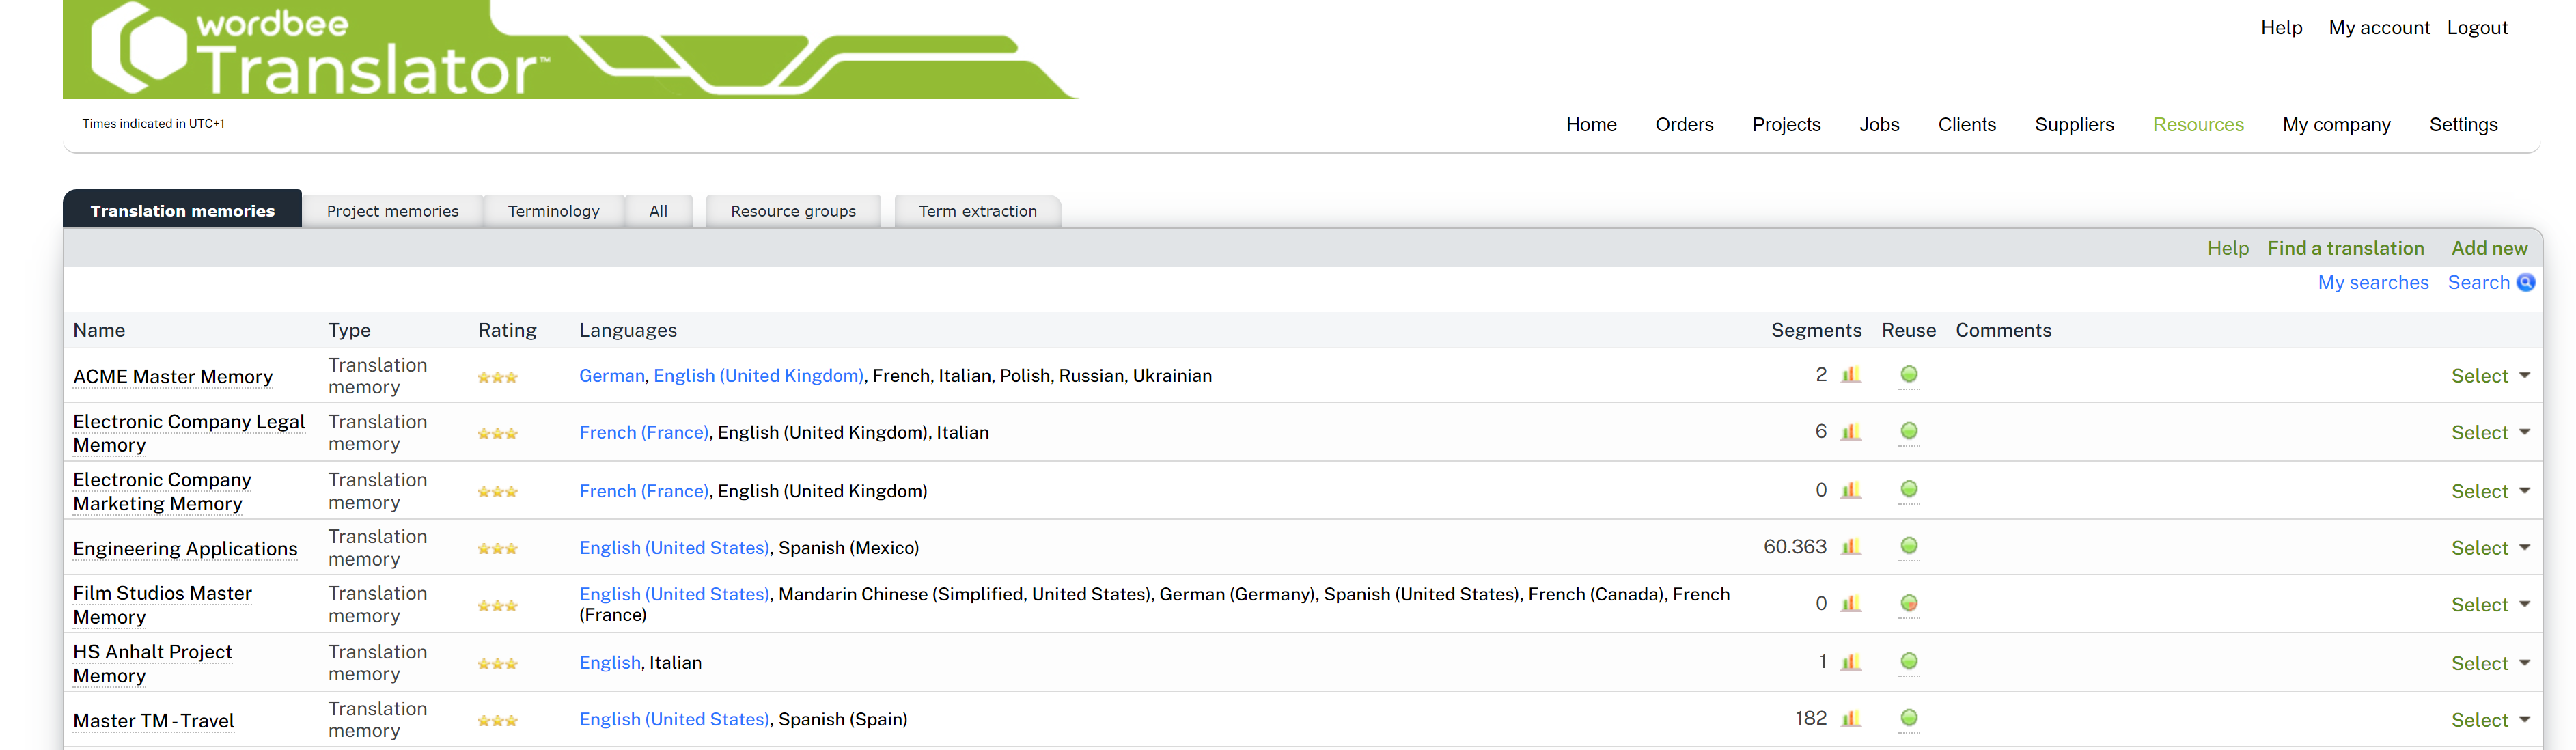
Click on Resources on the menu bar.
-
Click on Add new (at the upper right of the Translation Memories page, the Project
-
Memories page, the Terminology page or the All page) or point to Resources on the menu bar and click on Add new.
-
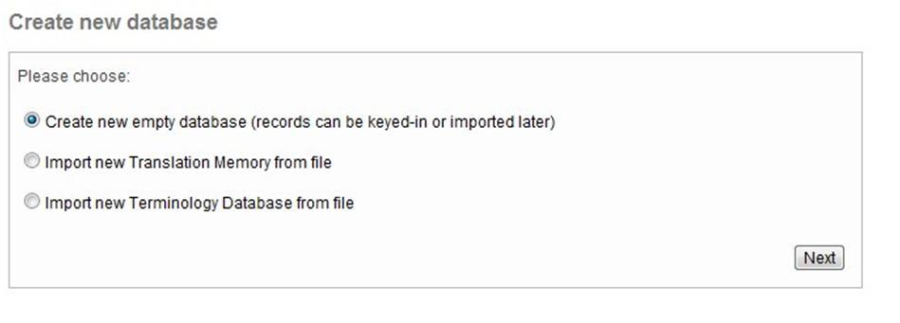
Create new database opens.
-
Click on Next.
-
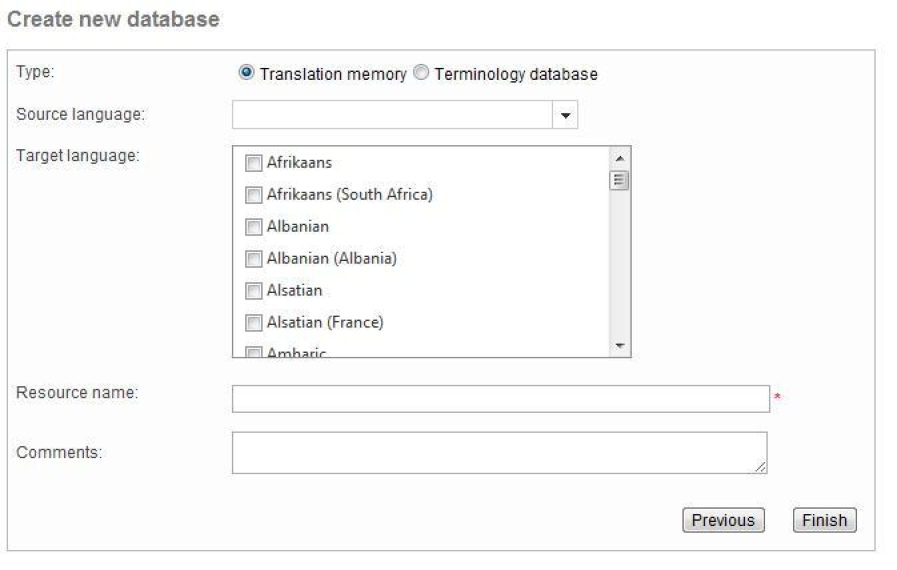
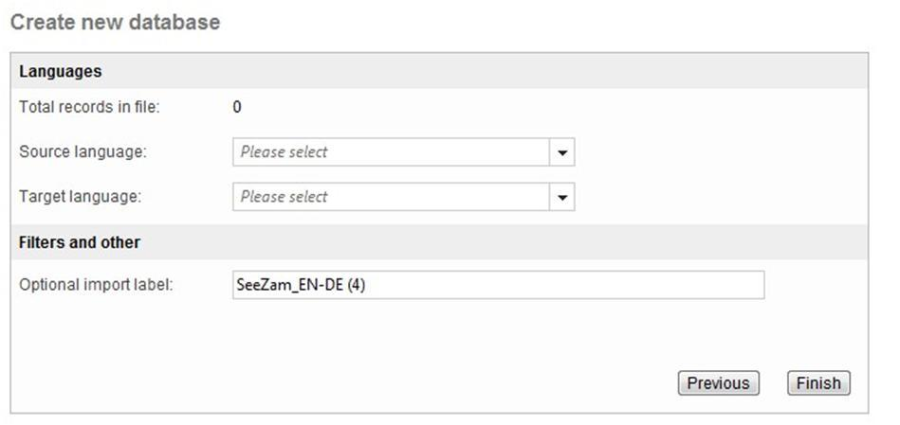
Choose between a Translation memory and a Terminology database.
-
Choose the source and the target languages.
-
Give a name to your resource and leave comments if you want to.
-
When you have finished filling in all the required fields, click on Finish.
Your new database has been created.
Importing linguistic resources
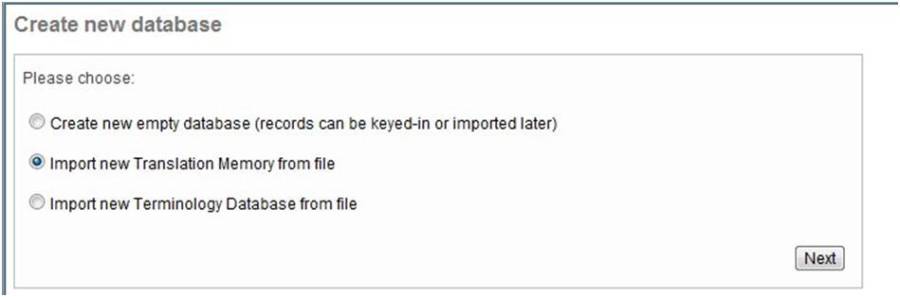
If you want to import a translation memory or a terminology database:
-
Click on Resources on the menu bar.
-
Click on Add new (at the upper right of the Translation memories page, the Project memories page, the Terminology page or the All page) or point to Resources on the menu bar and click on Add new.
-
Click on Next.
-
Select the file format from the list. According to the file format you choose, the process is different.
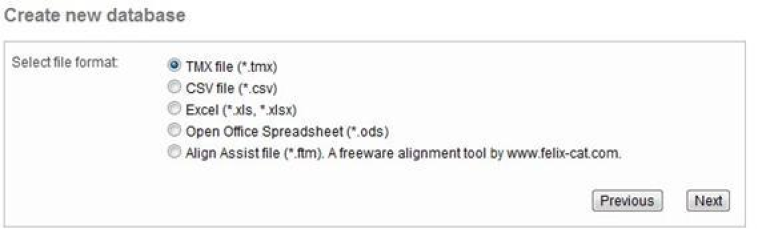
You can create a Translation memory database from a document which is already translated, by matching segments, phrases from the source language version to the translated version. This process is called Alignment.
Importing a TMX file
-
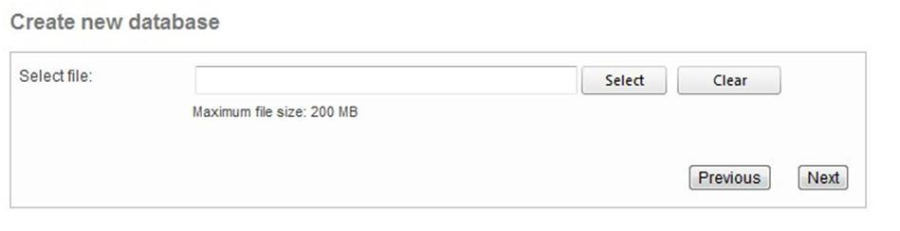
Click on Next and move forward to the import file screen.
-
Click on Select and browse for the file on your computer or Drag&Drop a file into the textbox, which becomes highlighted for easy placement.
-
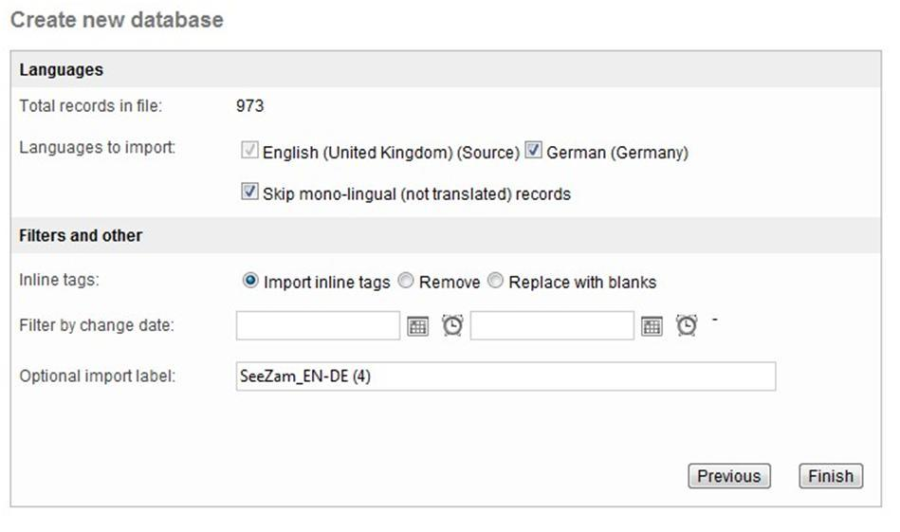
Configure the parameters and click on Finish.
-
Your new database has been created.
TMX metadata supported
The content of a TMX file includes text and metadata of the system used to generate the file (such as segment creation date and author). This information is useful when doing maintenance activities on the database (segment clean-up and merging content).
Wordbee Translator captures specific TMX metadata when importing and exporting the resource into the system. The properties currently supported during import are:
-
Translation Unit ID
-
Segment creation (date)
-
Segment creation (user)
-
Segment update (date)
-
Segment update (user)
For more details on the export, please refer to the article Export to TMX in the technical documentation section.
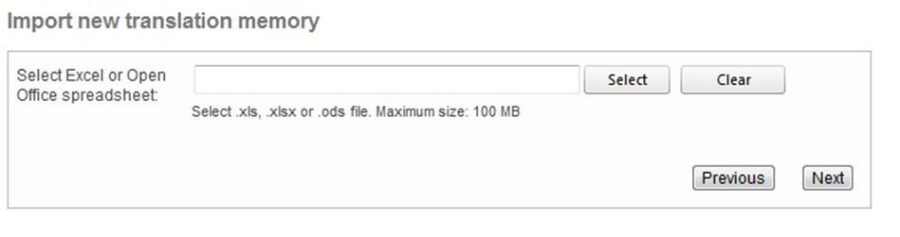
Importing an Excel or Open Office Calc file
-
Click on Next and move forward to the import file screen.
-
Click on Select and browse for the file on your computer.
-
Choose the source and target languages and name the translation memory or import batch. You can also leave a note to describe the type of content to be imported.
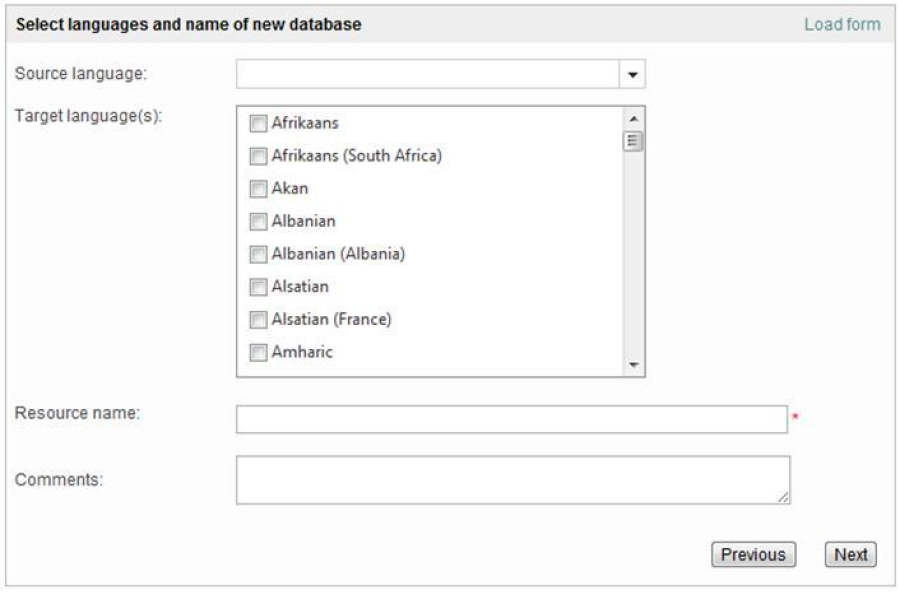
-
Click on Next.
-
Define the different parameters and click on Finish:
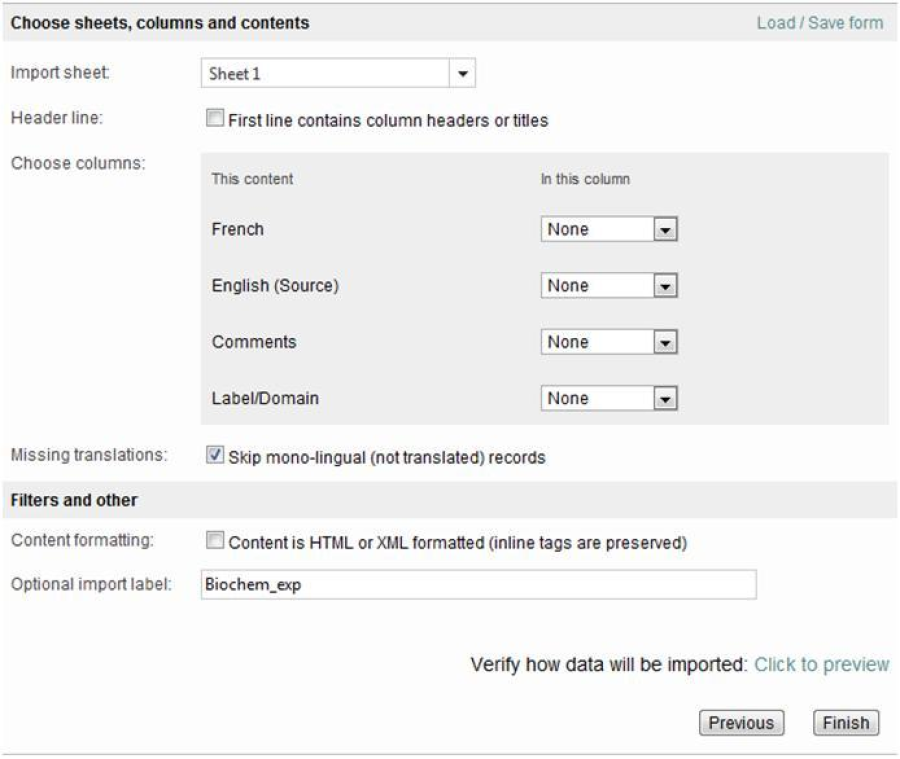
-
Your new database has been created.
How to quickly reuse Settings
Save the settings used for the Import so you can save time when importing other files with the same characteristics or structure (different languages and comments in the same columns).
-
Click on Load/Save form at the top right of the page.
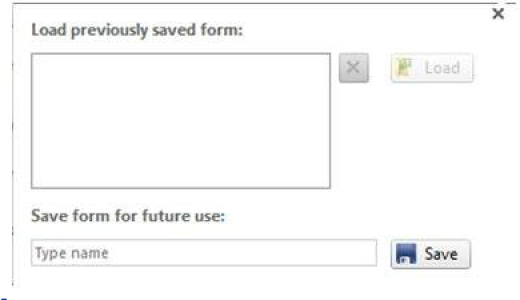
-
Name the form and click 'Save' to find it later.
These settings will be available for future use.
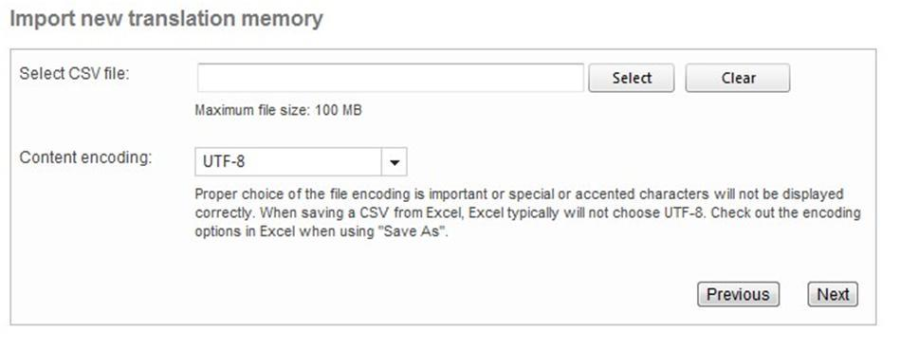
Importing a CSV file
-
Click on Next and move forward to the import file screen.
-
Select a file, define the right encoding and click on Next.
-
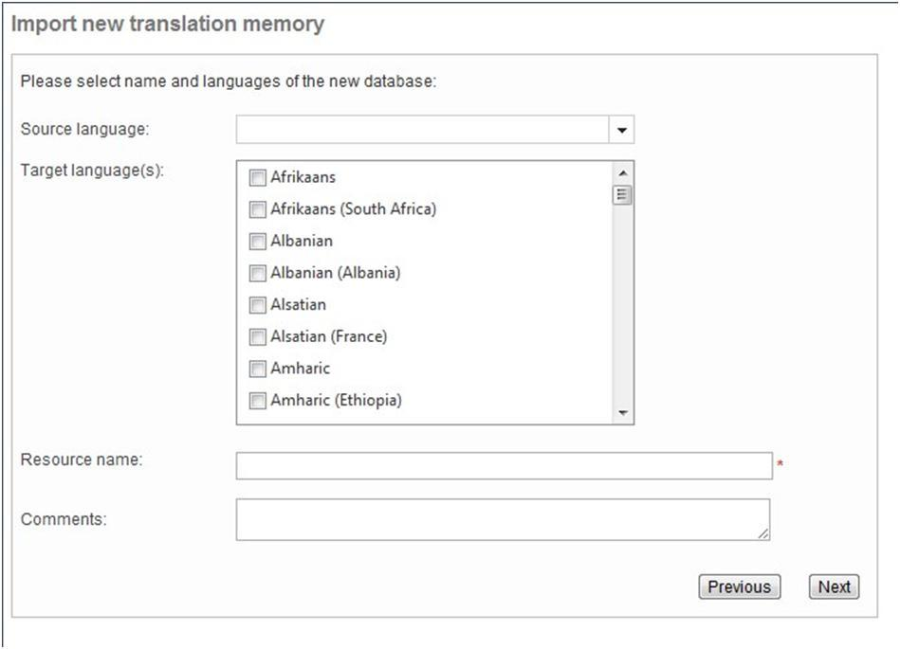
Choose the source and target languages and provide a name for the translation memory. You can also leave a note to describe the type of content to be imported.
-
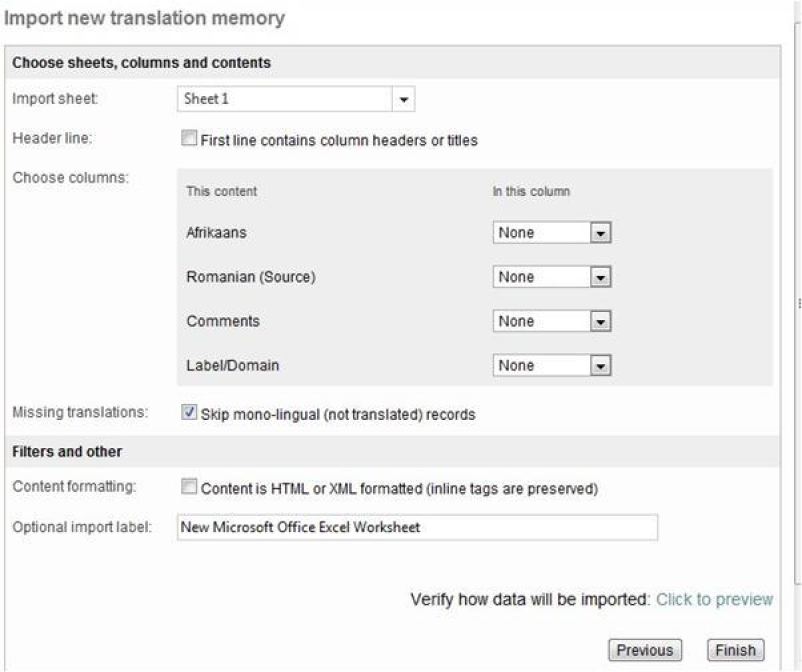
Click on Next to define further parameters and then click Finish to proceed with the import.
-
Your new database has been created.
Importing an Assist Align file
-
Click on Next and move forward to the import file screen.
-
Click on Select and find the file on your computer.
-
Choose the source and the target languages and click on Finish.
-
Your new database has been created.
Working with resources
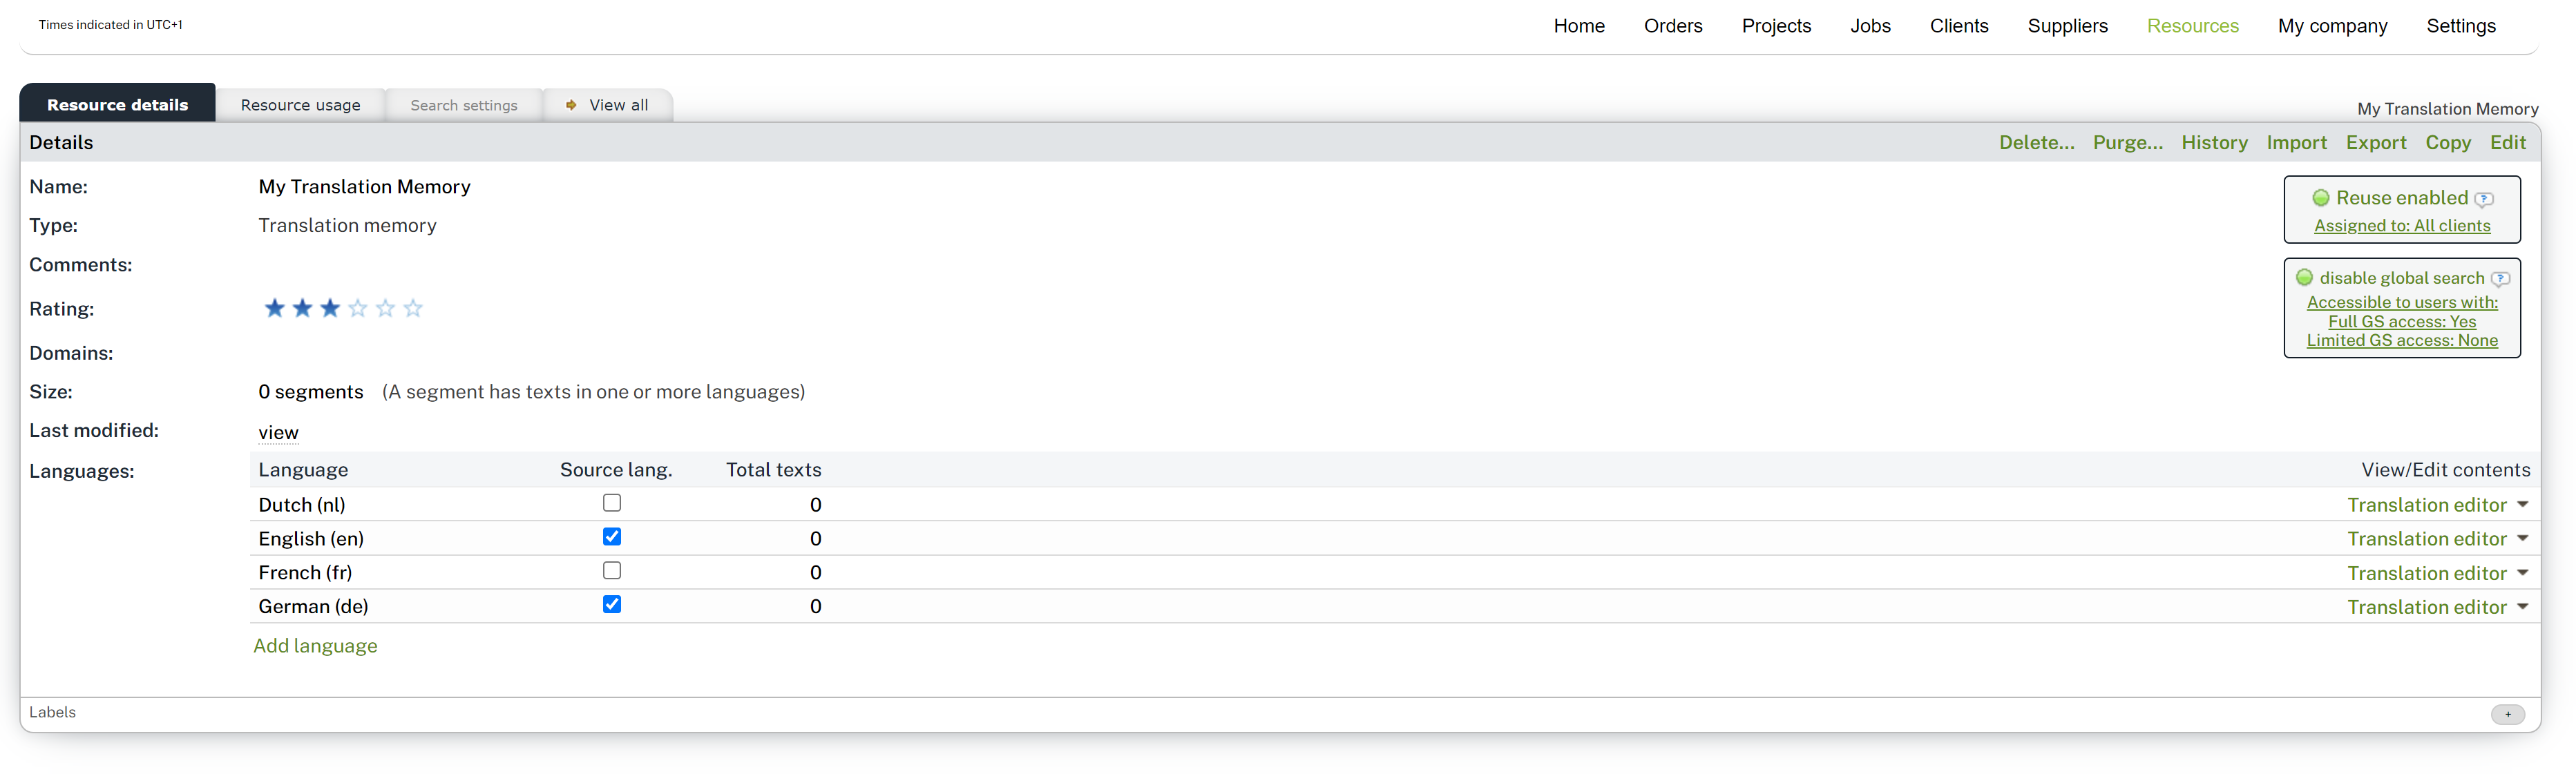
Once the resource is available in the system, you can run other operations with it and attach it to a project to start leveraging its content:
-
Click on Import if you need to add content from an existing file to this resource.
-
Click on Export if you want to export the content into a file you can then save to your computer.
-
You can also Add labels to your resources to annotate them or filter them easily on other pages (see: What is a label? for more information).
-
Click on History to find a log with all the operations that have modified segments in the database, including import and project consolidation events.
Check the linked articles for more details on resource and content management.