How to export Codyt jobs in XLIFF format or Word to work offline
How to export/import in Codyt
Export one or several jobs
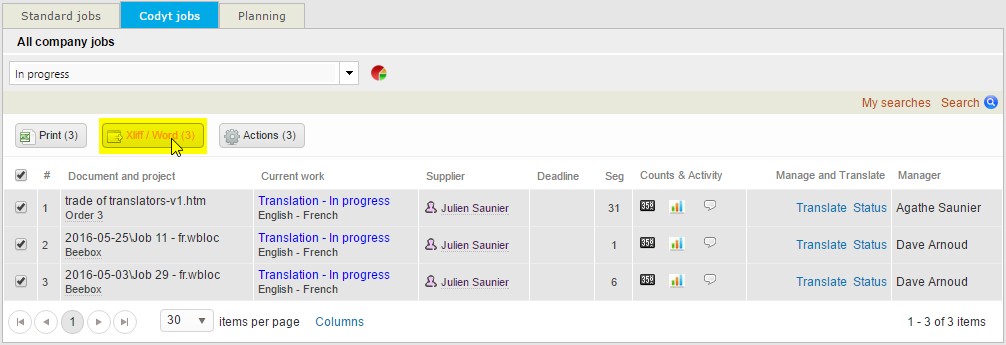
On the jobs page of your Wordbee workspace, select the jobs you want to export and then click the button Xliff/Word:

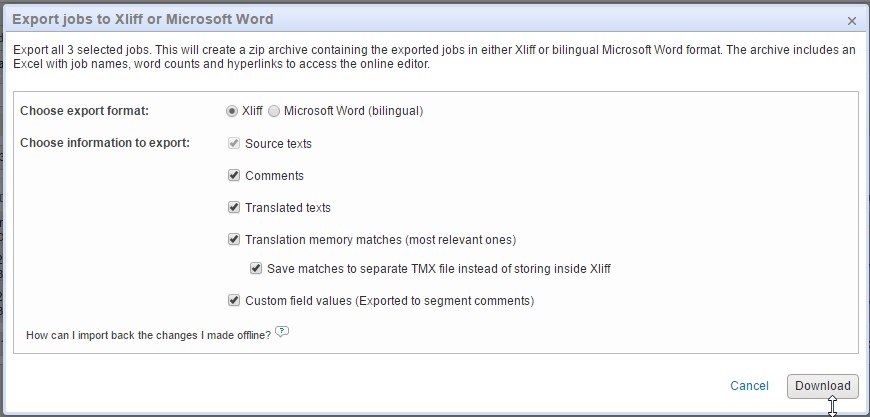
The following pop-up appears:

When exporting memory matches and terminology, you will be able to incorporate the relevant hits from the project TMs and TBs into your offline package. The system will collect the most relevant ones per segment and save them into the relevant file.
How to know which are the most relevant ones?
The Translation Finder has a setting to define the similarity-threshold for TM matches (anything above the threshold is considered relevant). For Terminology, you can include up to 30 terms per segment.
You can choose the exporting format and then select all the elements you want to export and then click 'Download'.
Note that when you export in Xliff you can export the memory matches in a separate .TMX file that you will be able to upload when working on your own CAT tool environment.
Import the job back for delivery
Once the work is done, you can import each job back to Wordbee Translator. Connect to your Wordbee workspace to deliver it to the project manager following the steps described below.
Go to the related job you want to deliver and click ‘Translate’ to open the online translation editor:

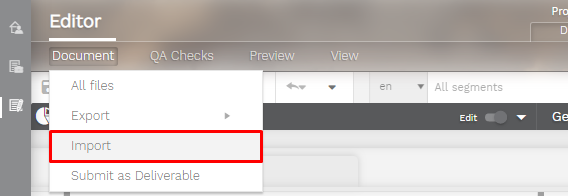
Once in the translation editor, hover Documents and click on Import to get to the import menu.

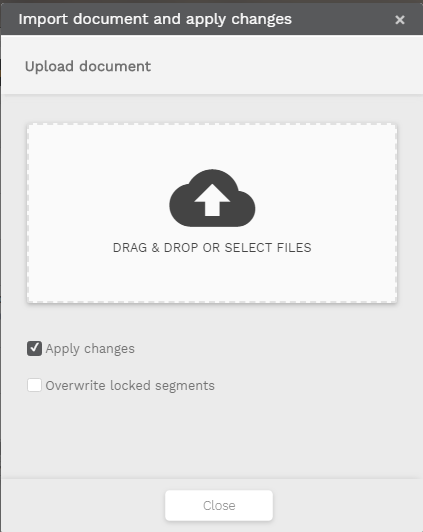
In the import menu, Drag & drop or select a file to import the translated file from your computer. Once done, your translations will automatically be saved in your project memory.

Update now the status of the job to mark it as 'Completed' to notify your project manager that your job is finished.
Only the MS Office/Xliff file previously exported from the platform or from the editor will be compatible with this import. Note that the import operation has to be done for each document.
