
Wordbee allows user authentication through your Microsoft Active Directory Server or Microsoft Entra ID (formerly known as Azure Active Directory).
Prerequisites are:
-
Active Directory version 2012 or later (ADFS), or
-
Microsoft Entra ID
-
A Wordbee Translator Enterprise level plan
These are the steps to make the integration happen:
Step 1 - Adding a Relying Party Trust
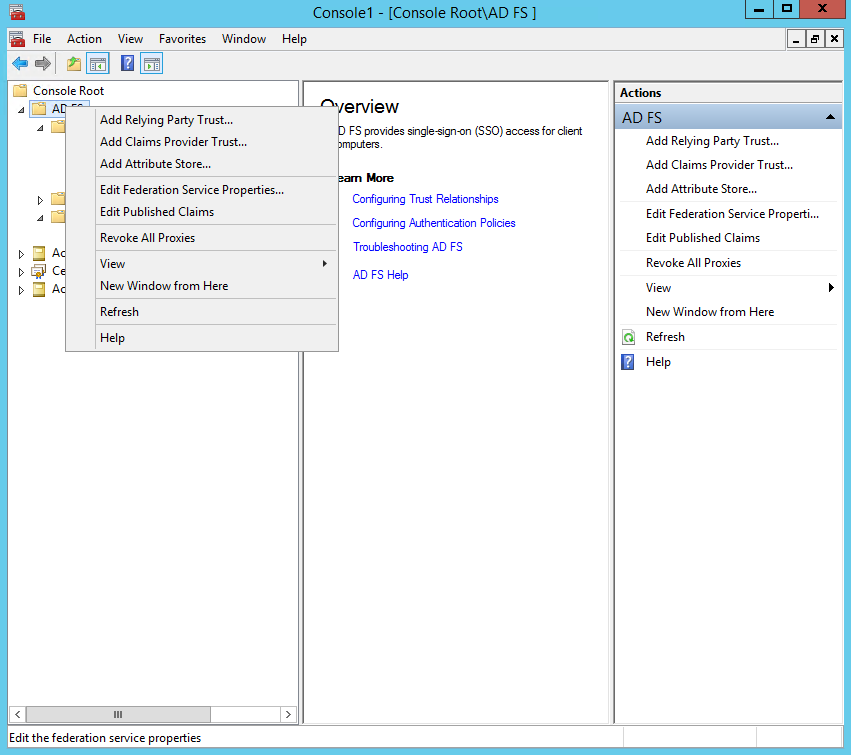
All steps are done using the ADFS configuration manager. Note that the screens for Azure AD are different:
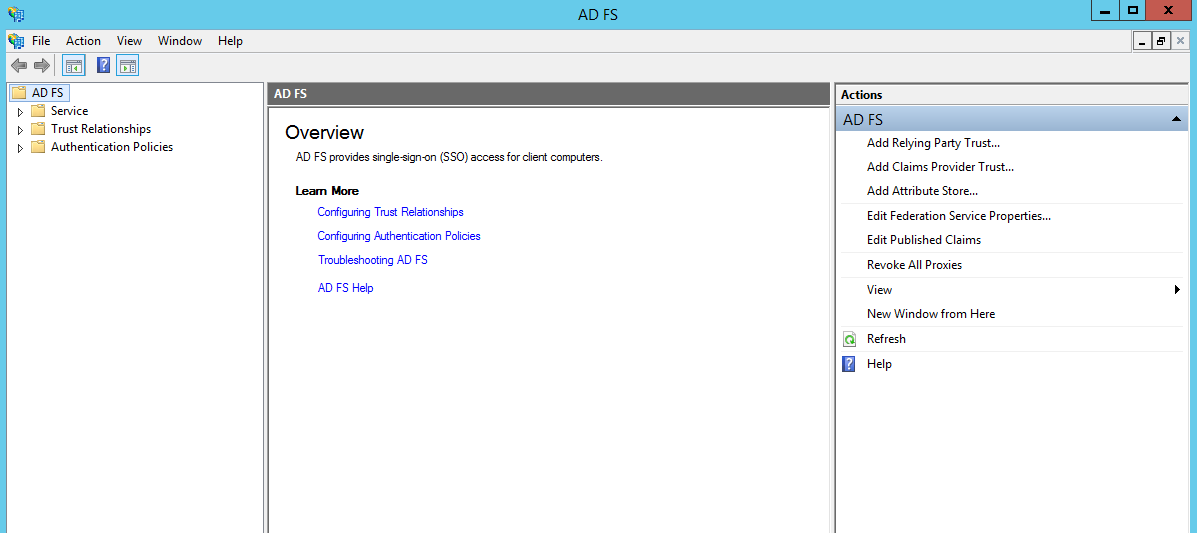
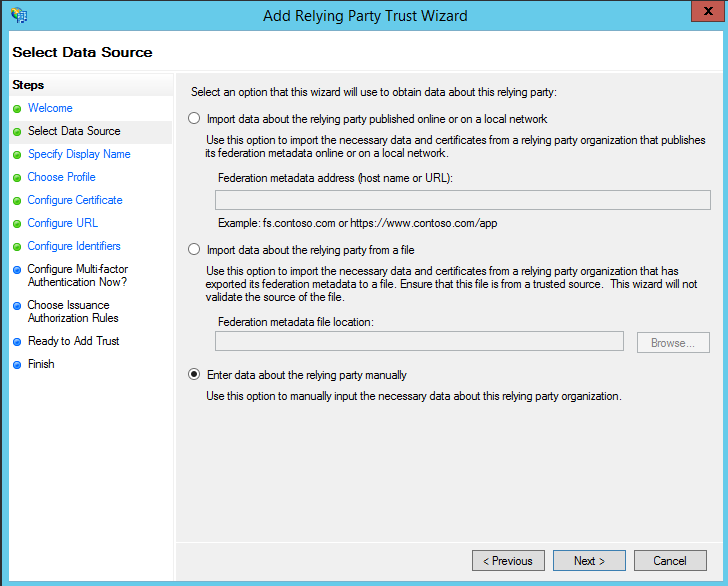
Add relying party trust
Click Add relying Party Trust in the Actions panel.
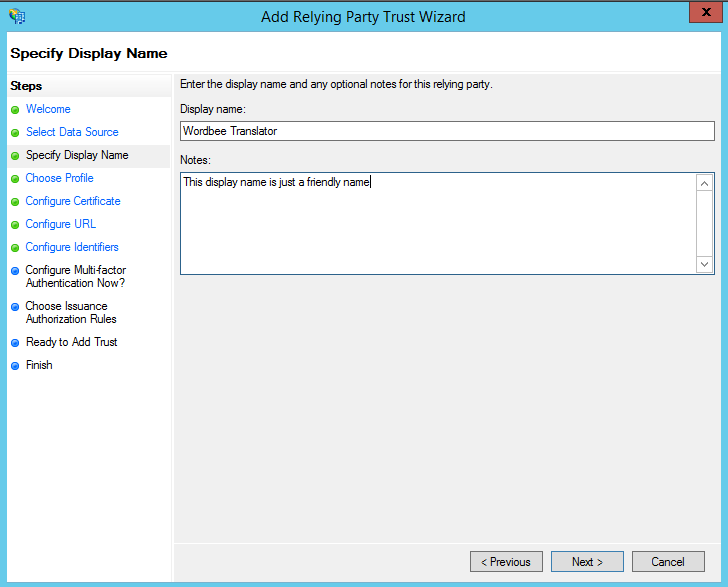
Select a display name
This display name is just the name under which you will find your configuration on your ADFS. It has no impact on the configuration.
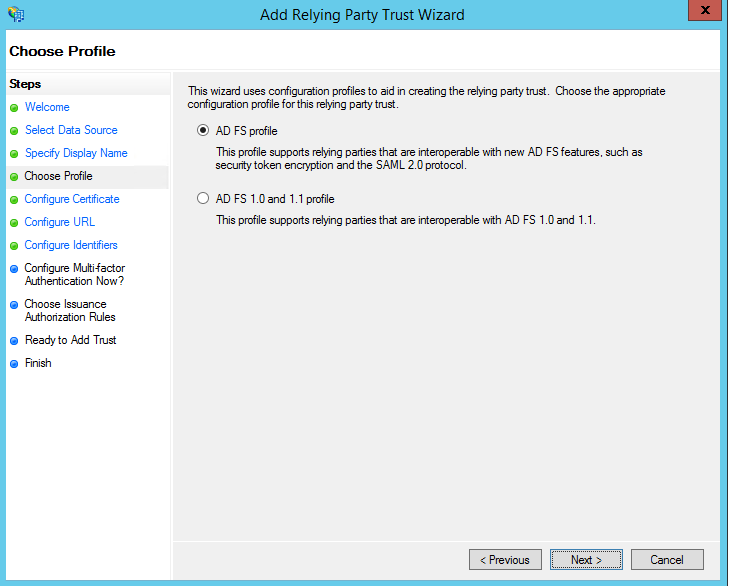
Tick AD FS profile option
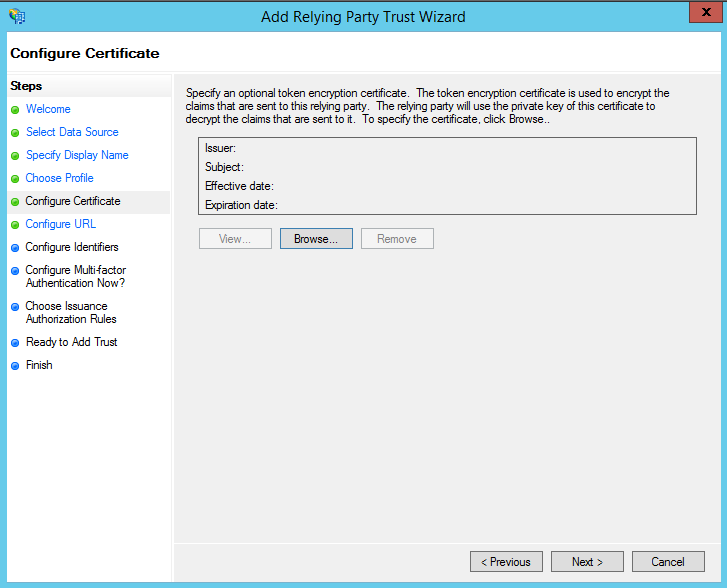
No certificate required here
Enable support for the SAML 2.0 WebSSO protocol
The Relying Party SAML 2.0 SSO service URL (also called Endpoint URL) is the URL which will forward the users to your authentication portal.
It should have been provided by Wordbee in the "SSO - Configuration Information" document.

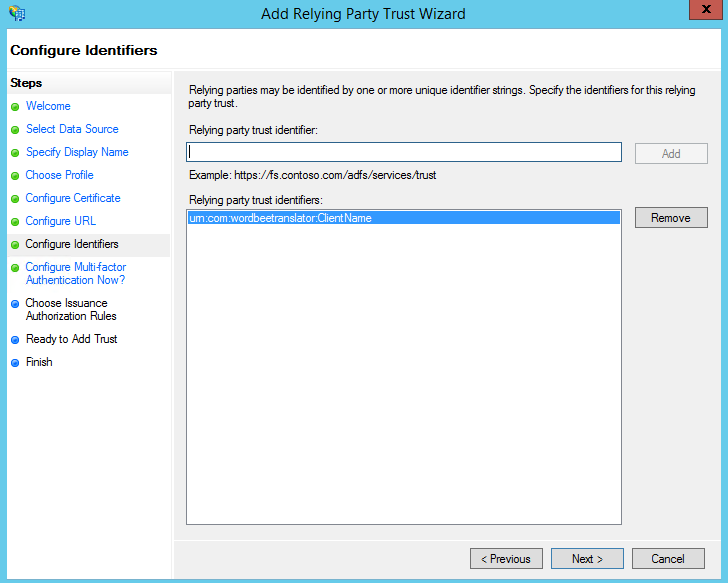
Relying Party trust identifier
The Relying party trust identifier (also called Service Principal Name) is the unique ID that will be used between our services. A suggested ID should have been provided by Wordbee in the "SSO - Configuration Information" document.
It can be changed if you prefer but should be the same on Service Provider and on Identification Provider, please let us know if our suggestion doesn't match your preferences.
This screen allows you to configure multifactor, which is out of scope of this guide.

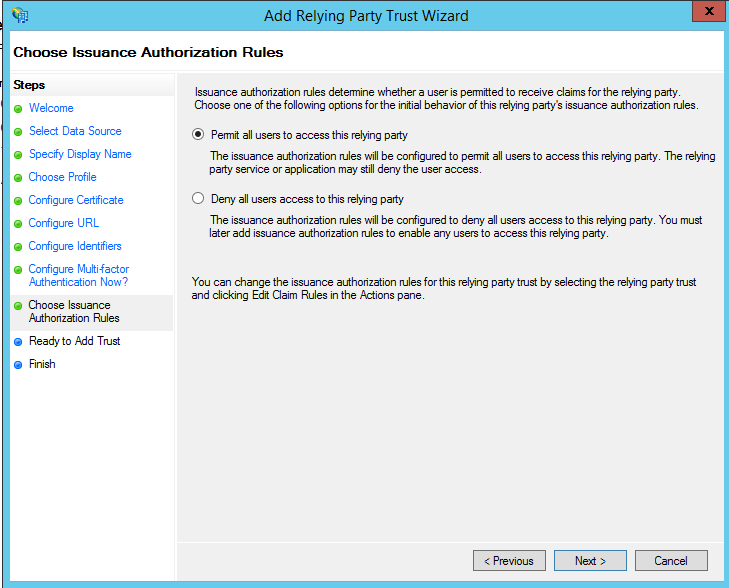
Permit all users to access this relying party
It is possible to set the default behavior as "deny" and grant only specific users access to your platform, but this configuration is out of scope for this guide.
The next steps of the wizard are only to verify and finish your configuration. Uncheck the box "Open the Edit Claim Rules dialog...", we will configure them later.
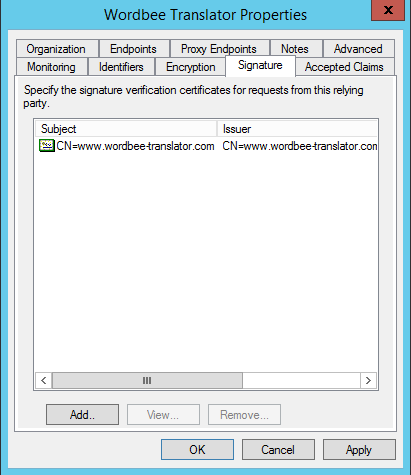
Signature encryption
Some configuration can not be done using this Wizard, to proceed further, open the properties of the freshly created relying party trust.
It is located in your ADFS management console in "Trust Relationships > Relying Party Trusts" under the display name you set earlier.
On the "Signature" tab, upload the public certificate provided by Wordbee.
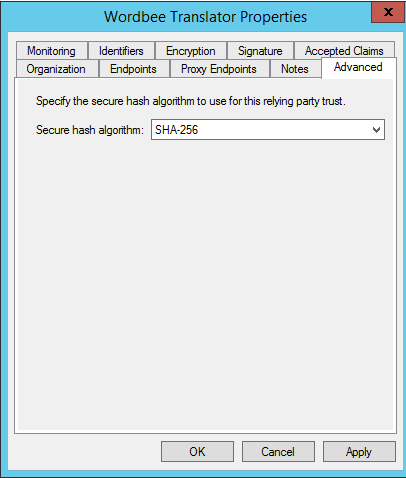
Hash Algorithm
Under "advanced" tab, make sure SHA-256 is selected.
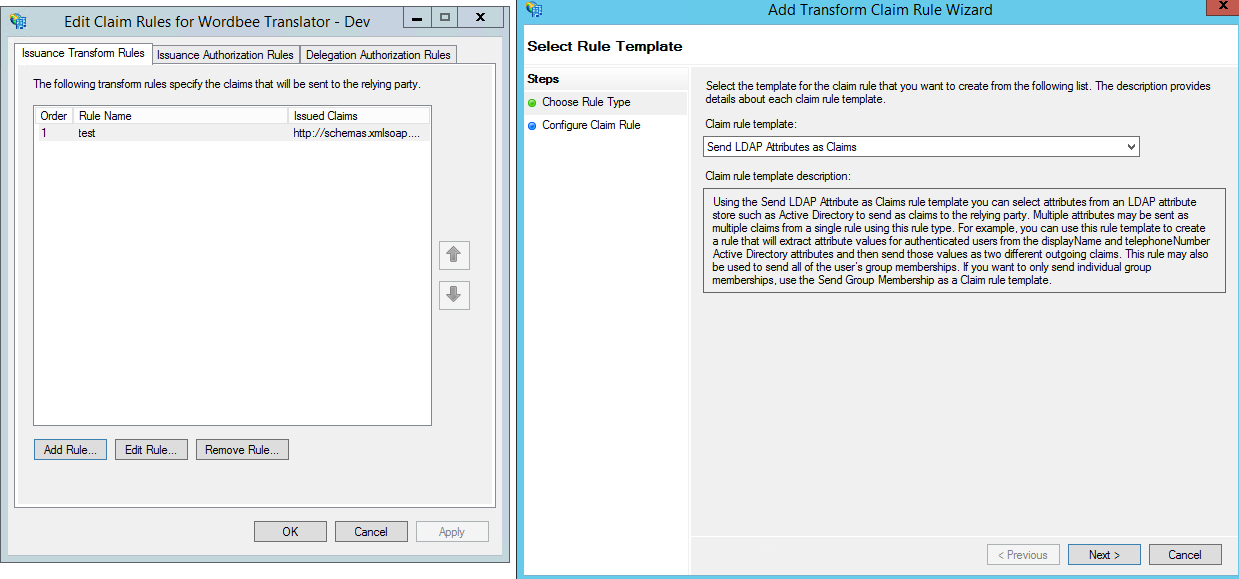
Step 2 - Creating claim rules
Claim rules are used here to define which user information will be send to our server.
You can configure them in your ADFS management console in "Trust Relationships > Relying Party Trusts", right click on the Wordbee-Translator Relying Party Trust and "Edit Claim rules"
"Add Rule" and "Send LDAP Attributes as Claims"
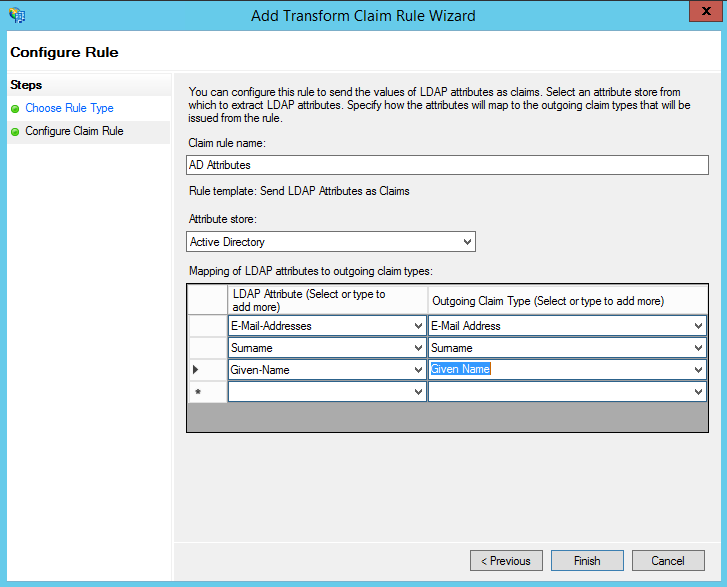
Select the attributes to send
To make it work with Wordbee-Translator, you will at least need to send e-mail-addresses as "e-mail address". More attributes can be requested by Wordbee to match your specific needs.
"Claim rule name" is just a friendly name and "Attribute store" should be Active Directory.
Step 3 - Activation by Wordbee
Your ADFS is ready at this stage!
We now require you to send us your:
-
Your public certificate
-
Your Active Directory endpoints.
-
Your field mappings
These details are required by Wordbee to activate the authentication in your Wordbee Translator platform
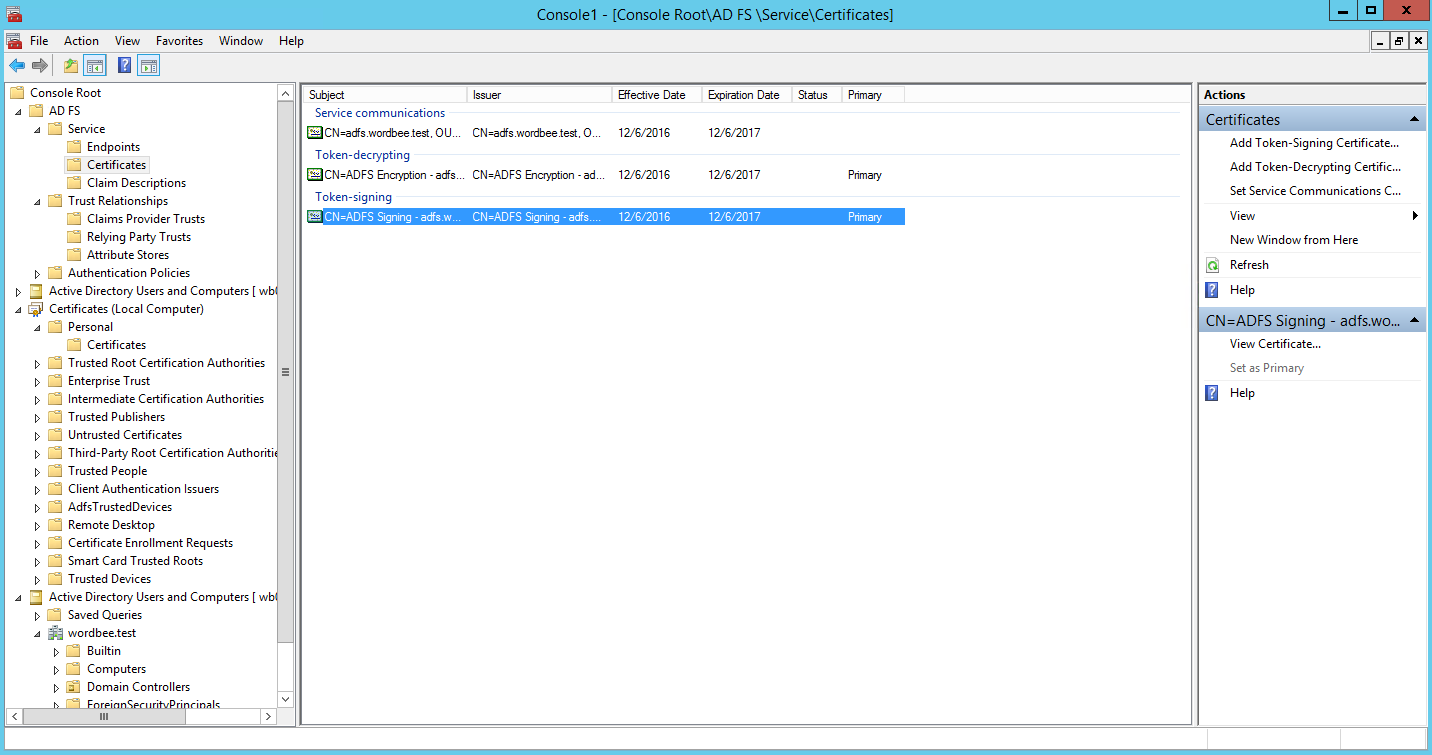
Extract your public certificate
This certificate can be found on your ADFS management console, under Service > Certificates, select the token signing cert and clic "View Certificate"
Go to details tab, clic "copy to file"
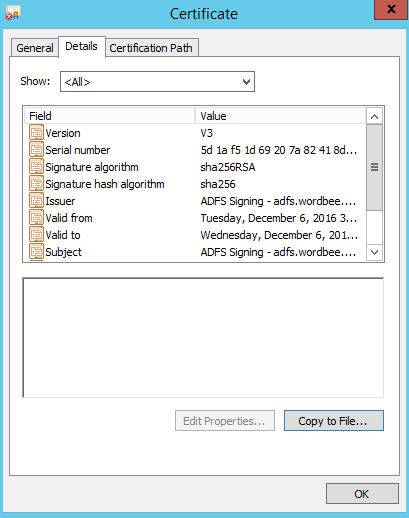
This should open the Certificate export wizard, export it in Base 64 file.

This file does not include the private key and can be safely sent via mail.
SSO - Configuration information document
In this document, we expect you to fill the "Contact details" part and the "Identity Provider Data for the AD FS PRODUCTION environment"
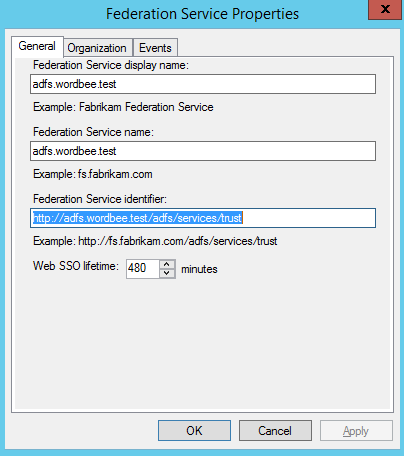
Identity Provider Name
The Identity Provider Name is also called "Federation Service Identifier" and can be found in the Federation Service Properties of your ADFS as shown on the screenshots below.
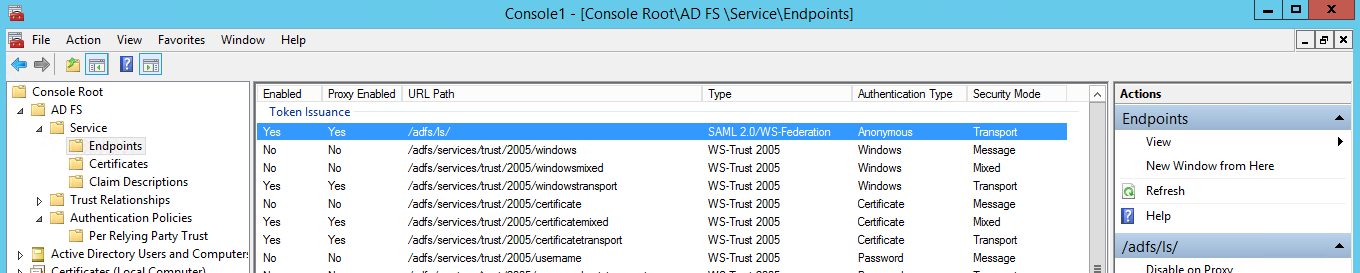
Single Sign On service URL
In Service > Endpoints, you can find your SSO Service URL:
Federation Metadata URL
In the same folder, a bit below, you can find your metadata:

Troubleshooting
How analyze SAML message
You can analyze the SAML messages in chrome or firefox using an extension:
-
Chrome: https://chrome.google.com/webstore/detail/saml-devtools-extension/jndllhgbinhiiddokbeoeepbppdnhhio
-
Firefox: https://addons.mozilla.org/fr/firefox/addon/saml-tracer/
Those extensions permit to view messages sent for authentication process.
Endpoint Index
If you remove the default endpoint (non-WWW), you need to conserve the index number 1 with binding POST for Wordbee Translator.