
Sometimes individual job assignment is not the best approach when using Wordbee Translator. To make it easier to assign multiple jobs to a freelance translator or an agency, Wordbee provides the option to perform batch job assignments. This allows new jobs to be quickly assigned to a specific individual or agency without having to manually assign each job.
The following sections have been provided to help you complete batch job assignment:
Accessing Company Jobs
To assign jobs in batch mode, first hover your mouse over Jobs in the Menu Bar and then click on All Jobs.

Next, click on All Company Jobs underneath the CoDyt Jobs Tab.

Filtering Displayed Jobs
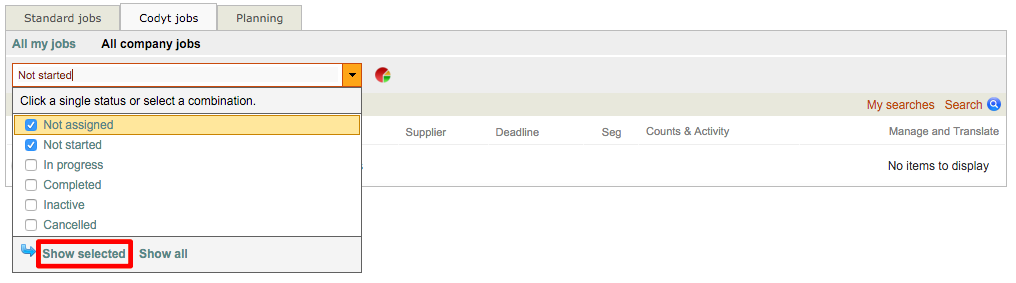
Use the filter menu to view specific job statuses in the system. For example, if you want to assign a supplier to jobs that have not been assigned or started, first check these filtering options and remove all other selections. Then click on Show Selected.
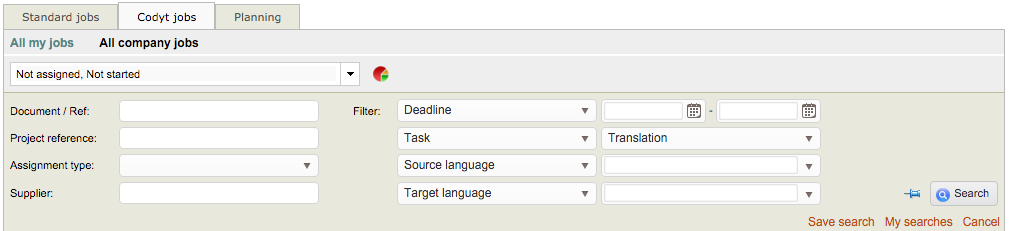
If multiple jobs exist with different types of tasks, you might need to add a search filter for the specific type of work, such as translation or revision, to ensure the appropriate jobs are displayed for batch job assignment selection. Additional filters can be used such as the assignment type, source language, etc.
Update job selection
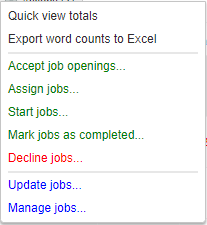
You can achieve this by using one of the options in the Actions drop-down menu:

The options listed will allow you to react on the selected items of the list:
|
|
General overview:
Options for suppliers
Options for managers
|
Job updates in batch may generate a big amount of notifications in the system. As an administrator, you may want to bundle these. Learn how to do it in the
Email Notification settings
Example: remove job assignments
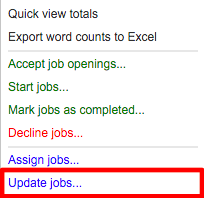
With your job selection. click on Actions > Update jobs... in the drop-down menu:
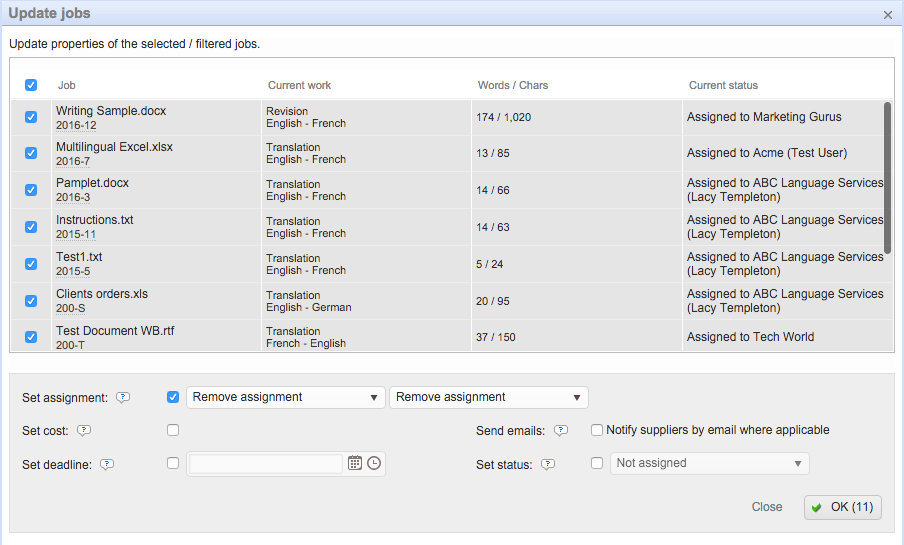
Next, tick the box for Set Assignment and leave the current selections in the drop-down menus as Remove Assignment. Then click on OK (#) to remove the current job assignments.

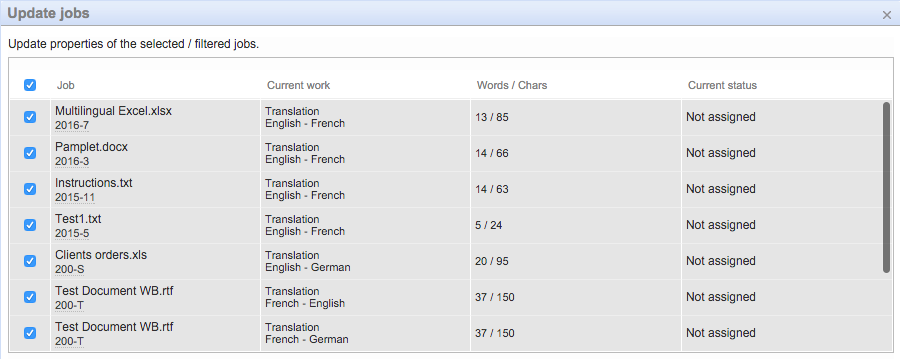
Once this has been finished, the pop-up window will appear as shown below. The Current Status column will show a status of Not assigned for each job.
Completing Batch Action
Make certain the appropriate jobs have been selected (all or only certain ones). Current selections will have a blue background with a check mark. Then tick the checkbox for Set Assignment.
Next, use the first drop-down menu to choose the new supplier (agency or individual freelancer) who will perform the task. To do so, first click on the drop-down menu and then click on the appropriate selection. 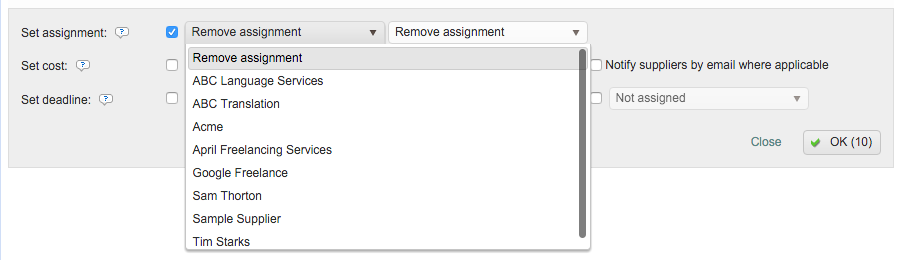
The second drop-down menu can be used to configure a manager or user for job assignment. Click on the drop-down menu and make a selection. In the example below, an agency has been chosen (ABC Translation Services) and a manager or user can then be chosen for the agency.

Please note that the second column is not required to complete batch job assignment. If desired, you can simply select the LSP or individual freelancer.
If you are assigning the jobs to an individual freelancer, you may assign the jobs to that person and/or a user.

Once the supplier and manager/user have been chosen, additional options may be checked and configured for the job assignment:
-
Set Cost - Check this option to have the system calculate and save the cost for the selected supplier. If the job was already assigned, the cost will be re-calculated.
-
Send Emails - Check this option to notify the supplier via email about the job assignment.
-
Set Deadline - Check this option to enter a deadline for the selected jobs.
-
Set Status - Choose a new status for the job(s) such as "Not Started" or "In Progress".
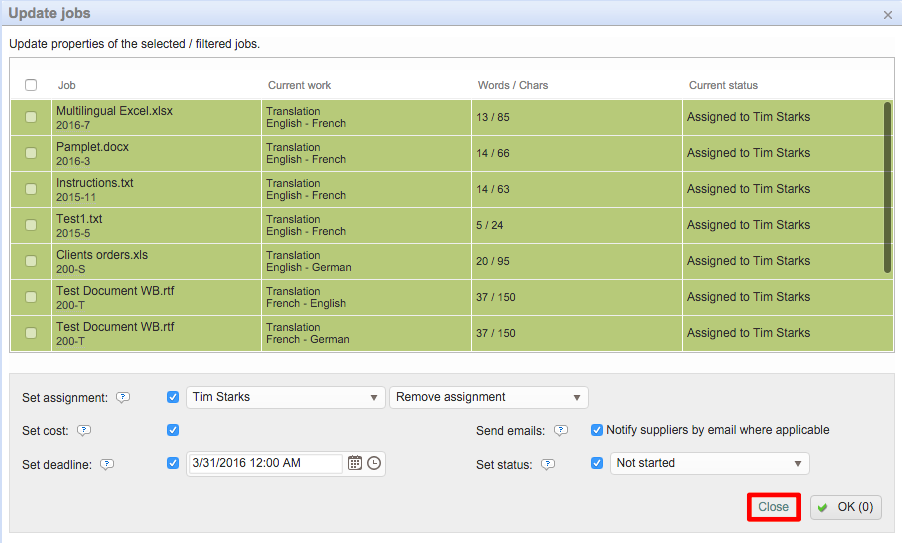
Be certain to click on OK (#) once all jobs have been selected and this information has been configured to complete the batch job assignment. Then wait patiently for batch job assignment to complete and click on Close to exit the pop-up window.
Once you confirm the action, notifications may be sent to all vendors who had their jobs updated (either assignment removed or new job assignment ready for them to start). These settings are individual for each user and can be defined in the Individual notifications panel from each user profile.

Once the batch assignment has been completed, the pop-up window will appear as shown below. The Current Status column will now show a new status, which will be the supplier and manager or user that has just been assigned. Click on Close to exit this window and return to the CoDyt Jobs Tab > All company jobs.
Displayed jobs will depend on current filter and search selections. If the jobs are not appearing on CoDyt Jobs Tab > All Company Jobs, try changing the current selections to the new status or the assigned supplier.
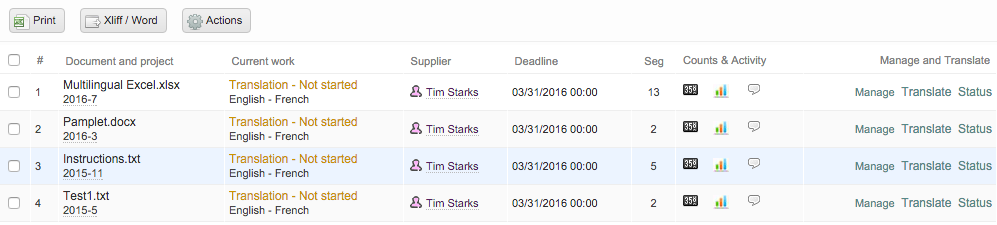
The jobs will appear as shown below after batch assignment has completed and the pop-up window has been closed. As you can see the Supplier column now shows Tim Starks, as this was the supplier chosen in the above example for batch job assignment.
If the jobs were batch assigned to an agency and manager, then they would appear similar to what is shown below. You will see both the supplier name and the assigned manager or user in the Supplier column.
