
The classic order form can be integrated with your website and provides an easy way for new clients to request work by submitting a general order. When this form is used, the order will be viewable in the system; however, the client will not exist and a project must be created manually from the submitted order.
To create a project from orders submitted via the classic order form, you will need to perform the following steps:
Once these steps have been completed, you will need to create a project for the order, configure it, generate quotes, send proposals to suppliers, etc. Information on these steps for each type of project can be found below:
Access & View the Order
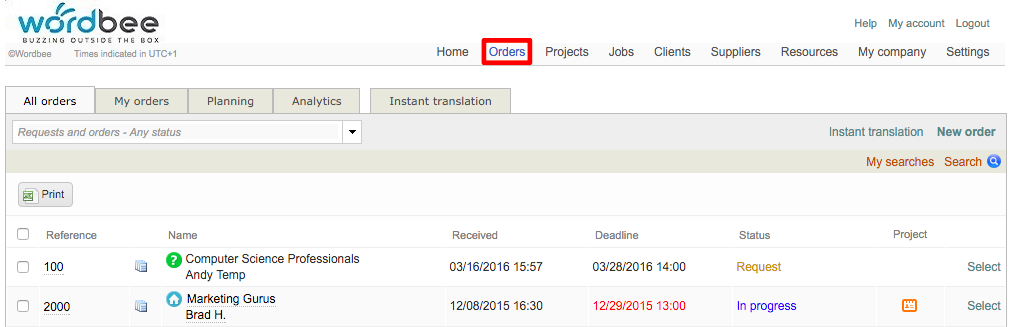
An order entered via the classic order form will automatically arrive on the platform and be viewable by the project manager when logged in. The status for a new order will be set to "Request" by default. Orders may be viewed on the Dashboard when viewing the Home Page.
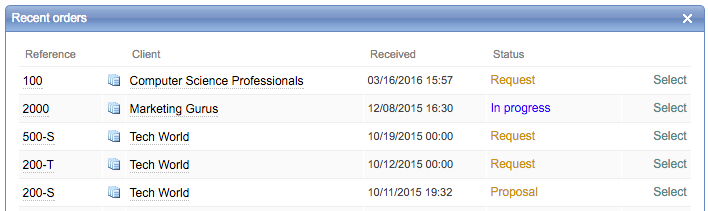
They may also be viewed by clicking on Orders in the Menu Bar. When an order has been submitted via the classic order form, you will see the name of the company , contact name, date received, entered deadline, and status.
The project column will be empty as a project cannot be created until the client is either entered into the system or the order is attached to an existing client. A Green Question Mark in the name column indicates that the client does not exist in the system. In the example below, a new client called Computer Science Professionals has submitted an order using the classic order form.
To view the order, you will need to click on Select. This can be done from either the Recent Orders Section of the Home Page or from the Orders Screen. This will direct you to the Order Details Tab for the selected order, as shown below:
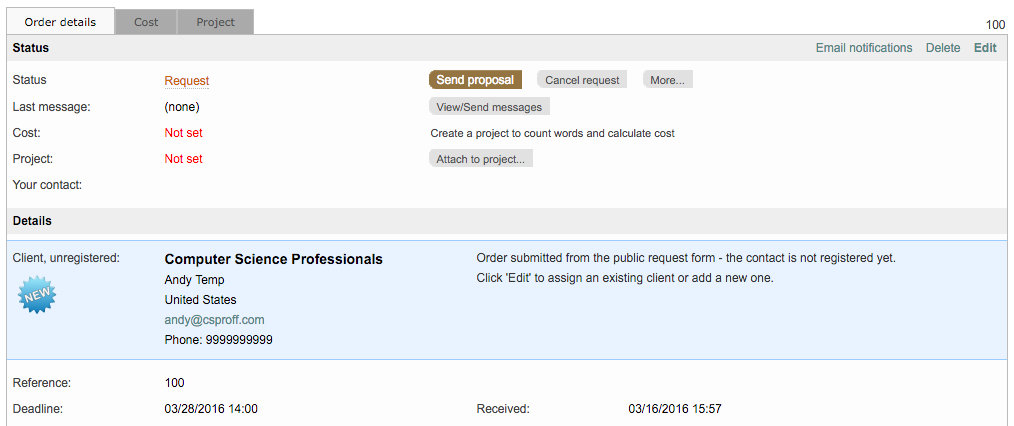
The Order Details Tab is broken down into the following sections:
-
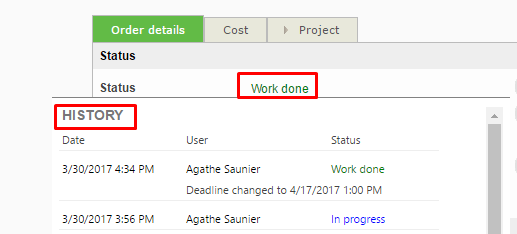
Status - Shows the status, message, cost, project and contact information. However, since this order was submitted via your website by a new client, there is no information to display and the cost/project must be configured manually. Note that when clicking on the 'Status' itself, both the client and project manager can see the history of the order to know when the order was set to 'In progress' by the project manager but also to see when the deadline has been adjusted by the project manager (if the client deadline could not be met).
-
Details - Shows the order information including the client, entered reference number, deadline, date received, and language/task information. Since the client is not registered in the system, you will see a message like the one above. Here you can assign the order to an existing client or add them to the system for project creation.
-
Documents - Shows all documents the new client submitted as part of the order.
Before a project can be created in the system, you will need to perform a couple of tasks. First, the order must either be assigned to an existing client or the new client must be added to the system. In most cases, the client will need to be added. The steps for doing so are shown in the next section.
Add the Client to the System
When viewing the details for the order (shown above), information will be provided to show that the client is not registered in the system. They need to be added and assigned to the order before creating a project in the system. You will see that the order has been submitted via the public request form (i.e. classic order form) and the contact has not been registered in the system.
A client must be assigned to the order; however, in most cases this will be a new client that must be added first. To add them to the system, first click on Edit at the top right of the Order Details Tab.

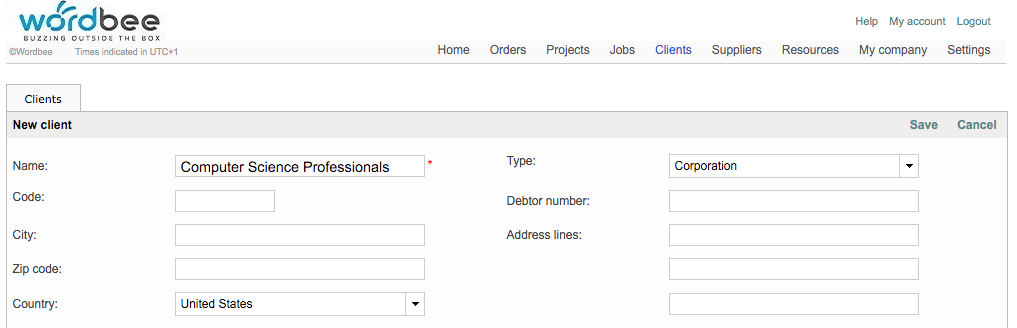
Then click on Create New Client to add them to Wordbee Translator.

You will be redirected to the Clients Tab and can enter or change any needed information. Once finished, click on Save to add them to the system. This will allow you assign them to the order and create a project in the system.
Click on Select next to Assign Client.

Then choose the new client from the pop-up window by clicking on Choose. This will assign them to the order.
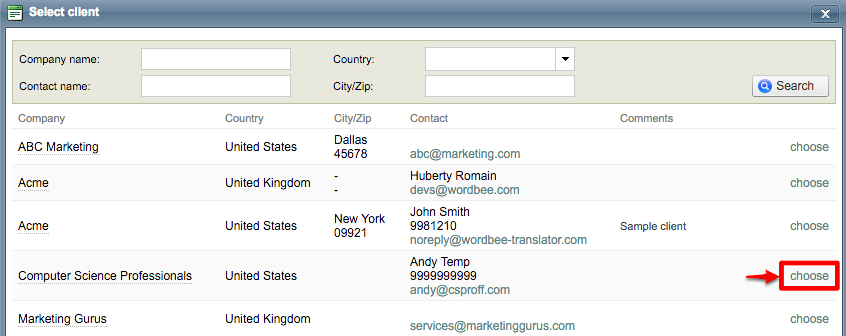
The client will be assigned to the order and you have the option of also adding a contact to the order. When finished, click on Save.

To learn more about managing clients in the system, please see the Managing Clients section underneath Project Management Tasks.