Configuring the system to show metadata in columns in the CAT Editor
A few steps must be performed to configure multiple columns in the editor. This might include configuring more than one column for the source language, and target languages.
The following sections have been provided to help you configure multiple columns for a project.
Step 1: Define Custom Fields (optional)
In order to configure multiple columns in the editor, you may first need to define custom fields for segments. Please see Custom Fields in the Administration portion of the documentation to learn more.
Once a custom field has been configured, you will be able to display the field as a column in the editor.
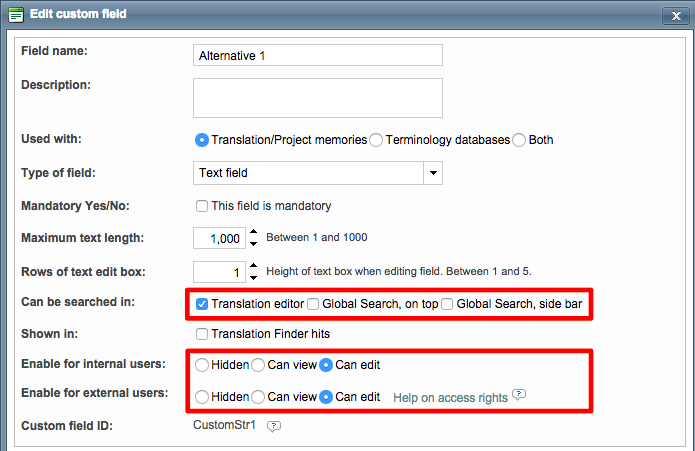
You can create for example custom fields named 'Aleternative 1' and 'Alternative 2' for projects in which you want your translators to propose more than one translation.
530px
When configuring your custom fields for this purpose in Wordbee Translator, it is important to configure the following settings for each custom field:
- Can be searched in - Set to Translation Editor for multiple columns.
- Enable for Internal users - Should be set to Can Edit.
- Enable for External users - Set to Can Edit if you want external users to be able to make changes to the column in the editor. If not, set to Can View.
Step 2: Configure a Workflow Template
As project manager, in order to decide which columns should be visible per job within a project, we recommend you to create workflow templates.
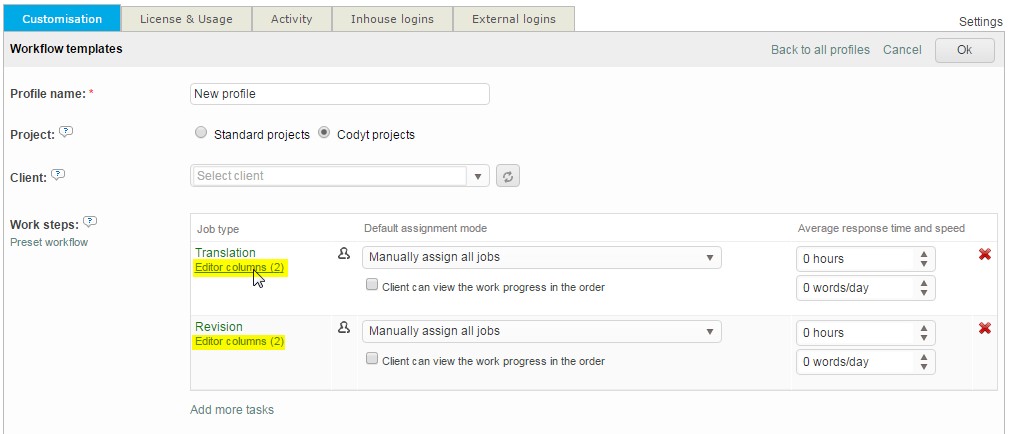
In the template, you select a project type, you define a workflow and then you can select the columns to be displayed in the translation interface for each job.
Underneath the Job Type, you will see an option titled Editor columns (#). The number shows how many columns are currently configured for that job type in the editor. You can click on this option to configure more columns for any job type.
The Source and Target language columns are the set defaults for column display in the editor and these cannot be removed. However, you may add as many additional columns as needed.
To configure an additional column, click on the drop-down menu with the description Select column to add:
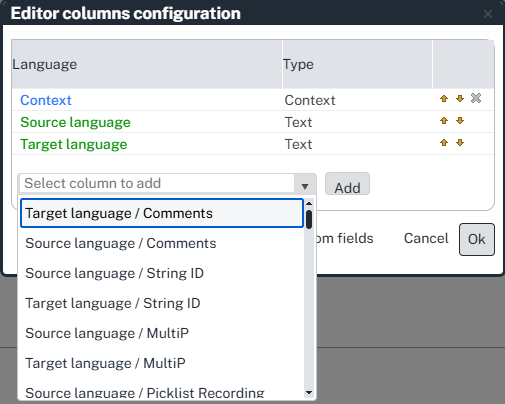
Make a selection and then click on Add. This step must be performed for each column you want to display in the editor. The new columns will appear in this screen as shown below.
You can use the Up/Down Arrows to change the position of the column. Use the X to remove a column from the configuration. When finished, click on OK.
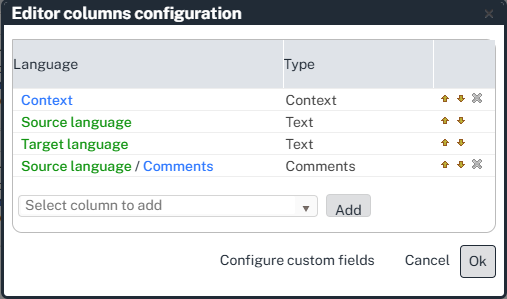
Once finished, you will see the total number of columns for the selected job type.

Remember to click on Save when finished.
Step 3: Apply Workflow Template to Project
Once the workflow template created and saved,you just have to select it in your Codyt or Standard project:
- For Codyt: click Project settings > Workflow & Suppliers > click the arrow next to Edit and select Preset from workflow template. You will then be able to select your template and modify it if needed.

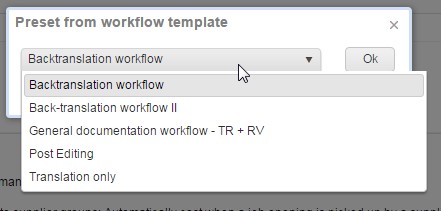
- Same process for standard projects, reach the Project details page > select Workflow & Suppliers > click the arrow newt to Edit and select Preset from workflow template. You will then be able to select your template and modify it if needed.

Step 4: External Worker Access (Optional)
If you have given external users the ability to edit custom fields in Step 1, you may want them to only see the custom fields created for the languages they are working on, or all languages. Depending on your need, an access right setting can be changed.
By default, an external worker is able to see the custom fields created for the languages outside of his own. To change this setting, first click on Settings in the toolbar and then click on Configure next to Access Rights.

Scroll down to the External User Profiles section and click on Select to the right of the External Worker profile option.

The option you will need to disable is Can View Translations in all Languages Beyond Job Languages.

A person viewing the document in the editor may also make changes to the configuration depending on their profile and access right settings. To learn more, please see Working with multiple columns.
