
The default configuration for XLIFF files is designed to handle online translations, but not HTML content. It is completely possible to translate XLIFF files with HTML content and all you have to do is create a custom file format configuration with the appropriate options enabled.
To do so, access the desired XLIFF configuration to make changes by going to Settings > Translation Settings > Document Formats > XLIFF.
Unless you have already configured a custom configuration for XLIFF files, the best approach is to access these settings in Wordbee Translator and create a new custom configuration from the provided Default Configuration. Please refer to the Create file format configurations page for more information.
Follow the steps below:
Step 1: You will need to click on Edit to begin making changes to the chosen XLIFF configuration. If only the Default configuration is present for XLIFF files, simply edit it and then Save as New when finished.

Step 2: Next, click on the checkbox to the left of Content is html located underneath the HTML Content section to enable this configuration item. By default, this option is disabled (OFF) in the default configuration file.
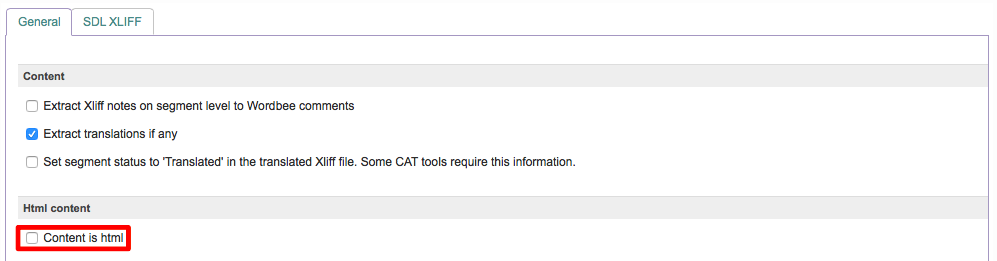
Step 3: When this option is turned ON (enabled) you will be able to select an HTML configuration to use (default or custom) and whether or not the text should be split on HTML breaking tags.

Step 4: If you do not specify something different, the Default HTML configuration will be used. To change this, click on the drop-down menu next to "HTML configuration to use" and then click on View located to the right of default in the menu. This will allow you to view the default configuration and make changes for creating a custom HTML configuration.

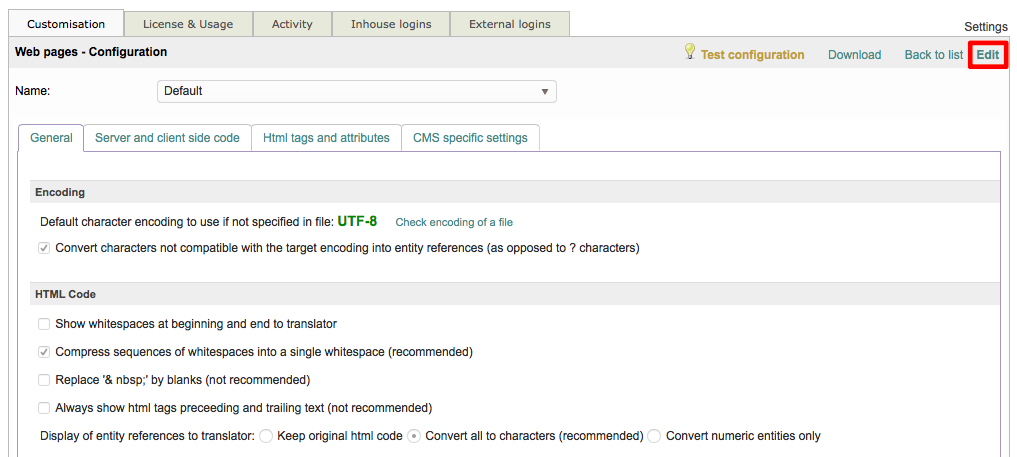
Step 5: The Web Pages - Configuration is used by default for HTML. To make changes, simply click on Edit to enable (check) or disable (uncheck) any desired options. Then remember to give it a new Name before clicking on Save as New in the top right corner of the screen. The steps for this process can be found here: Create file format configurations. The HTML Configuration may be customised to:
-
Use a different default character encoding.
-
Show whitespaces at beginning and end to translator.
-
Show the preceeding and trailing text of HTML tags.
-
Extract or include quoted strings.
-
Handle HTML tags and attributes.
-
Configure CMS specific settings.
-
And More...
Step 6: Once changes have been made and you have saved a new HTML configuration, you will be able to view and select it within your XLIFF configuration, as shown below:

Step 7: By default, the Split text at html breaking tags is enabled (checked); however, you may uncheck (disable) it if needed prior to saving the custom XLIFF file configuration. This option when disabled (unchecked) will sub-segment the text at each HTML breaking tag (i.e. <p>, <div>, etc.). It should only be enabled when the file contains existing translations that do not properly match the source HTML.

Step 8: You will need to save the change to the chosen XLIFF configuration. If you are editing a configuration other than the Default, simply click on Save. Otherwise, enter a Name and Description for the new configuration and then click on Save as new in the upper right corner of the screen.

Step 9: The new XLIFF file configuration has now been added to Wordbee Translator. To view it within the list of available file format configurations, click on Back to list in the top right corner of the screen.
