Supplier company Logins
The People & Logins Tab displays a list of current user logins for the supplier. It can be used to view the information for a user, to make changes, to add new users, and to manage logins. To access it you will need to:
- Click on Suppliers in the toolbar.
- Click on Select next to the appropriate client.
- Then click on People & Logins.
User profiles determine what the user is allowed to see and do within the system when logged in. The People & Logins Tab provides access to every login for that client and can be used to make changes, disable logins, delete logins, remove users from the system, and to create new logins. The tab will appear as shown below:

Within this tab, you are able to click on a Column Name to change the ordering. You may also click on the Email Address to send the primary contact a message or click on the user's Last Name to see a pop-up window with additional information.

The following sections have been provided to help you manage people and logins within the system:
Creating New Users & Logins
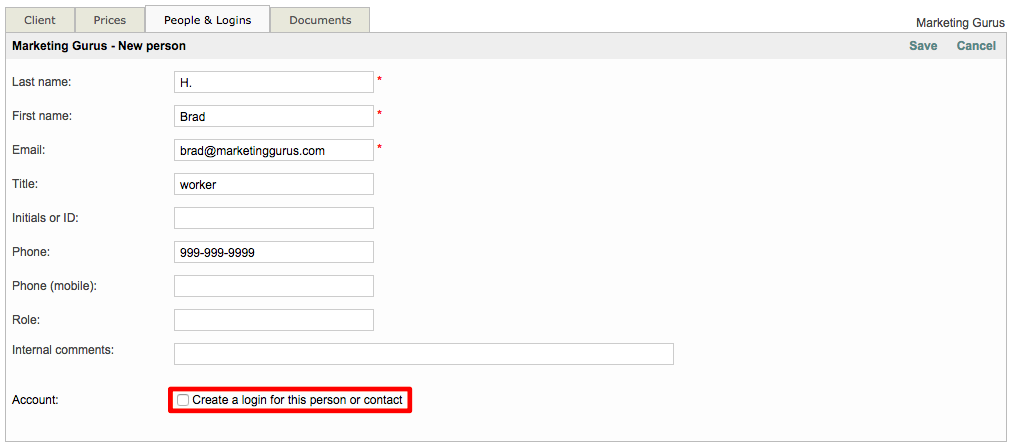
On the People & Logins Tab, an option is provided to add a new user. To do so, click on Add New in the upper right corner and then enter the user's information.


Updating User Information
To view the login information for a specific user or to make changes to their information, click on Select to the right of their name. Then click on Edit Details in the upper right corner of the screen. Once all changes have been made, click on Save to finish.

Deleting Users from the System
A user can be removed at any time by clicking on Delete when viewing their information. You must confirm the deletion by clicking OK to finish.

Managing Login Information
In the Login Section of this tab, several options are provided to manage user logins. Additional information is provided to show if the login is enabled and the last time the user logged into the system.

- Edit Login/Profile - Click to make changes to the ID, password, or user profile. Click on Save once all changes have been made.
- Disable/Enable Login - Click to disable or enable the user's login. This is a good option when the user needs to be restricted from logging in over a period of time. When the login is enabled, you will see a green circle with a checkmark and disabled logins have a red circle with a dash.
- Delete Login - Click to remove the login for the user. The user will remain in the system, but will not have a login.
- Defining a Login - If the user has never had a log in set up in the system, you will see the message "This person has no login". Click on Define a login to set up a user ID and password for the person in the system.

Below is an example of the People & Logins Tab with an active login, a disabled login, and a user with no login. Users with no login have the same icon as a disabled account (red circle with dash), but will have None underneath the User Profile column.

User notifications
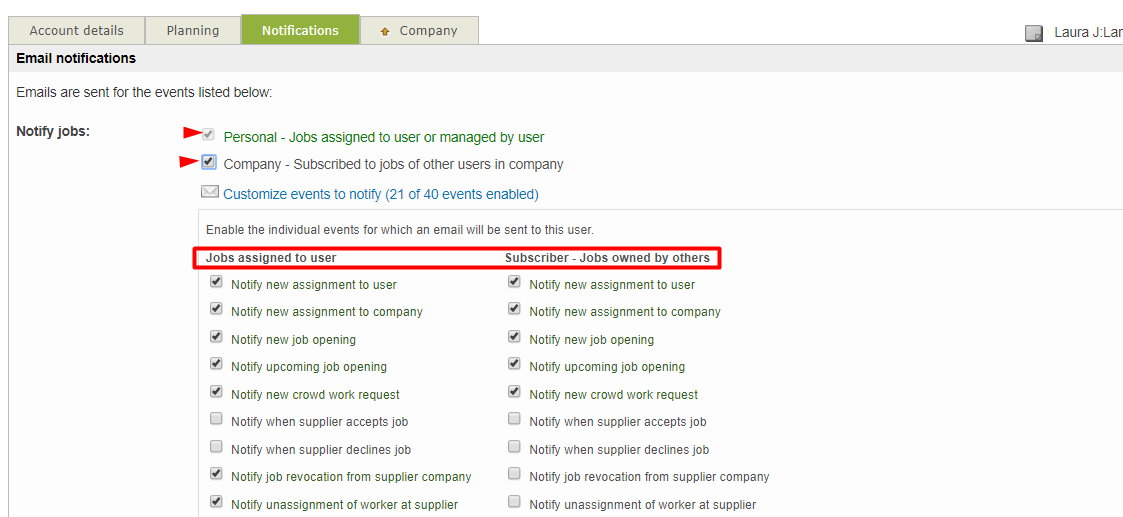
Below you can find an example of the notifications available for external user profiles. When you navigate to the profile of a specific supplier and then go to the Notifications tab, you will see all event types for which they can get emails. Click on edit, each category will display the full list of events.

Event types:
- Personal: Events triggered or involving the current user
- Company: for users who can follow-up the activity of the supplier company/team.
Depending on the user profile of the user and the number of logins available per supplier company, you will have to follow-up the emails sent to your colleagues and other team members or you will just focus on what is assigned to you. Working as a freelance translator (one single license used) you should configure personal and company events at once.
