Use Labels for proactive Resource Management
How to create labels
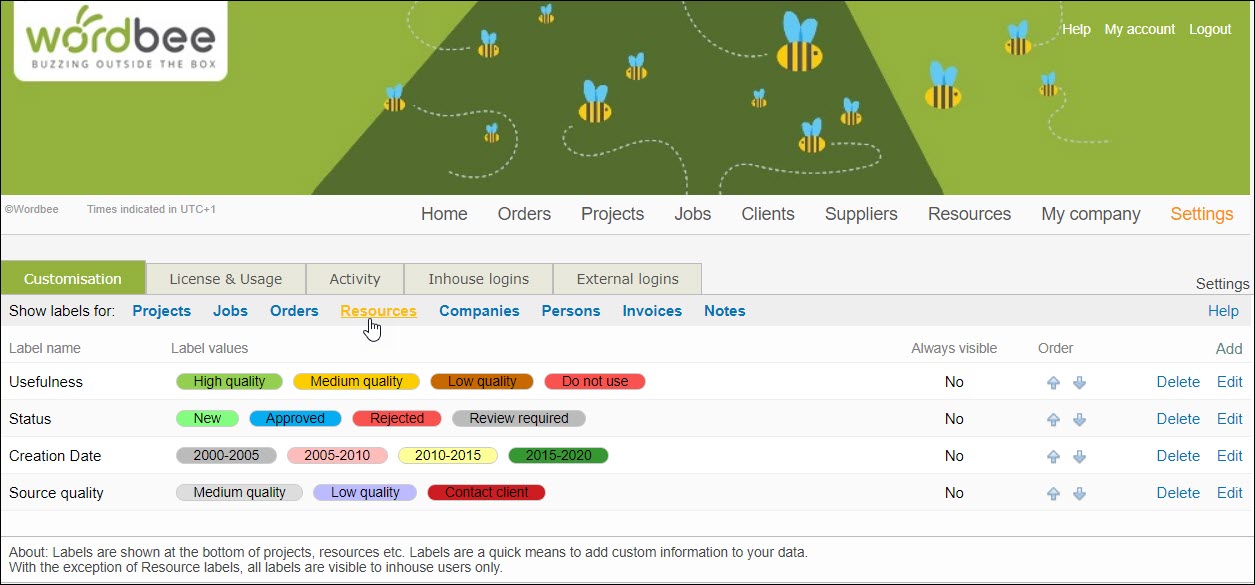
Add labels to Resource Details
After you have defined created the labels you want to use for Resources, open the Resource Details of one of your database and attach the appropriate labels:
Usefulness: high-quality, medium quality, low quality, do not use.
Status: new, approved, rejected, review required.
Creation date range.
Source quality: medium quality, low quality, contact client.
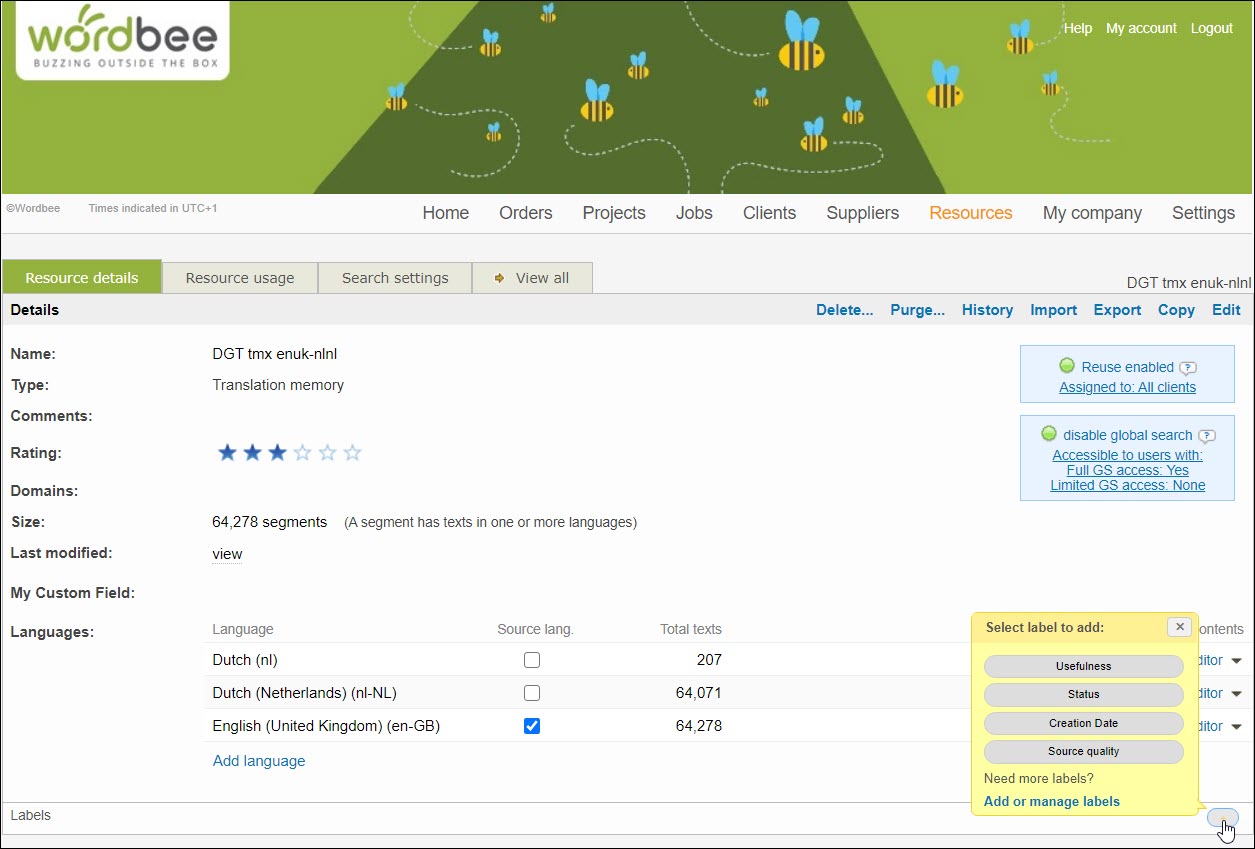
Click on the + sign that you see at the bottom and select the suitable labels for the resource in question.
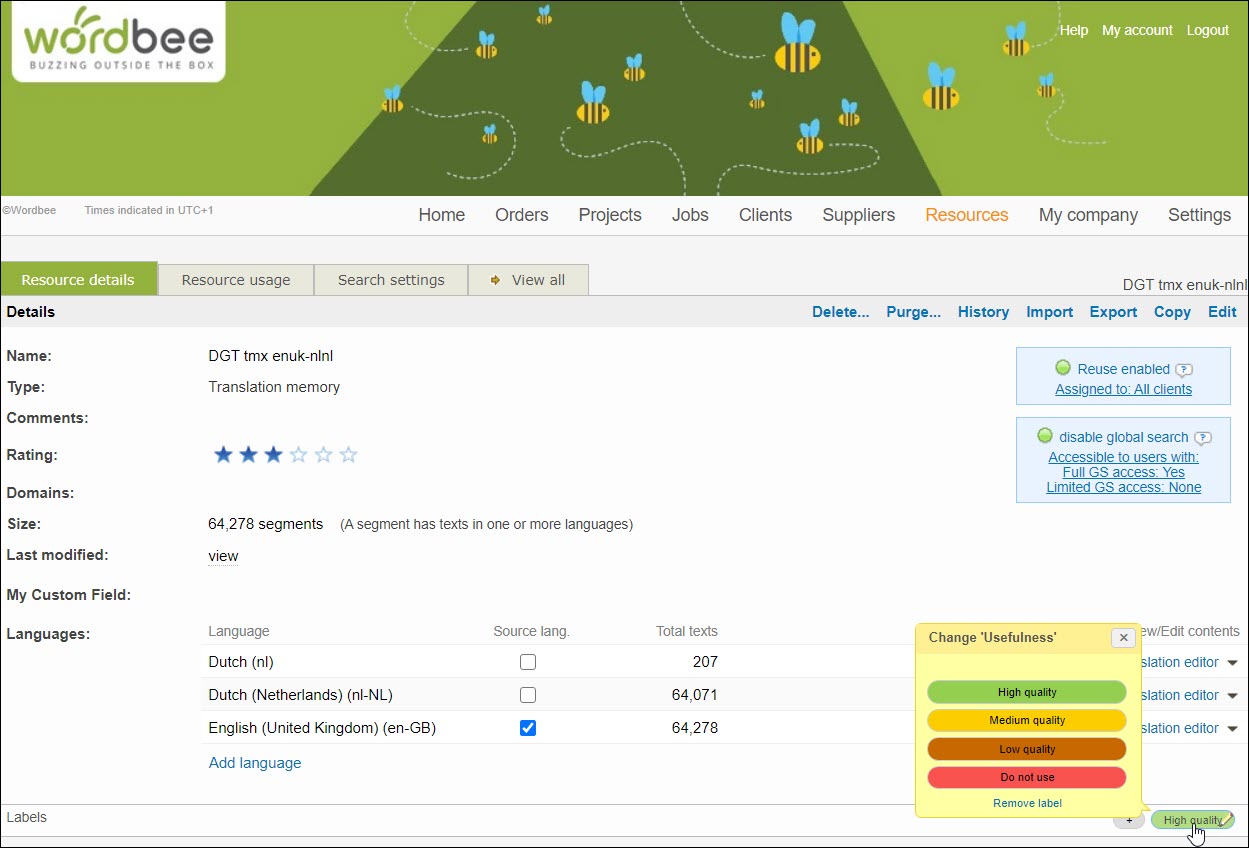
The example shows the details of a translation memory created by the DGT translators from the EU. The resource is publicly available on the internet and has been imported into Wordbee Translator for reuse. To reassure the translators of the quality of the resource, I have applied the high-quality usefulness label.
Add labels at the TM segment level
While cleaning up your translation memory and terminology management databases, you could also add labels at the segment level to indicate their usefulness or status.
Add labels to individual segments
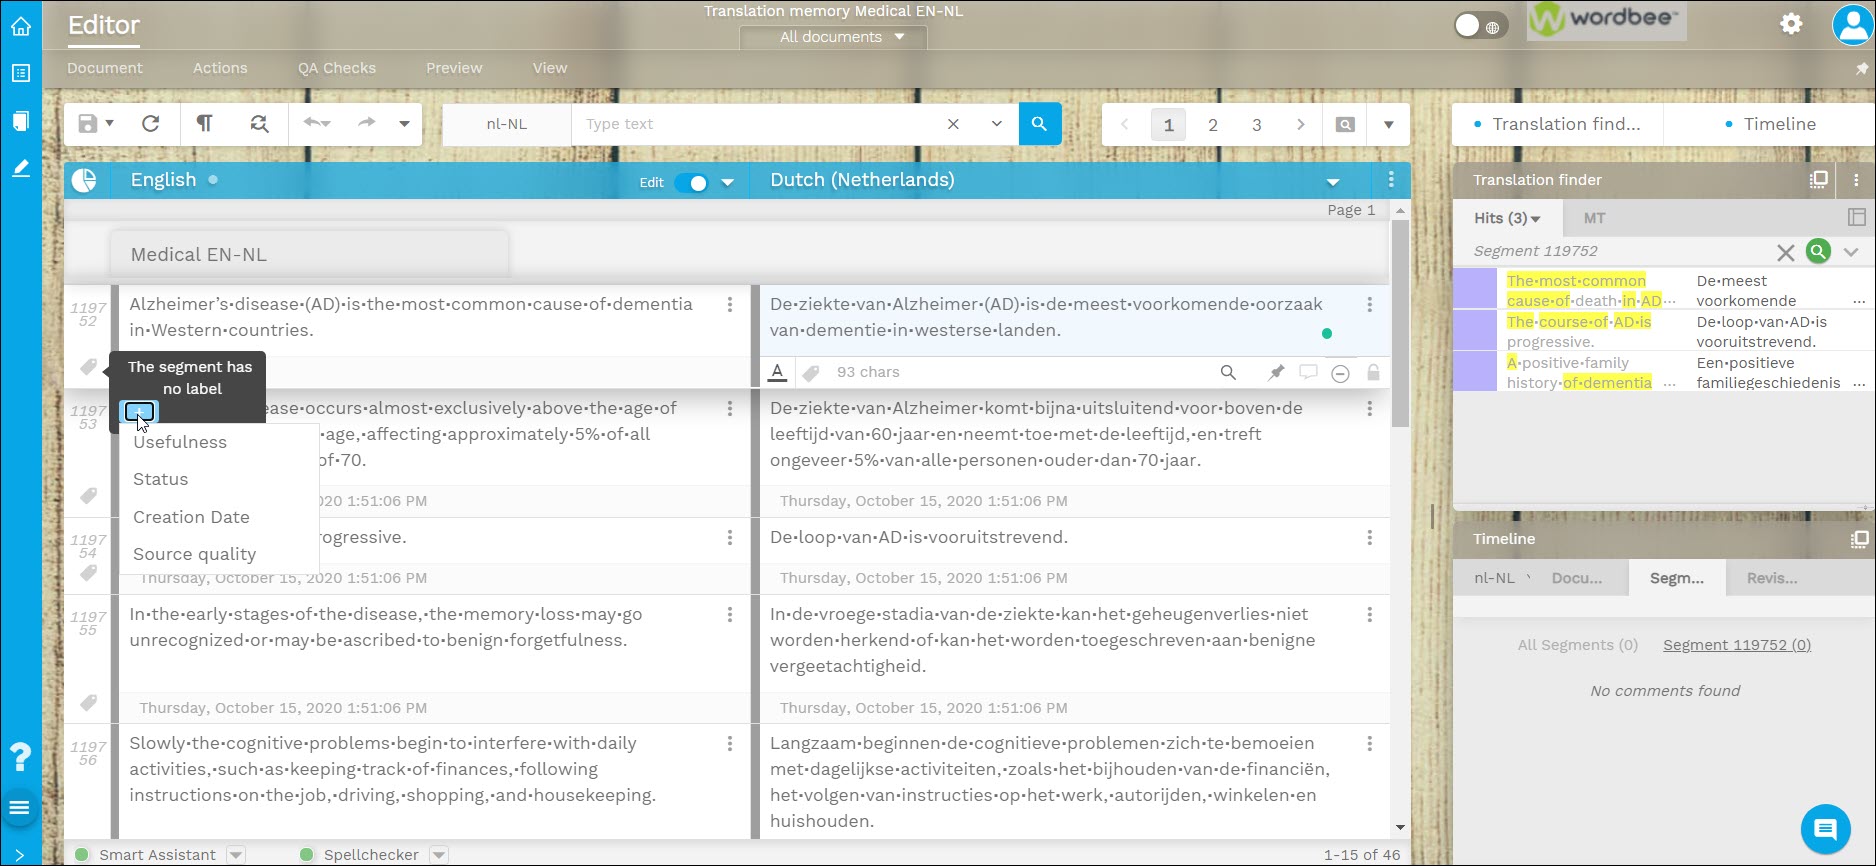
Open your databases in the Translation Editor.
To add a label to a segment, hover with the mouse over the label icons you see on the left side of each segment and then click on the + sign.
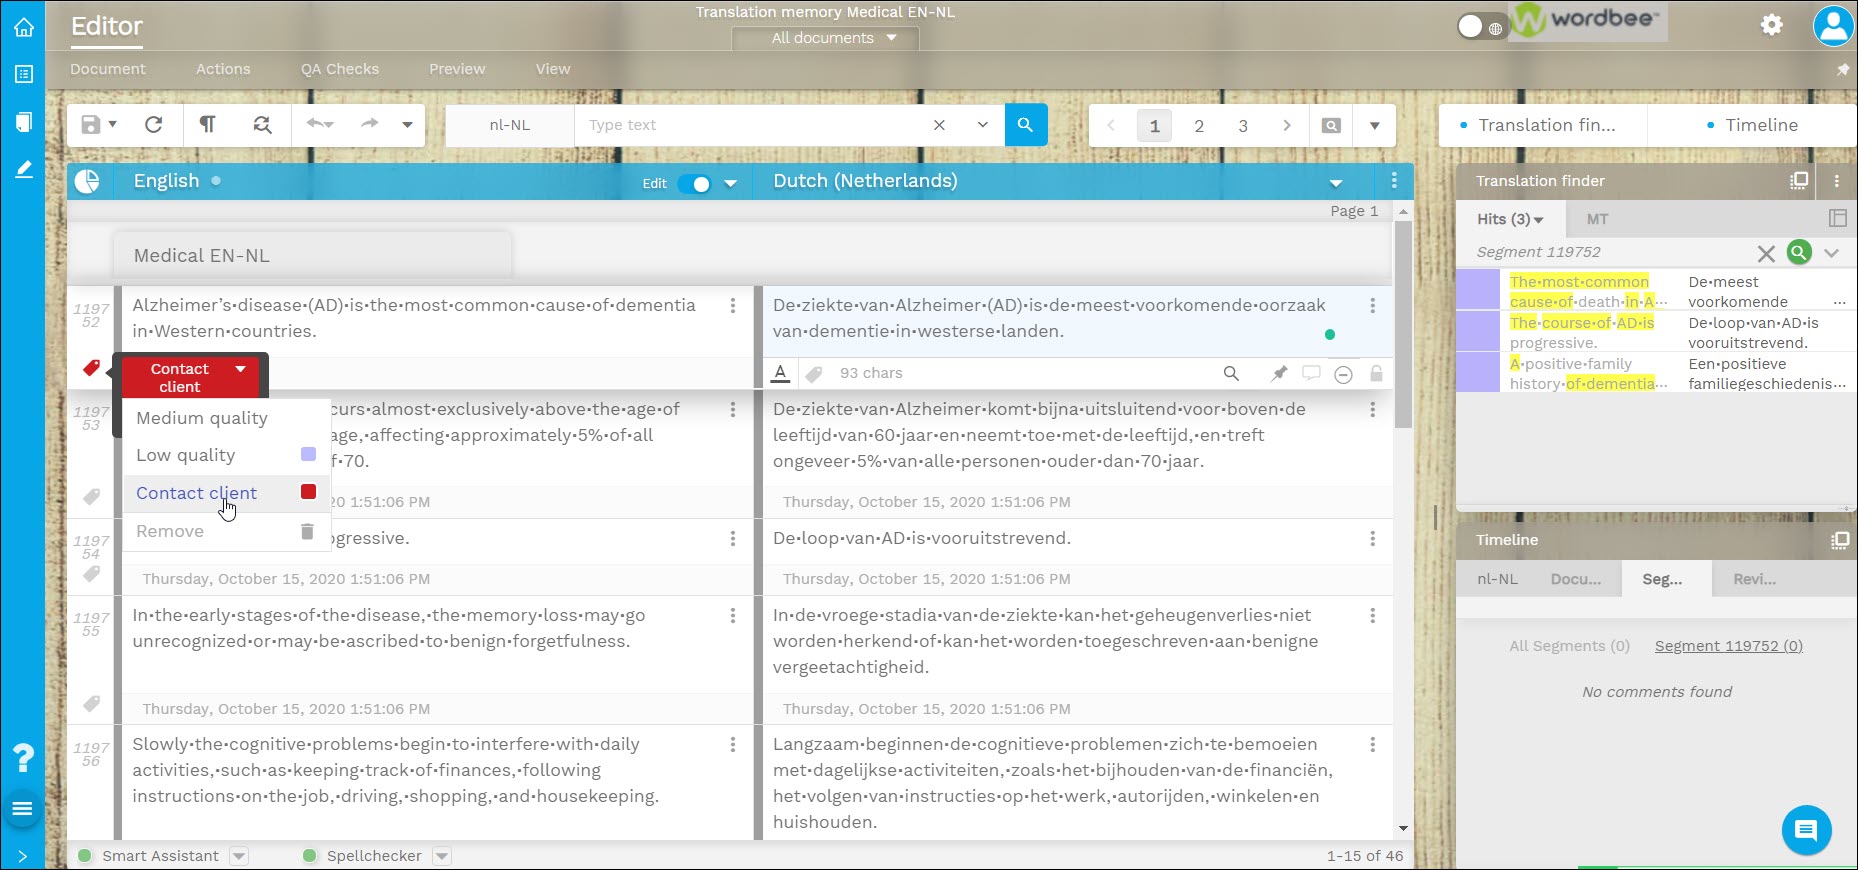
The example shows that a source quality label has been assigned to the first segment indicating that the client needs to be contacted for questions.
Add labels to TM segments in a batch
You can also add labels to all the segments in a batch.
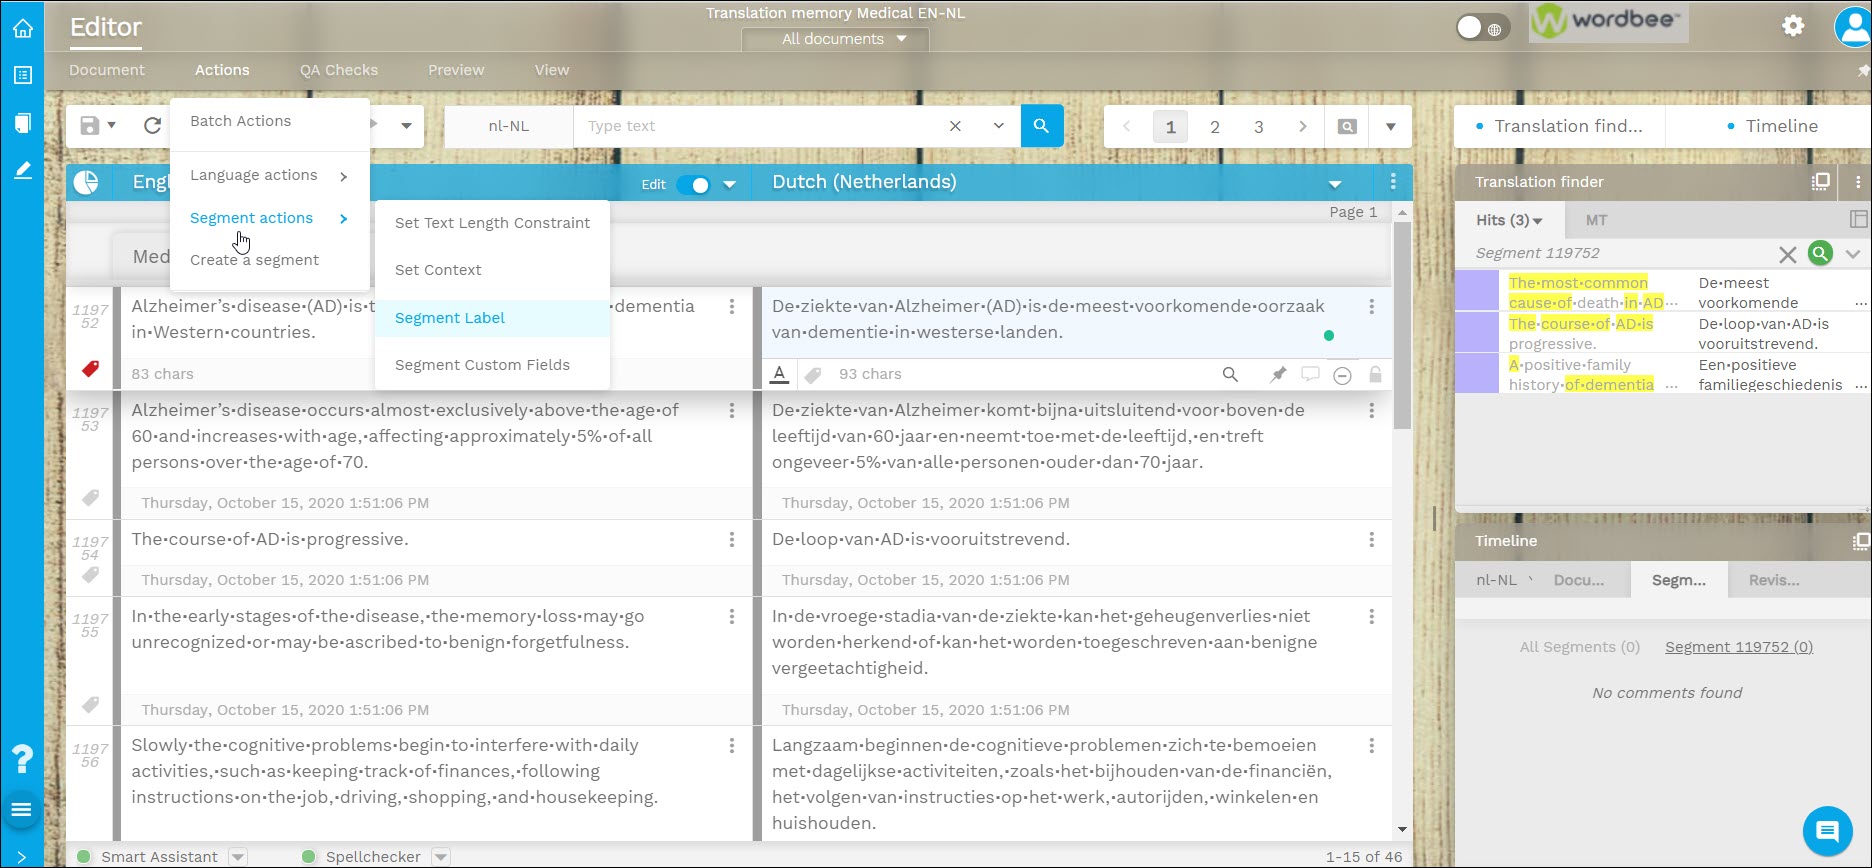
Go to the Actions menu > Segment actions.
Select Segment Label.
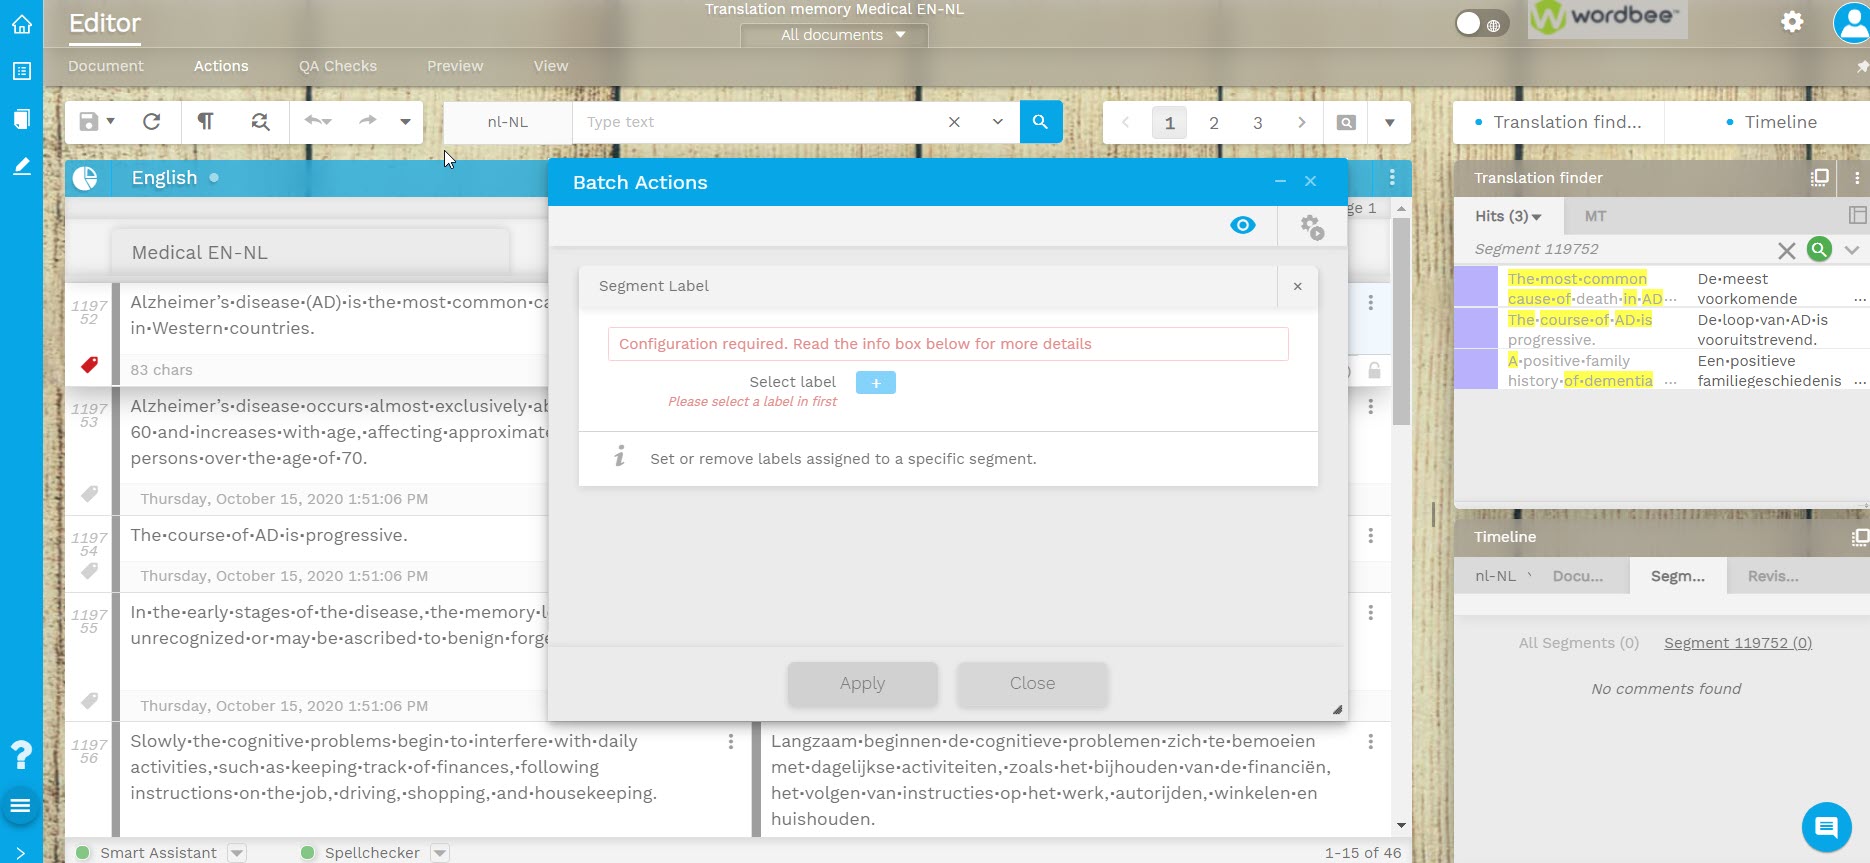
In the Batch Actions pop-up, select the labels you would like to apply to all the segments in your memory.
