Import
The Import feature allows you to bring external content into the system to populate or update the Strings database (in Wordbee Translator, this is the Flex container).
Two workflows are available:
Import New File – Use this when uploading a file that has not been processed by the system. Ideal for adding new source strings or translated content.
Import Modified File – Use this when re-importing a file that was previously exported and updated. This option is used to update or overwrite existing records.
Each workflow includes step-by-step guidance to ensure clean, traceable data integration
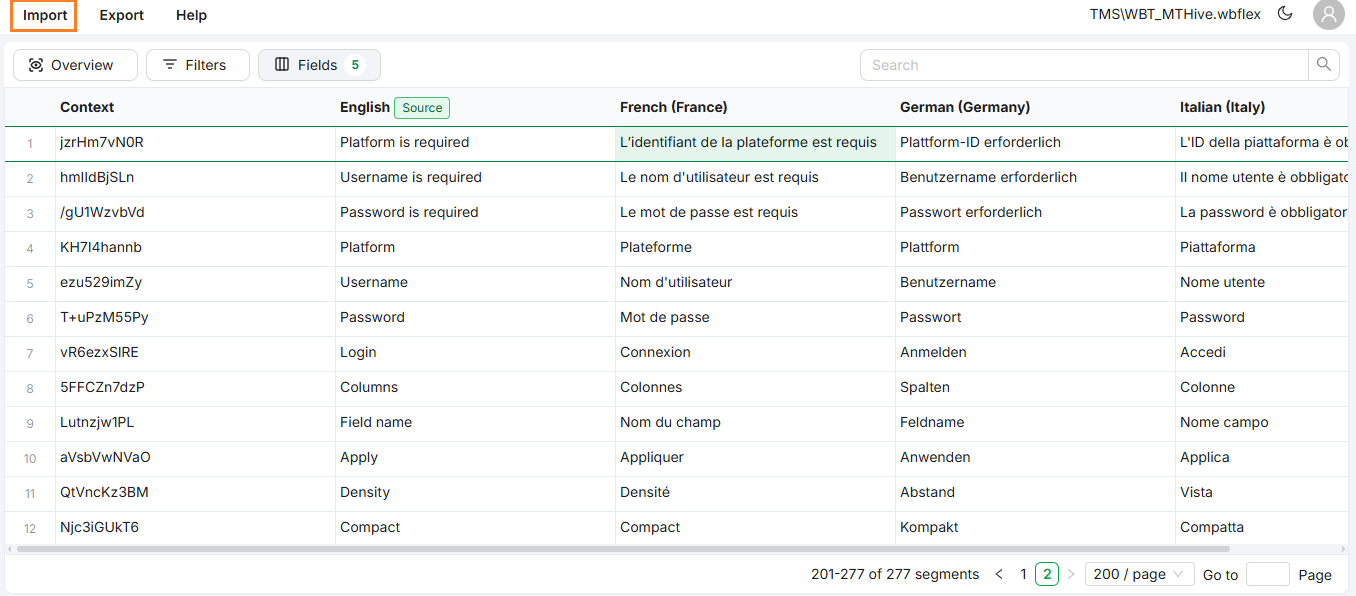
Import menu
Import New File
This option is for uploading a new file that has not been imported before. It is typically used when starting a localization project or when new strings need to be added to an existing one.
When to Use
Use Import New File if:
You are adding new source strings into the system
You have received a file from a vendor or external team
The file was not previously exported from the system
Supported File Formats
XLSX – Excel (preferred for structure and multilingual support)
CSV – Comma-separated values
JSON – Structured localization data
XML – Common in software and web strings
POT – Portable Object Template for gettext workflows
Import Process
1. Choose Import Type
Navigate to the Import dialog and select Import New File.
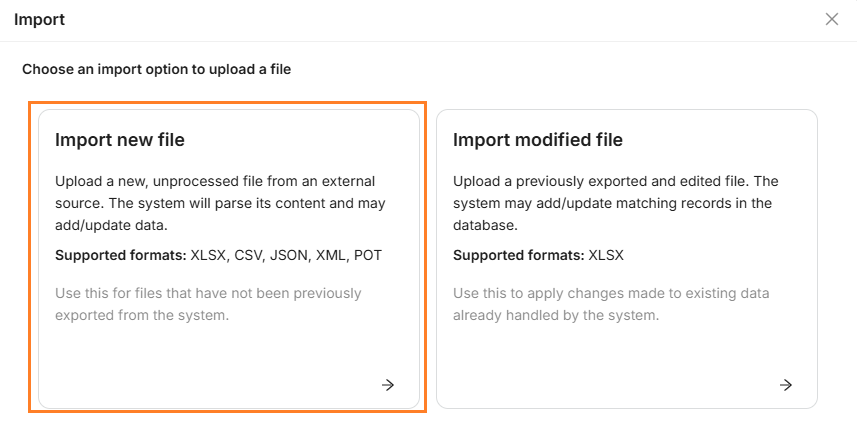
Import new file
2. Upload File
Drag and drop the file, or browse from your device. The system checks file type and size.
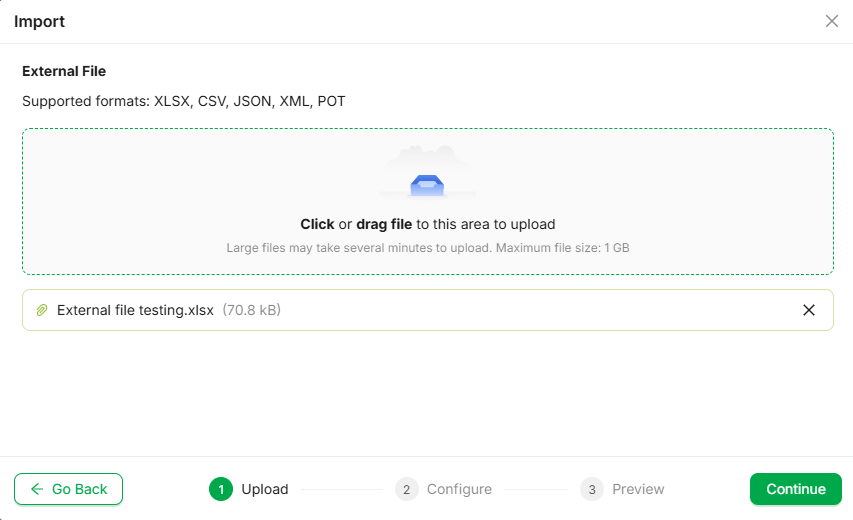
Upload file
3. Configure Import Settings
Configure how the system will process your content:
Text Source: Select the parser
Target Handling Options:
Keep existing targets – Adds new source strings without changing current translations
Replace existing targets – Overwrites existing translations with the new ones
Import source only – Ignores target translations and imports only the source text
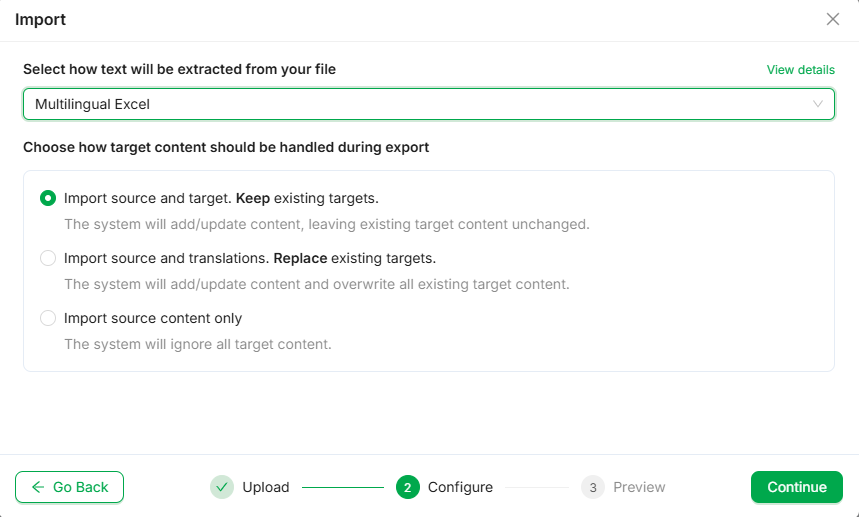
Configure import settings
4. Preview Changes
You’ll see a summary of what the import will affect:
Number of paragraphs and segments
Potential issues or conflicts
Click Import to proceed.
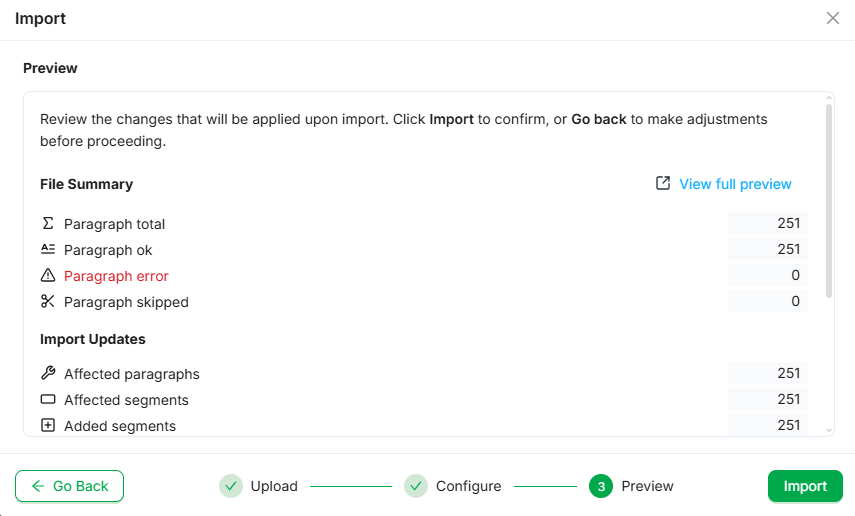
Import preview 1
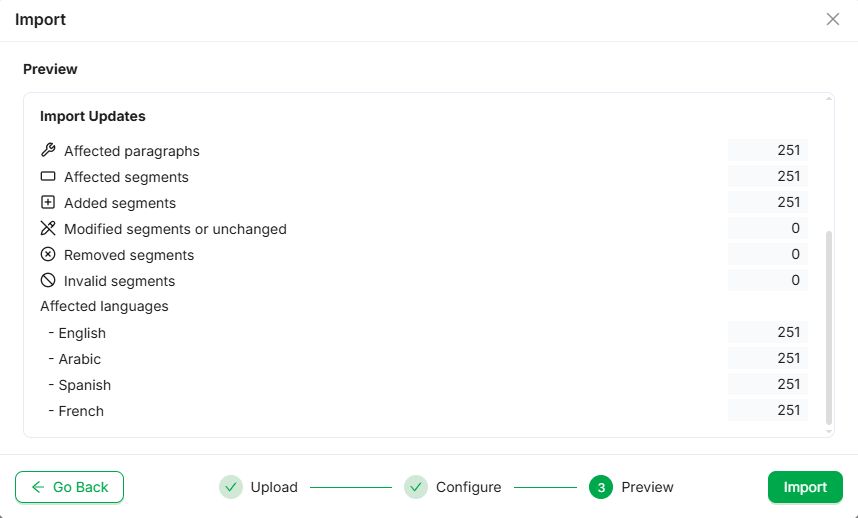
Import preview 2
5. Import Confirmation
Once complete, the system displays a success message with:
A transaction ID
Access to full import logs
Click View updated segments to view the updated segments in the editor.
Click Download updated file to download a copy of the imported file.
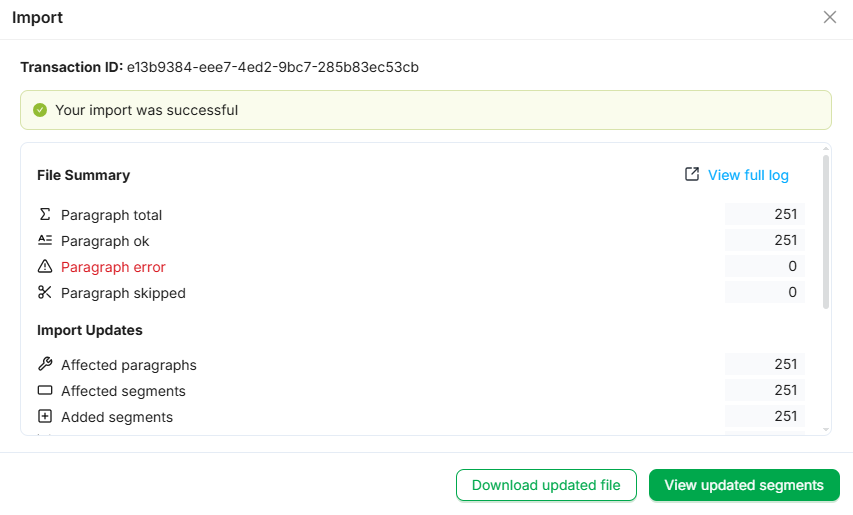
Import summary 1
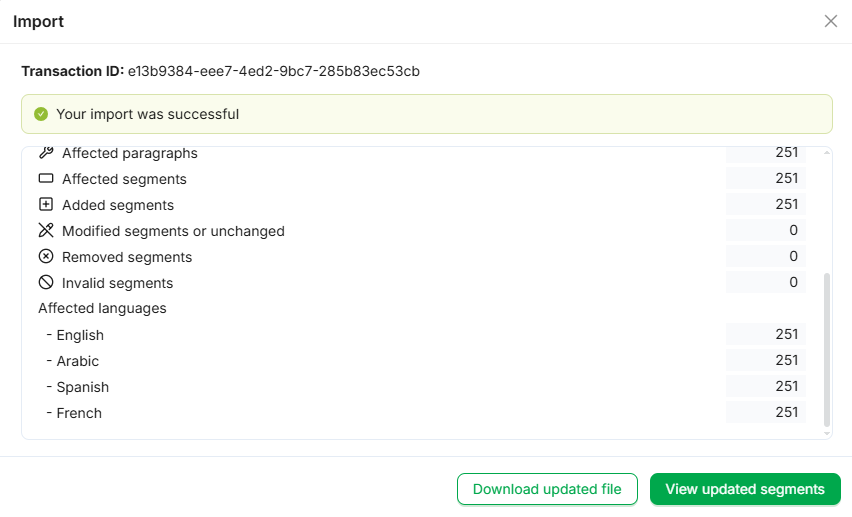
Import summary 2
💡 Tips & Best Practices
Task | Recommendation |
|---|---|
Add new strings | Use “Import source and target” or “source only” |
Update translations | Prefer “Replace existing targets” only when confident |
Review before commit | Always check the preview summary |
Audit imports | Use transaction ID and logs for traceability |
Import Modified File
The Import Modified File workflow allows project managers to update existing content by uploading an edited version of a previously exported Excel file (.XLSX). This method applies changes such as updated translations, metadata, or segment values directly to strings already stored in the system.
Only Excel files exported from the system can be used with this workflow.
When to Use
Use Import Modified File if:
You have exported a file for review or offline editing
Translations or metadata have been updated externally
You want to overwrite or append values to existing records
Labels or other structured data need to be re-applied
Supported File Formats
XLSX – This is the only supported file format for Import Modified File. Files must originate from a previous export using the system's Export function to ensure proper structure and segment mapping.
Import Process
1. Choose Import Type
Navigate to the Import dialog and select Import Modified File.
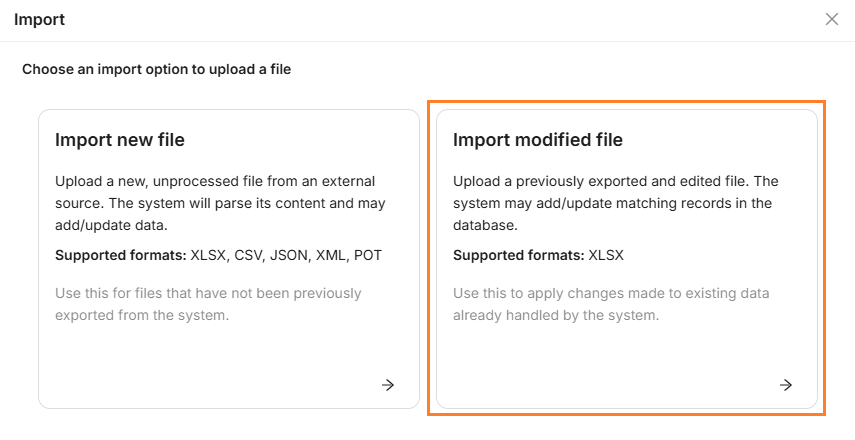
Import modified file
2. Upload File
Drag and drop your updated
.xlsxfile, or browse to uploadThe system validates the file’s structure and prepares it for mapping
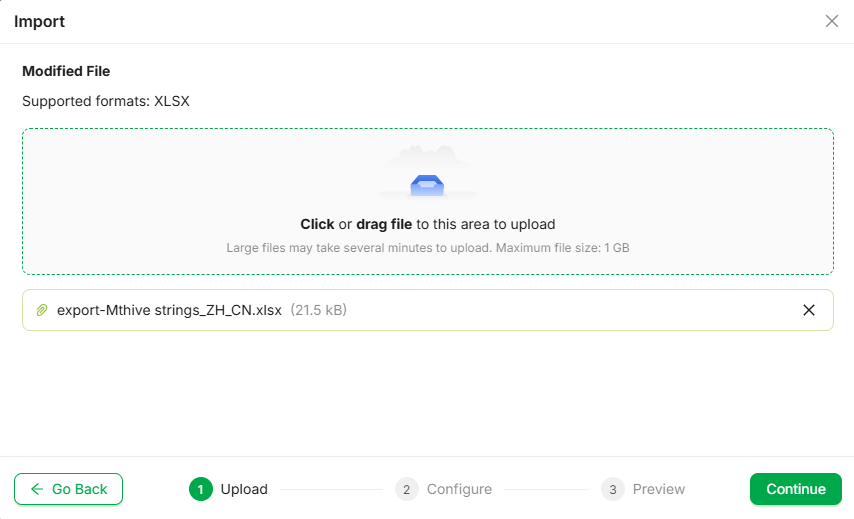
Upload file
2. Configure Import Settings
Segment matching is based on the Context/Key column.
Select which fields should be included in the update
Use toggles to include or exclude individual fields
Use Select All or Unselect All for quick bulk selection
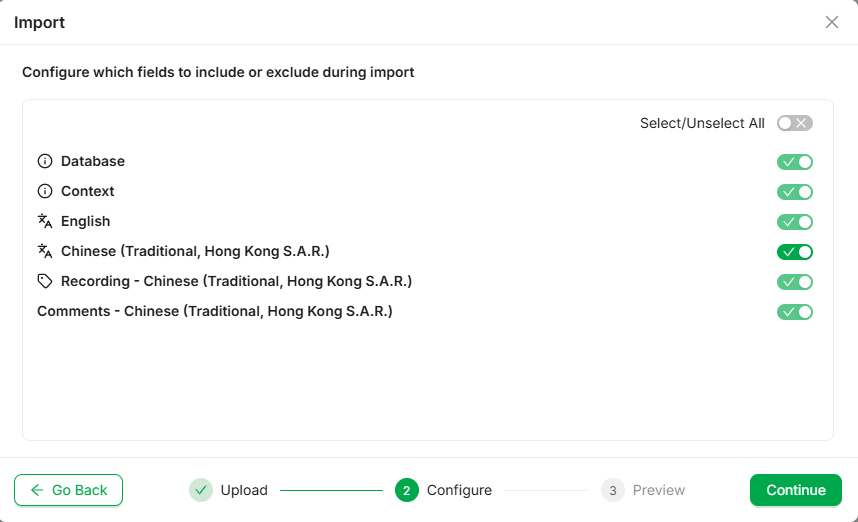
Configure import settings
3. Assign Labels (Optional)
Labels can be applied to imported strings to support tagging and metadata management.
Add labels manually or let the system use default project settings
Labels apply at the language level
Click Add Label to choose from available tags
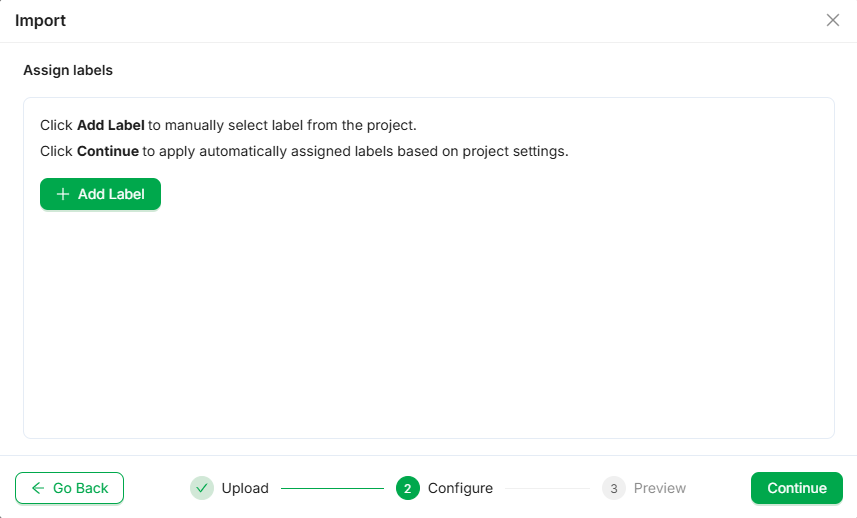
Assign labels
4. Preview Changes
Before importing, review a summary of the updates:
Total paragraphs and affected segments
Any warnings or detected issues
Click Import to confirm and apply the updates.
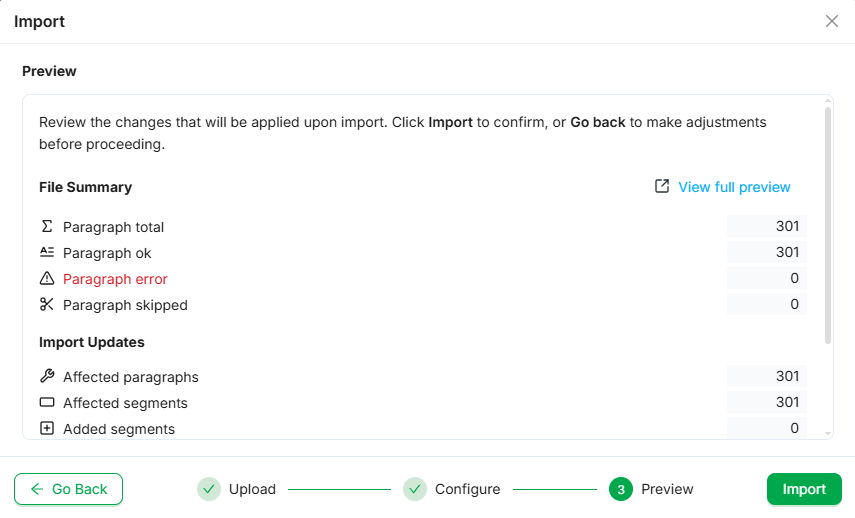
Import preview 1
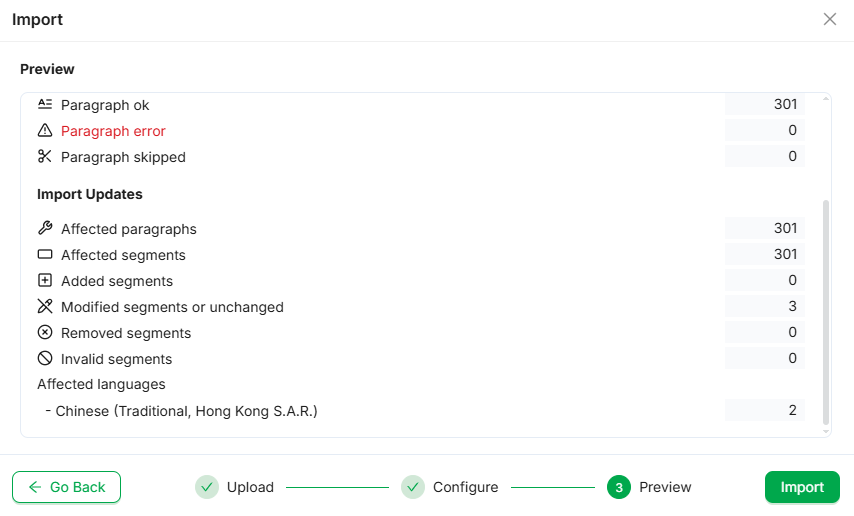
Import preview 2
5. Import Confirmation
Once complete, the system displays a success message with:
A transaction ID
Access to full import logs
Click View updated segments to view the updated segments in the editor.
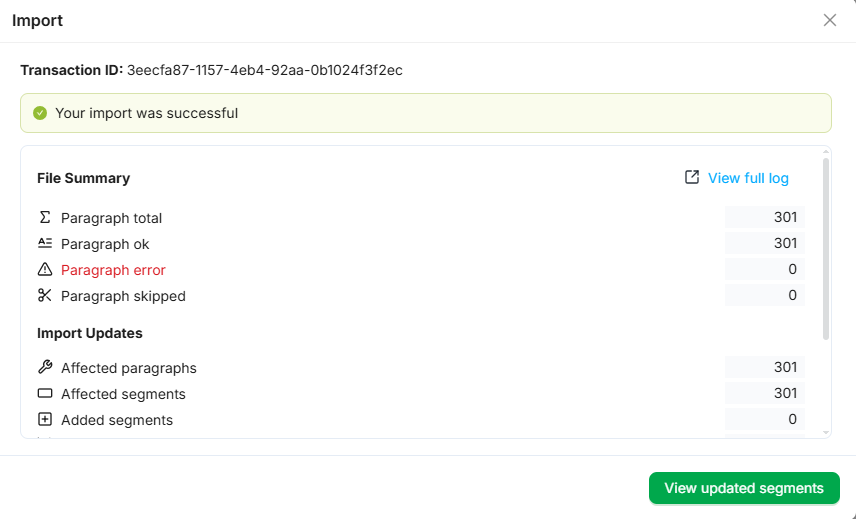
Import summary 1
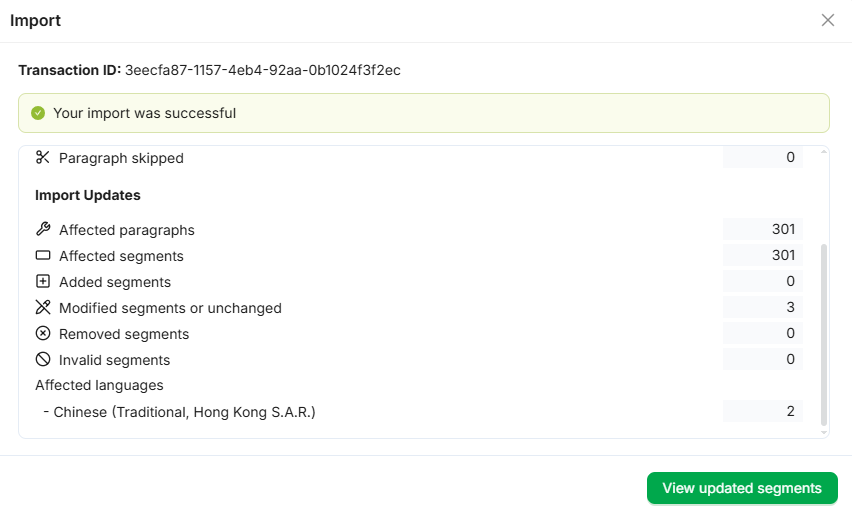
Import summary 2
💡 Tips & Best Practices
Task | Recommendation |
|---|---|
Update only what’s needed | Toggle off unneeded fields |
Ensure compatibility | Only use |
Validate before finalizing | Use the Preview screen to check segment count and errors |
Track imports | Use the Transaction ID and logs to audit changes |
