When translating an Excel File with existing translations, a few steps must be performed to ensure text is extracted appropriately and the pre-translation is a success. For example, let's say you have an Excel file with three language columns:
-
Column A - English (en)
-
Column B - French (fr)
-
Column C - German (de)
Some of the translations are already present in the file and do not need to be translated again. A format configuration and the appropriate settings in your word count profile will ensure that the text is extracted correctly and any applicable discounts are applied for already translated texts.
If these items are not configured, then all text including translated text will be extracted and no discounts will be applied by the system. Configuring the format configuration and the appropriate options in the word count profile ensure that the system applies discounts, etc for already translated texts in the file.
To configure this type of Excel File for extraction and pre-translation in the system, complete the following steps:
1. Create an Excel Format Configuration
A format configuration must be created for pre-translation of the document. This configuration defines what columns and languages are within the Excel file. It can be defined for Monolingual or Multilingual Excel files.
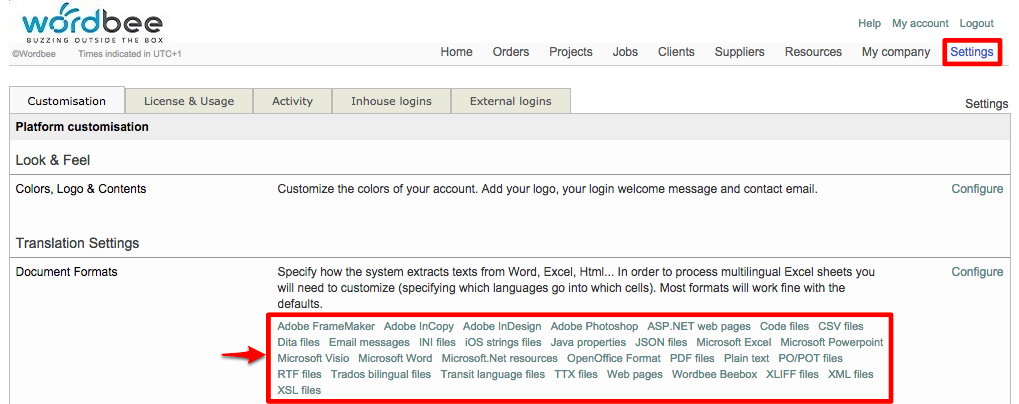
To create an Excel file format configuration, first click on Settings in the Menu Bar and then Excel in the Document Formats section.
Click on Add New to create a new configuration or Select to edit an existing one. Remember to give the configuration a name (if new).

Multilingual Files
If the file is a Multilingual Excel file as in the example given above, you will need to configure the columns and languages for the Excel File. First, tick the radial next to the Multilingual option.

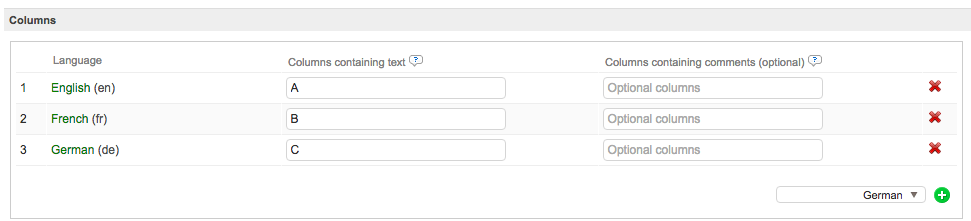
Then add each column in the document and define the language for each one. To add a column and language, select the language in the provided drop-down menu and then click on the Add Button .

Please note this step must be performed for each language and column in the document. You may also configure any columns with comments, etc.
When adding the languages, you must also configure a column for the language in the configuration. Text columns (language columns) reside on the left and Comment columns reside on the right of the column section.
Click on a field and type in the column value as it appears in the Excel Source File. Click on Save when finished with the configuration.
In the example below, the Excel file format configuration contains three columns:
-
English (en) - Column A
-
French (fr) - Column B
-
German (de) - Column C
Monolingual Files
If it is a Monolingual Excel File, simply define any columns that should be translated along with rows, sheets, etc. and then click on Save. If no columns are defined then all columns will be translated.
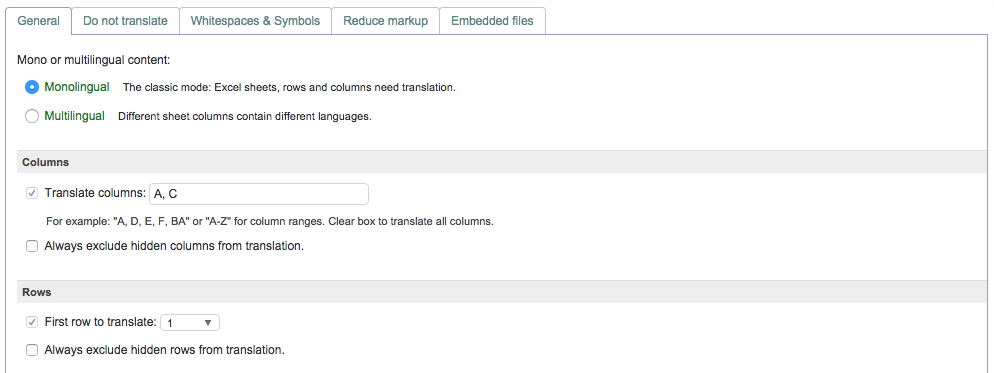
For Monolingual Excel Files, the format configuration is only necessary if certain columns, rows, sheets, and so on are to be translated. Otherwise, you may skip to Step 2 and configure the Word Count Profile.
For more information about creating and managing format configurations, please see Document Formats in the Administration section.
2. Configure a Word Count Profile
Next, you will need to configure a word count profile that informs the system to count already translated texts as pre-translations. This will ensure any entered discounts for pre-translated texts in the pricelist will be applied during word counting.
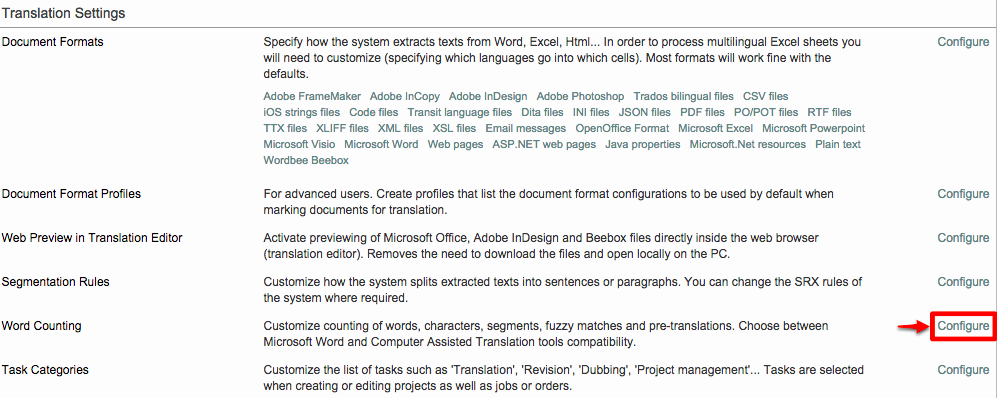
To create a word count profile, go to Settings > Translation Settings > Word Counting and then click on Configure.
Add a new profile by clicking on Add New or modify an existing one by clicking on Select next to the appropriate profile.

If new, add a name and configure the fuzzy matches for the profile.
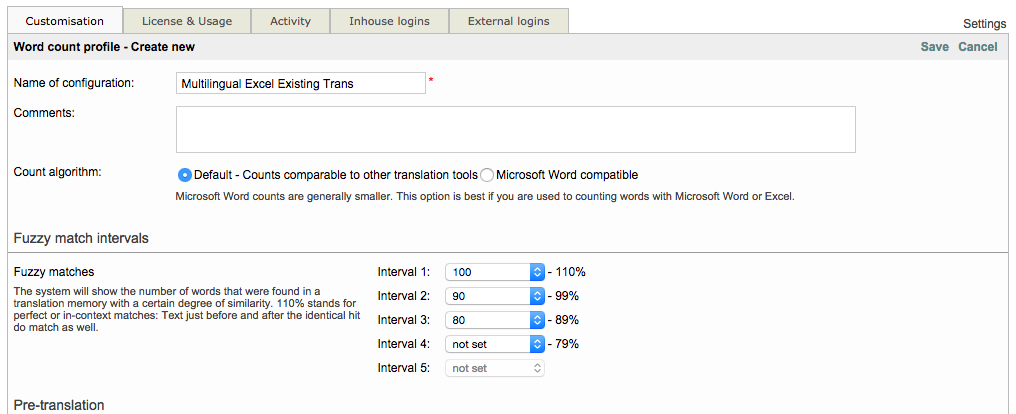
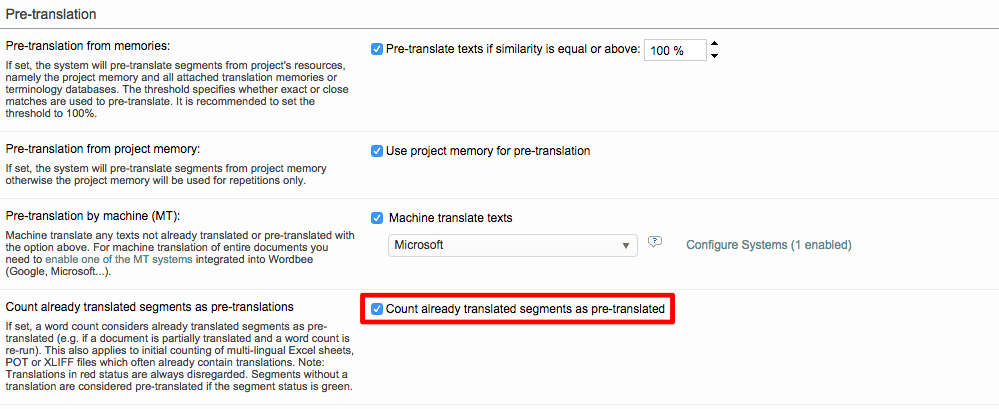
In the Pre-translation section, make certain the "Count already translated segments as pre-translated" setting is enabled. Enable any additionally needed settings and then click Save to finish.
For more information about creating and managing word count profiles in the system, please see Configuring Word Count Profiles within the Administration section.
3. Assign the Word Count profile to your project
The word count profile needs to be applied to the project and can be configured after the project has been added to the system.
For Standard Projects, click on the Word Counts Tab and then Count Words.

Select the appropriate profile in the Word Count Profile Menu and click on OK when finished.
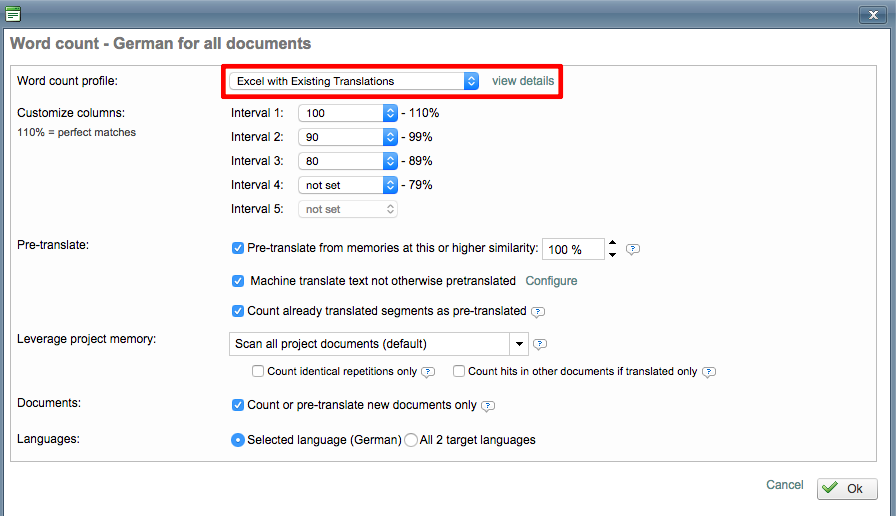
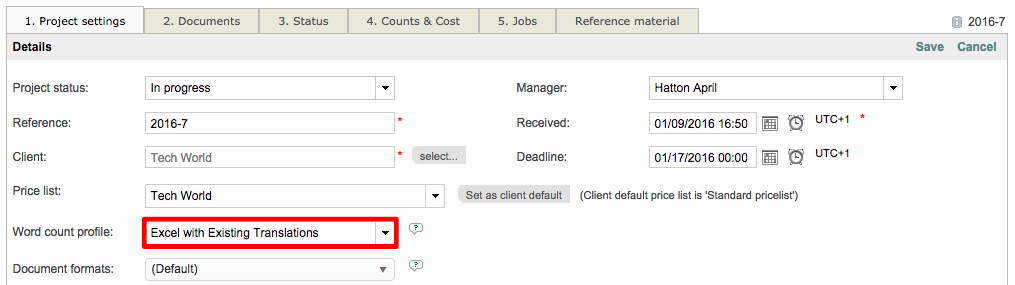
For CoDyt Projects, the word count profile may be selected during project creation or when editing the project, as shown below:
More information about assigning the word count profile to Standard and CoDyt projects can be found here: Assigning Word Count Profiles.
4. Select Excel Format Configuration within Project
The process for selecting the Excel File configuration is the same for both Standard and CoDyt projects and occurs when marking the document for online translation.
First, click on the Documents Tab when viewing the project and then perform the following for the appropriate document:
-
Right click on the document.
-
Choose Translate Yes/No.
-
Choose Mark for Online Translation.
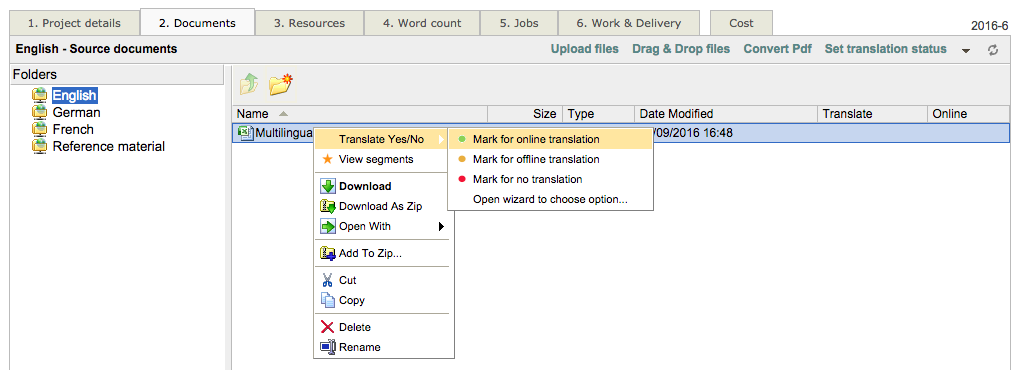
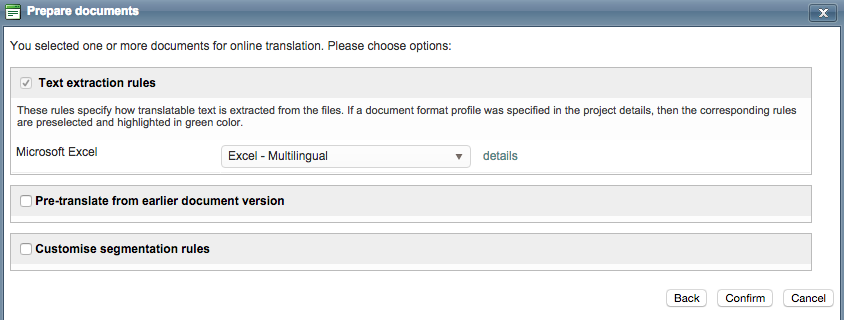
Click on Next (CoDyt) or Confirm (Standard) in the provided pop-up window to choose your configuration. You will see a section titled Text Extraction Rules and this is where the Excel Format Configuration will be chosen.
Click on the drop-down menu and choose the format configuration that was created in the first step of this page. When finished click on Confirm (Standard) or OK (CoDyt).