
Authentication
First you have to connect to your Wordbee Translator platform. In the Tools tab in Unreal Engine you will find the Wordbee Link extension and you can click Configure to get started.
In the Connect tab, for authentication you need to provide a URL, Account ID and API Key.
By clicking on Test Credentials users can check if the entered information is valid.
Authentication credentials can be found on the respective Wordbee Translator platform under My account in the API tab. It becomes available once an admin has granted API access to a user.
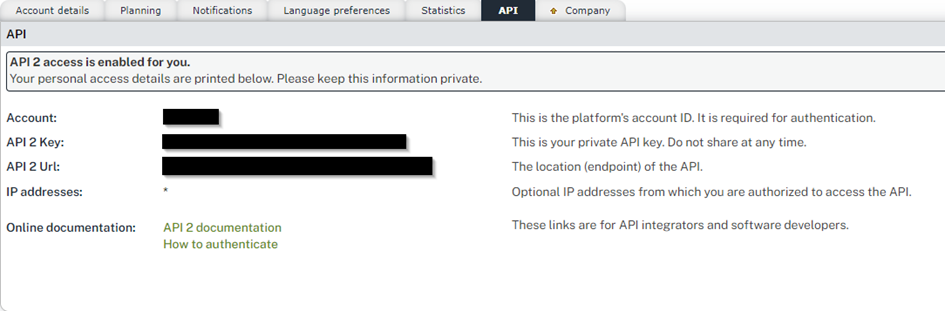
Granting API access to new users
Administrators can easily grant API access to new users by sending them a direct link to the API usage page. Follow these steps to do so:
-
Go to Settings > Activity > API Usage.
-
Click on View API usage and usage limits.
-
Switch to the API Version 2 tab.
-
In the user’s row, click Send invite to send authentication details directly to the user.

This page also allows administrators to monitor and manage each user’s API usage.
Establishing the Link
Once the authentication has been successfully completed, you have two options to link the Flex container to Unreal Engine:
-
Enter the Document ID of the Flex container (which can be found by right-clicking on the Flex container in Wordbee Translator, hovering over Flex and clicking View Document ID).
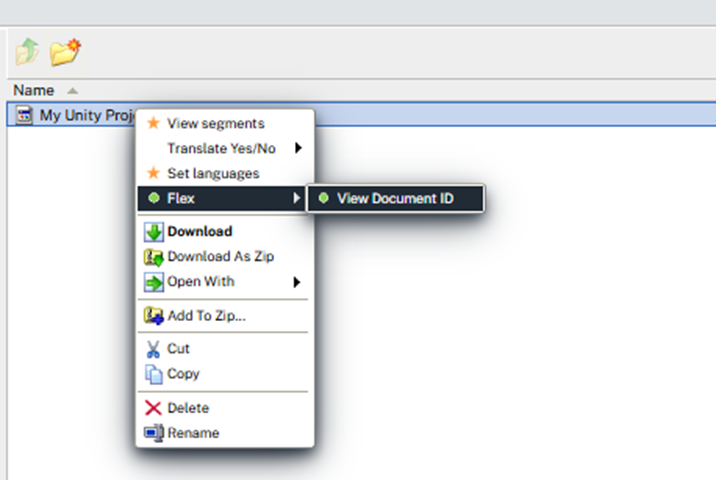
-
Clicking on the Select Document option in the Configure window and choosing a specific Wordbee Translator project and Flex container.
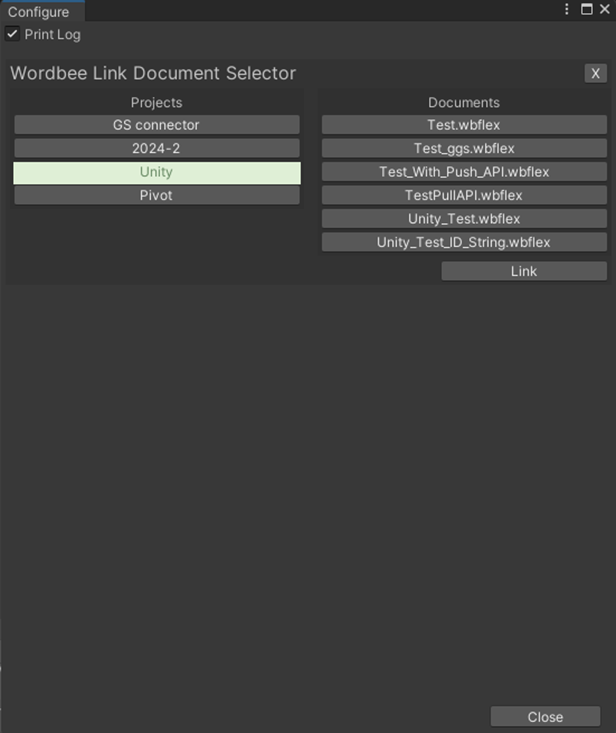
After entering the Document ID or choosing a particular Flex container, click on Link to establish a connection between Unreal Engine and the selected container.
Unlinking a Document
It is also possible to unlink Unreal Engine from a Flex container. This may be necessary if you want to link your string localization table to a different container. To relink your table to another container, you must first unlink an existing connection. You may also simply want to end the project and prevent updates from synchronizing between the two systems.
You can unlink by navigating to the Connect tab under the Configure window and clicking the Unlink button.
