
Let’s go now through a typical localization workflow where no files are involved, and content flows between Unreal and Wordbee.
Before you start, make sure you have:
-
Created your locales
-
Set up one or more string localization tables
-
Linked them to your text objects in Unreal
This setup ensures you are ready to move ahead with Wordbee Translator.
To connect Unreal’s localization dashboard to Wordbee Translator, you'll first need to create a project with a Flex Container. A Flex container is a database to store incoming translation strings from connected systems. You can decide to send new content, delete content or change existing content from this database by synchronizing with the linked string localization tables.
Create a Project
The information on this page serves as a quick guide to get your first project started. If you want to learn more about Flex containers please have a look at our Flex Workflow Documentation.
In the first step, you need to create a project in Wordbee Translator and set up the languages and project parameters.
For the purposes of these instructions, we chose to create a Standard project, which means there might be minor differences in the process and screenshots if a user decides to use a Codyt project.
Create a Flex Container
Once you have created a project, you can now create a Flex container.
-
Go to the Documents tab and select the source language folder
-
Open the Files section in the toolbar
-
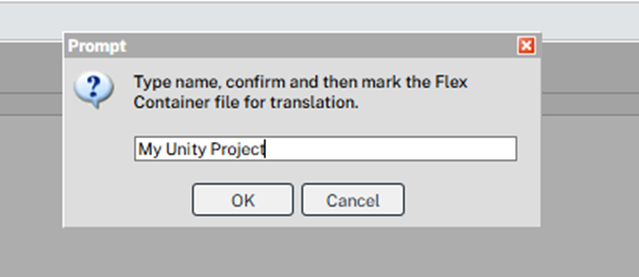
Click on Add Flex Container file

In the resulting pop-up window you can specify the name of the container. The name will also appear in Unreal to indicate which container to connect to.
Mark the Flex Container for Online Translation
As a last step, the created Flex container needs to be marked for online translation in order to be able to link it with the string localization tables in Unreal.
-
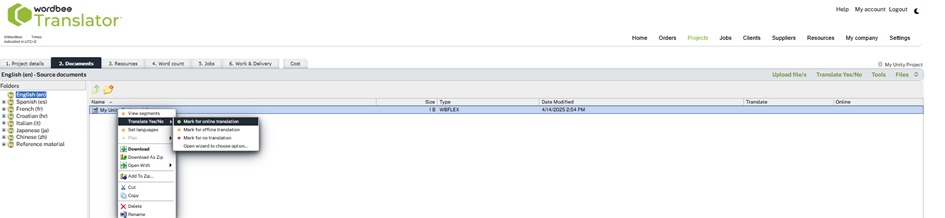
Right-click on the Flex container, hover over “Translate Yes/No” and choose the option “Mark for online translation”.
-
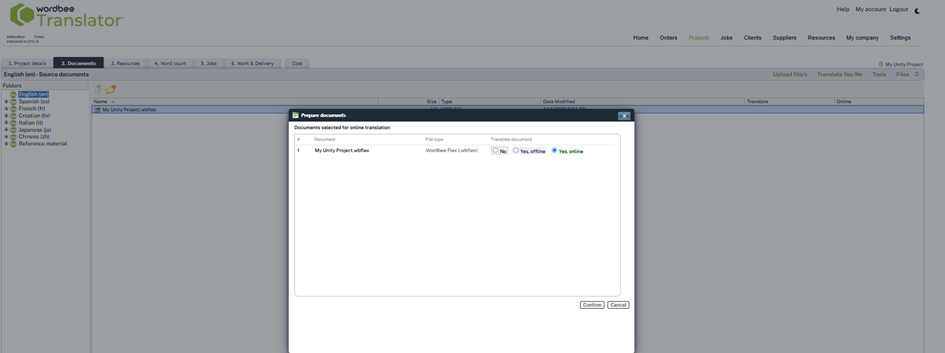
In the resulting window, choose the radio button next to “Yes, online”.
-
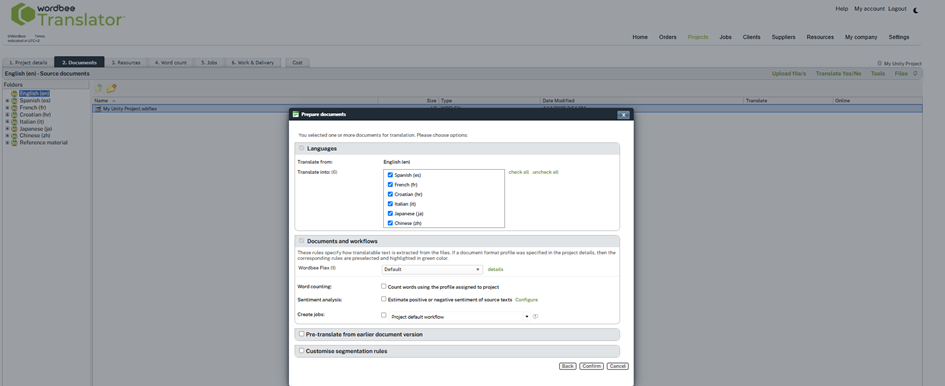
Set up the languages, the workflow and the text extraction rules for the Flex container and click “Ok”.
-
Once the Flex container has been activated, you can see the indicators that it has been marked for online translation. You can now go to Unreal to link your string localization table to this Flex container.

Copy the Container ID
Each Flex container has a unique identifier. To link your Unreal table to the correct container, right-click the container name and copy the Container ID for future use.