
To create or modify an existing custom field, go to Settings > General Settings > Custom Fields and then click Configure.
How to Create a Custom Field
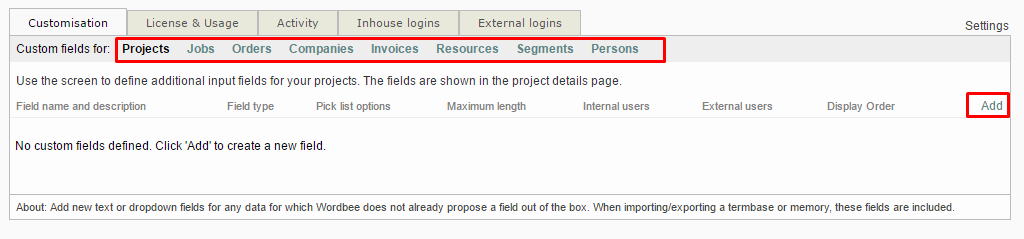
Click on the appropriate location for the custom field (Projects, Jobs, Orders, etc) and then click on Add in the upper right corner to include a new field for that category in the system.
Example
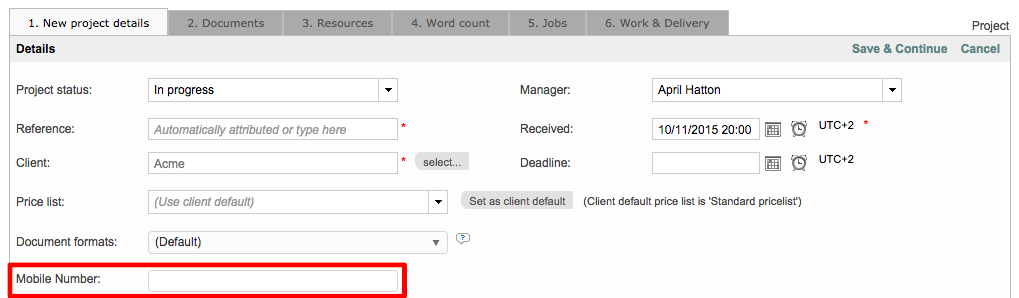
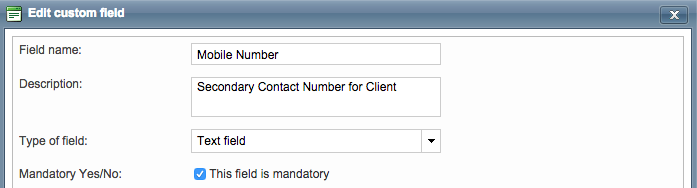
For example, let's say you want to create a custom field for Projects titled Mobile Number. In order for this field to appear as an entry option in projects, it must first be created as a custom field. This is because the pre-defined fields do not include the option of entering a mobile number. To make this all happen, you will need to create the custom field, as shown below:
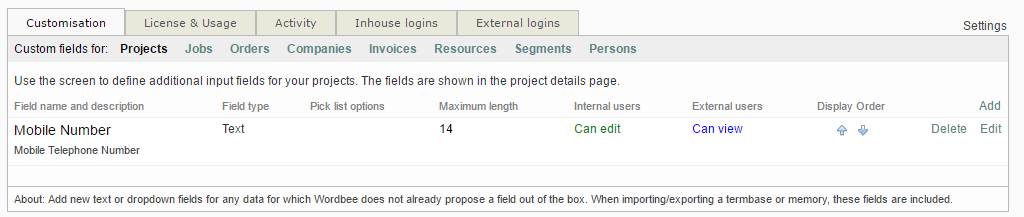
Then, when a project is created in the system, the mobile number field will appear on the project details page.
Custom Field General view
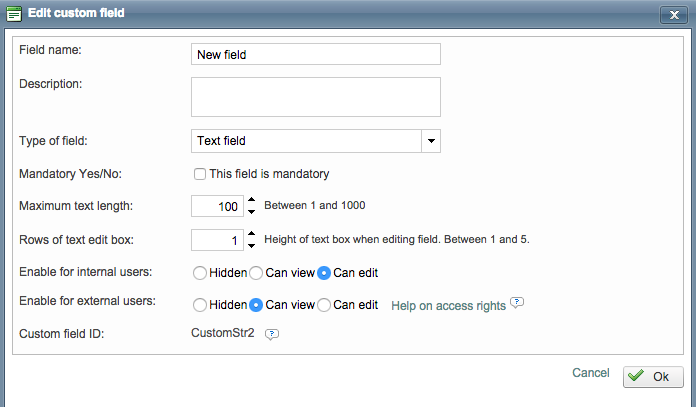
When creating a custom field, you have several configuration options to choose from. The screen for configuring a custom field will have different options depending on what it is being created for (i.e. projects, orders, etc.). It will appear as shown below when creating a custom field for a project:
The following are available configuration settings for custom fields within the system. You can also find a direct link to each of the specific sections which can also contain this kind of information:
Please note that the following example applies to custom field settings for projects, jobs, orders, and invoices. Additional sections explain unique settings for companies, resources, and segments at the bottom.
Edit custom field
Name and Description
For this example, we will be showing how to create the Mobile Number custom field for projects in the system. To begin, first enter a Field Name for the custom field by clicking on the text box and entering the desired name. You may also add a Description in the same manner, but only the Field Name is required.

Type of Field
Next you will need to select the Type of Field that will be used for the custom field. The type may be one of the following:
-
Text - A simple text entry field, which may be limited by setting a maximum number of characters and number of rows.
-
Pick List - Enter options per line to provide a list of choices to the person filling in the information. Only one choice can be selected when this field type is used.
-
Pick List, Custom Text Allowed - if none of the options in the list are appropriate, users can opt to type their own value. This pick list is ideal if you want to capture custom values or if you want to include new values required by users into the default picklist.
-
Pick List, Multiple Choice - Same as above; however, the user can select more than one option in the list by ticking on each checkbox.
-
Pick List, Autocomplete - Ideal for pick lists with hundreds or thousands of options a user can choose from.
-
Hyperlink - Field appears as a text box with http:// to show that a hyperlink must be entered.
-
Image - Field consists of a button for uploading an image to the project, order, etc.
-
Checkbox - This field provides a single checkbox. If ticked, the related value will be considered 'True' by the system, and 'False' if not. Note that by default, the field value is not ticked.
To make a selection, click on the drop-down menu and choose the type you want to use for this custom field. In this example, it will simply be a text field for entering the mobile number. You may also configure the field to be mandatory by ticking the checkbox next to this option on the configuration screen.
Maximum Text Length and Number of Rows
Since this is a mobile number the Maximum Text Length will be set to 15 and the Rows will be set to 1. The maximum text length is 1000 and the rows may be configured to as high as 5.

Please note that the options shown on the configuration screen will vary depending on the field type and where in the system the custom field is being used.
Pick lists
There are several types of pick lists supported. Based on your needs, chose the one that works best for each case:
Pick list
Users can select one of the options in the list. The values are predefined in the settings of that custom field.
Pick list, custom text allowed
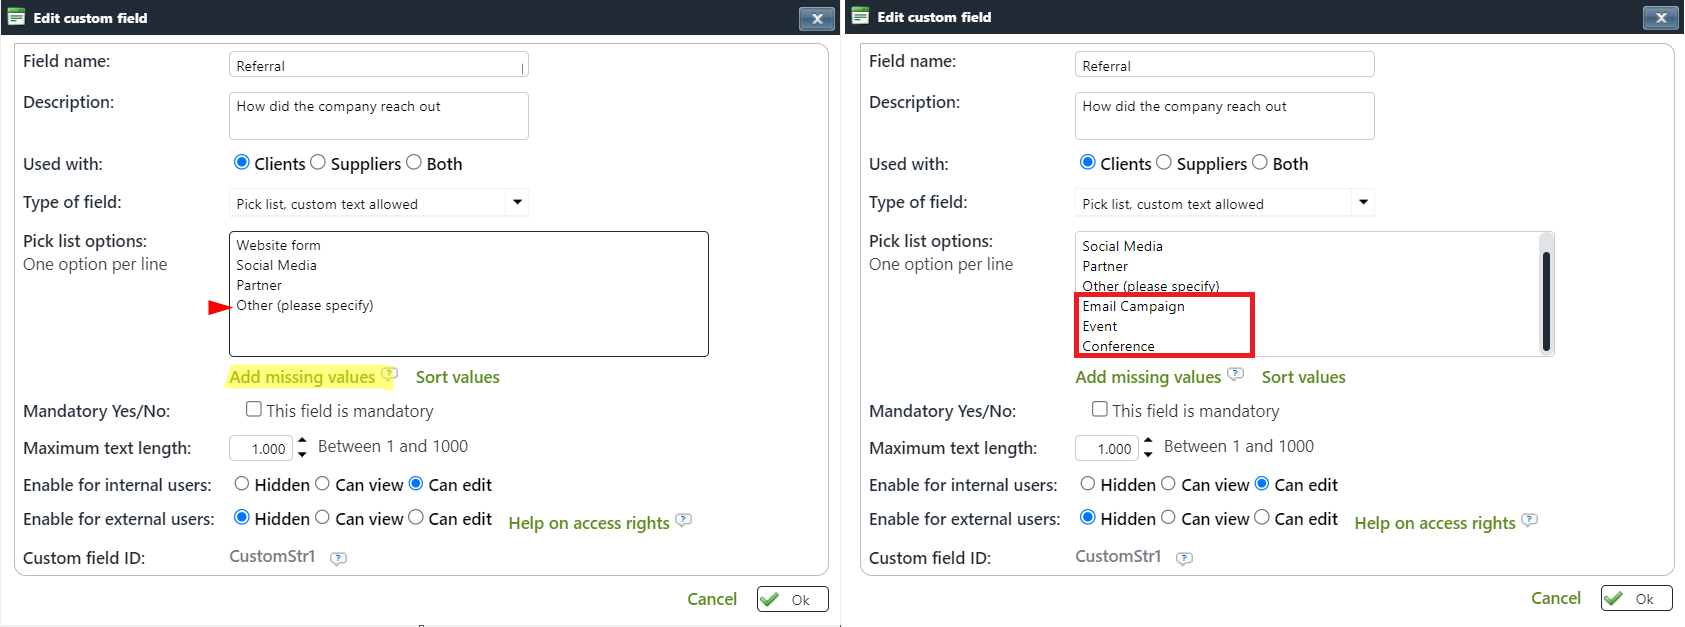
Whenever this field is presented to users, they can select one of the values proposed in the list or type a new value. As a result, the list of options can eventually grow bigger (if values get officially added).
In the configuration screen of the picklist, just below the options text box, two features make it possible to include values typed by users in the default pick list or even sort all options by alphabetical order.
How to
Click on 'Add missing values' to incorporate all values captured from user input into the list of possible values.
Pick list, multiple choice
Users can select one or several values in the list
Use the Filter Behavior option to define the search option for this custom field: AND or OR.
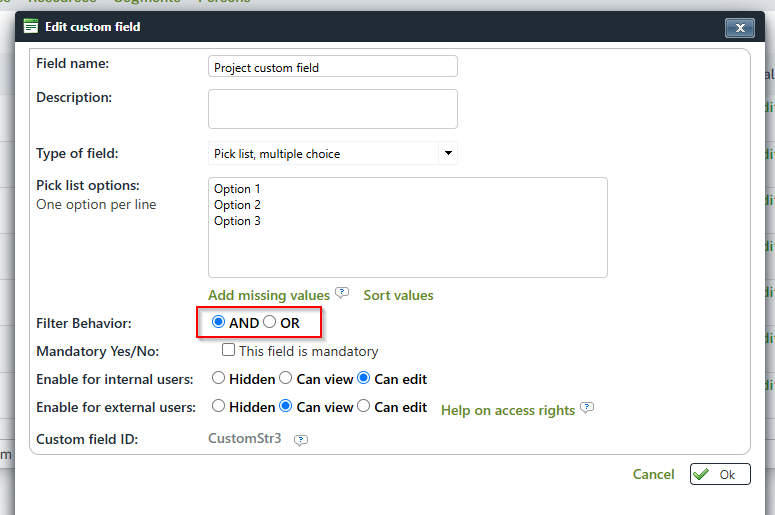
AND means that when using the search filter with multiple values, the system will look for results with all the select values.
OR means that when using the search filter with multiple values, the system will look for results with any select values.
Hierarchical pick lists
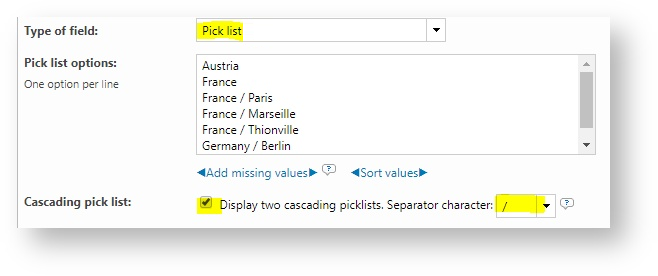
Pick list fields can be configured to be editable as two cascading drop down lists. This option is great when a pick list has many options and there is a hierarchy of options.
Consider the configuration below. We chose "/" as the hierarchy separator. The values can then be organized as a neat hierarchy of countries and cities. The first option for "France" does not have a city and can thus be selected on its own.
In the user interfaces, the selector is now shown as follows when editing or filtering the field:
Note
Optionally add the split character in the lines above and add a space before and after. The first picklist shows the text before the split character (prefix), and the second picklist shows the texts after the split character (suffix).
Autocomplete Pick List
This type of picklist is recommended with lists that include hundreds or thousands of options a user can choose from. Their key features are listed below:
-
Able to handle hundreds even thousands of options. Other pick lists are only capable of handling hundreds of options.
-
Shows the options that match a text typed by a user. This allows for extremely efficient selection that users will appreciate it.
-
Allows to include meta-information with the options. Define the information that shall be shown to the user. This could be a short description or anything you deem important to visualize.
-
Retrieve or update options using the API.
-
Client order forms: Copy the meta information of the selected option to order or project custom fields. This is a very advanced use case. Please contact support for more help or have a look at the order form configuration (Settings > New order forms).
Click the Add link and chose the field type as shown below:
.png?cb=bd1fc85ff0354e375a082e02efac0bb7)
Use a different type of pick list in these cases:
-
The number of pick list options is small (less than 100).
-
I need to edit options from the user interface. I cannot use the API.
-
I really do not need that meta-information feature explained above.
Viewing and Editing Permissions
Next, additional options are provided for configuring viewing and editing permissions for internal and external users. If you need additional information, please see the Access Rights section of the Administration Guide.
The default settings are to allow internal users to edit this field and external users to only view it. If you do not want external users to see the field, you will need to tick the radial for Hidden next to "Enable for external users".
Additionally, you can give editing permissions as well to external users in instances where you want them to be able to update the information. Internal users may also view only, view and edit, or have the custom field hidden as well.
For the mobile number, we will be using the default settings. In this scenario, the number will have to be entered on the project by an internal user during project creation or on an existing project. Certain fields such as those you might add for orders could require external user viewing and editing.

Exclusive Options for 'Order' custom fields
Custom Fields for orders can be set client specific. By means of regular expressions, it is possible to show/hide fields based on specific criteria available in the form. This way, a field can be shown whenever the pattern defined matches the "User Option" (in the order form settings) or the "Type of Work" (in the order form itself). Additionally, the fields can be enabled or disabled for specific client companies directly on their company page (within the section 'Client Portal')
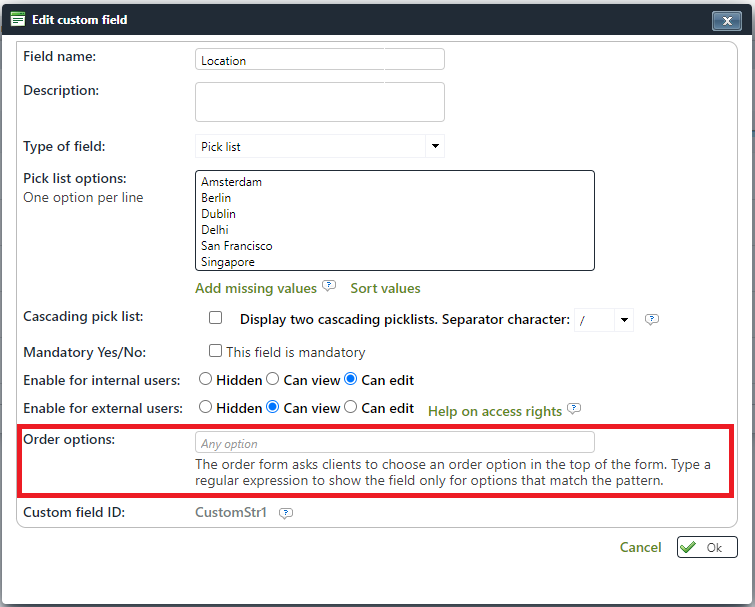
Example: Let's say you want a custom field to apply only to interpretation orders. The user option for submitting new requests is called "Interpretation" in the order form settings. If you now enter "interpretation" in the new custom field option, this specific custom field will only be displayed during submission for all forms with a user option that includes "interpretation" in its name, and in addition, the custom field will only be displayed after submission for all users if the same condition is met.
Complete Field Creation
An additional option resides below these settings and consists of a Custom Field ID. This ID may be used to export the data to an invoice, quote template, etc. When finished, click on OK to save the configuration.
Remember
The custom field ID is a unique identifier you will be able to use to customize your reports, invoices, columns and so on You will need to enter it in the specific templates or dashboards to retrieve the information passed over on that field.

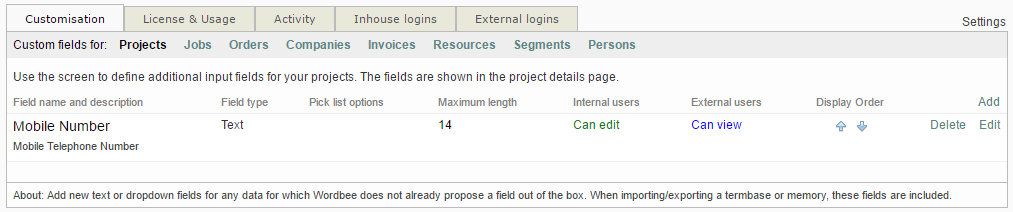
It will appear as shown below after saving. If you need to remove the field or make changes, a Delete and an Edit option is provided next to each custom field in the settings.
Custom Fields for Company Information
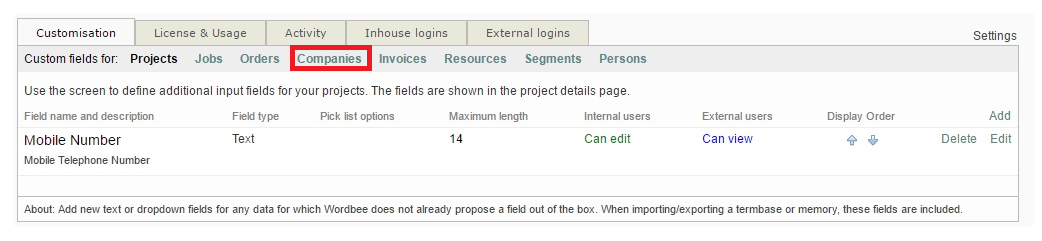
When creating custom fields for company information in the system, an additional choice is provided above the Type of Field option titled Used with:. This setting determines if the field will be used for clients, suppliers, or both in the system. The default choice is Both and you can change this by ticking the appropriate radial.
Custom fields for company information will appear on the Company Details page for clients and/or suppliers depending on what has been chosen here.

Custom Fields for Resources
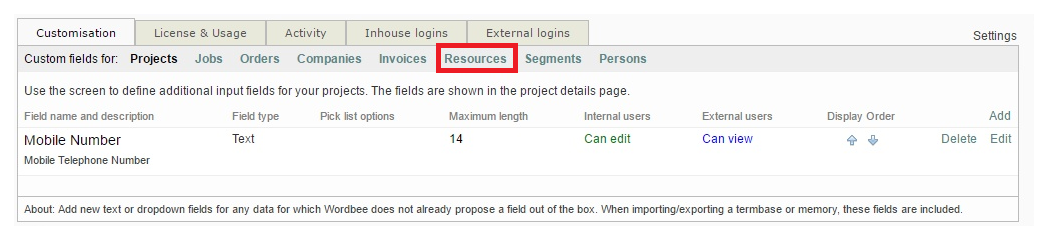
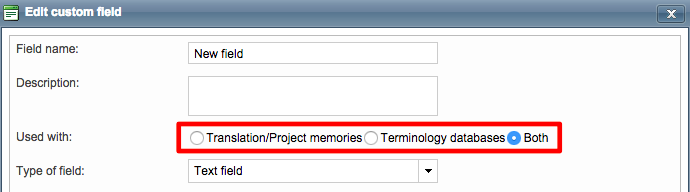
Resources consist of the translation/project memories and terminology databases used for client projects in the system. When configuring a custom field for resources, you have an option to configure the field to be used with one or both of these.
By default, Both is the chosen setting for these custom fields. To change this, just click on the radial next to the desired option.
Custom Fields for Segments
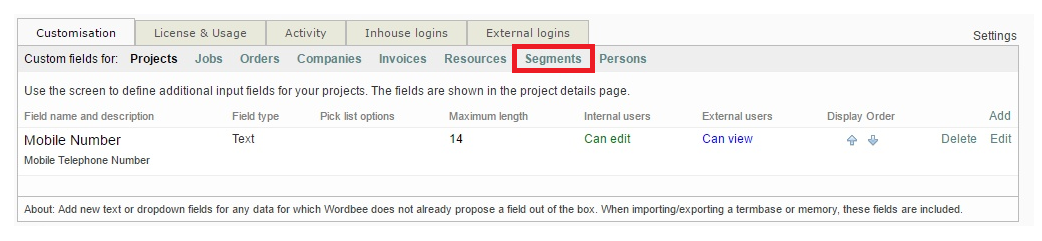
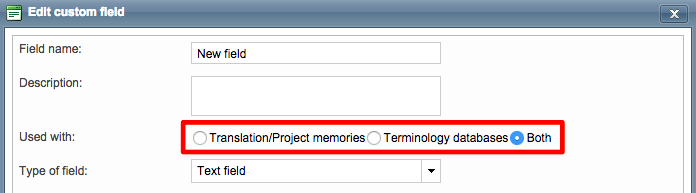
Custom fields may also be created for segments any linguistic resources (translation memories/project memories, terminology databases or both). These will help you to include meta information for each entry, which may be relevant for the context or its different uses.
You will find Custom Fields specially useful when importing your own linguistic resources in Excel or CSV format. To know more go to Importing Terminology Databases#Step5:Configure Sheets,Columns & Contents.
By default, Both is the chosen setting for these custom fields. To change this, just click on the radial next to the desired option.
Next you will need to select the Type of Field that will be used for the custom field, as described in the section above.
Custom fields for segments have two additional fields for determining where the information in the system may be searched for and whether or not this information must be displayed in the Translation Finder hints. To setup the way the information is displayed, just tick the checkbox next to the appropriate option on the configuration form. One or all options may be chosen depending on your search needs. You can look up Custom field information within:
-
The Translation Editor - Web-based editing tool for working on files and documents for jobs.
-
The Global Search (Top or Sidebar) - Global search tool for locating specific keywords or segments within the system. To learn more, see the What is Global Search? page.
