
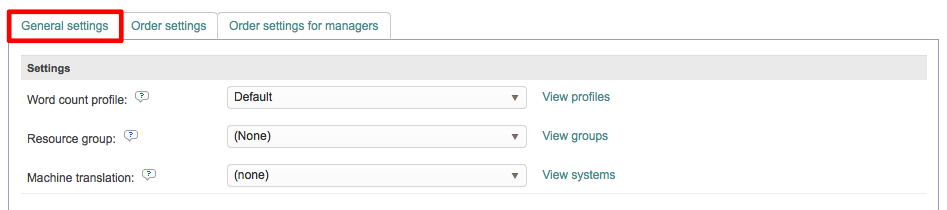
General Settings Tab of the New Order Form
The General Settings Tab of your custom order form is where you will configure the word count profiles, resource groups, workflows, project, and invoicing information for the user option.
Please see the following sections to learn more about configuring this portion of the user option settings:
Settings
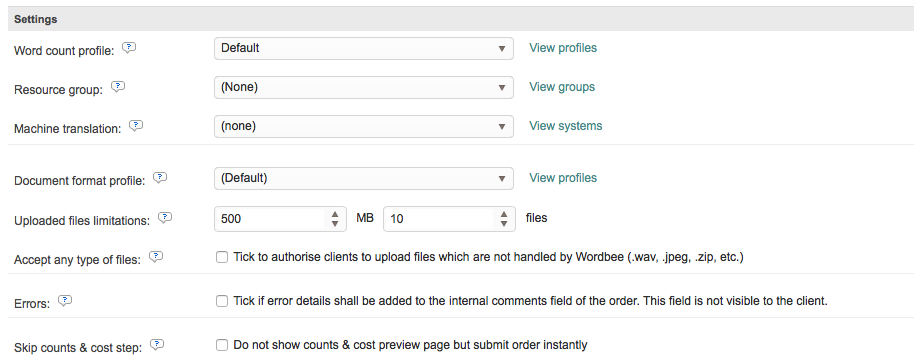
The Settings configuration options are where you will configure automation for word counts, resources groups, machine translation, document profiles, and general settings for errors, file uploads, etc.
It appears as shown below when nothing has been configured:
Word Count Profile
Within the Settings section, you have the ability to choose a Word Count Profile for counting the number of words per file and determining what will not be or is included within the word count. If no profile is chosen, then a Default profile will be used.

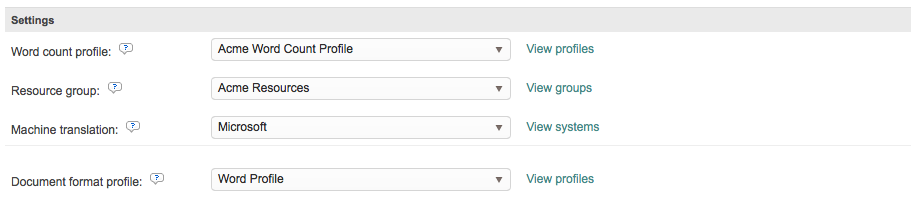
To choose a specific word count profile for the option, click on the drop-down menu and make a selection. If you cannot find the right profile or one has not been created, click on View Profiles to see current word count profiles in the system. In this example, the Acme Word Count Profile has been chosen.

Resource Group
Additionally, you may choose a Resource Group to be used for this option. A resource group can include memories and term bases from previous translations. These are then assigned as resources for this new project/order by the client and used for the new translation. By default, no resource group is selected for the option.

To assign a Resource Group, click on the drop-down menu and choose the appropriate resource group for the client. If you need to view the current groups within the system, click on View Groups. In this example, Acme Resources has been selected.

Machine Translation System
Besides choosing a word count profile and resource group, you also have the option to configure a Machine Translation System (i.e. Microsoft, Google, etc.) for the user option. This is the system that will be used to pre-translate uploaded documents.
First the system will use the translation memories to pre-translate texts and then the Machine Translation System will be used to pre-translate any texts that were not translatable via translation memory. By default, no Machine Translation System is selected for the user option.
At least one Machine Translation System must be configured to see selection options in this drop-down menu. To learn more about configuring this information, please see the Machine Translation Settings section of the documentation.
To make a selection, click on the drop-down menu and choose the Machine Translation System you want to use for this specific user option. If you need to view, configure, or make changes to this information, click on View Systems to the right of the menu.

Document Format Profile
The next available option to configure in the Settings section is the Document Format Profile. This is the profile that informs the system of how text will be extracted from the uploaded file(s) for translation for specific document formats.
A document format profile may contain multiple formats such as Word, XML, PDF, etc. and text extraction rules may be defined for each.The client will be able to choose what file type applies to each uploaded file when multiple file types are present in the profile. If none is selected, then the system will use a Default Profile.
A good example of how this works, is you may configure a Word Document Format Profile to exclude red text from the translation. This means that any red text will not be extracted from the uploaded file(s) when this specific profile has been selected in the configuration.
To make a selection, click on the drop-down menu and choose the Document Format Profile to be used for the option. In this example, the Word Profile has been selected and only contains this specific format.
If you have not configured a profile in the system or need to make changes, click on View Profiles to view this information.
Uploaded Files Limitations
You can limit the size and number of files that clients may upload with an order. Up to 250 files can be uploaded per order, with a maximum file size of 1000 MB each. These limits can be adjusted at any time in the Uploaded Files Limitations settings.

Additional Settings
These additional settings reside within the Settings section and can be enabled or disabled by clicking on the checkbox next to the setting's description:
-
Accept Any Type of Files - Sometimes the client will need to upload a file that is not handled by Wordbee, but imperative to the order. For example this might be a reference material or other item that does not need to be translated, but is necessary to understand or complete the order. In these situations, this option should be ticked.
-
Errors - By default errors ar not visible to the client. This particular configuration setting informs the system to show error details in the internal comments field on the order. If it is not enabled, then there will be no descriptive information when an error has occurred. By enabling it, the internal managers, etc. are able to see what went wrong and correct the problem easier.
-
Skip Counts & Costs Step - This is an important option as what is chosen here will affect later configuration settings in the Costing section on the General Settings Tab. If this option is enabled, then the client will not be shown a preview of the costs and the word count process will be skipped. This might be necessary in situations where you want to send a quote to the client after the order is submitted. When disabled, the client will be shown the costs before confirming the request.

By default, these settings are disabled (not ticked) in the form configuration. If one or more of these settings have been enabled, the option configuration will appear as shown below:

The Skip Counts & Costs Step configuration is the only option in this section that affects what the client sees during ordering. The rest of these settings pertain to the workflow of the order after submission.
Work
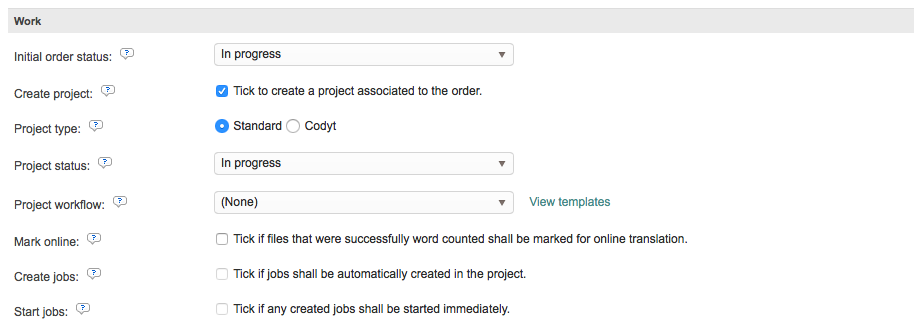
The Work section applies to the initial status of the order and whether or not a project should be created when the order is submitted by the client. Additionally, you may configure the type of project, it's status, the project workflow, and other items to further automate this process in the system for new orders.
Initial Order Status
The Initial Order Status setting will determine the status of the order when it is submitted and in most scenarios should be set to "In Progress". It is set to "Request" by default in the option configuration.

You have three status options to choose from for the order:
-
Request - The order has not yet been accepted.
-
Proposal - Used when you want to send a quote that the client will accept and is generally applicable when the Skip Counts & Cost Step setting has been enabled .
-
In Progress - Recommended for full automation where the project will automatically be created, etc.
To make a selection, click on the drop-down menu and choose the status you want to use when the client selects this option on the order form. In this example, "In progress" will be selected.

Create Project
Next, you may configure whether or not a project will automatically be created when the order is submitted. By default, this option is not enabled, as shown below:

To enable the option, tick the checkbox for the Create Project option and additional configuration options will appear below this option for selecting the project type, workflow, etc.
First, you must select the Project Type: Standard or Codyt and a Project Status: Preparing, Waiting, or In Progress.
A Standard Project will only create the project. All other configuration and setup will have to be handled manually after it has been created. If a standard project is created, the Project Status may be set to Preparing or In Progress, depending on your specific needs. In the example below, a standard project is created and the status has been set to "Preparing".

If the goal is to achieve complete automation, you will want to create a Codyt Project, as this selection will ensure complete automation based on the selected workflow, etc. If a Codyt project is created, you will need to set the Project Status to "In Progress". In this example, Codyt will be chosen:

Next, you may select a Project Workflow to be used for the chosen option on the order form. This is the tasks that will need to be performed and included as part of the created project for this option.

To make a selection, click on the drop-down menu and choose the project workflow template you would like to use for this form option. If you need to view or make changes to a template, click on View Templates.

Three additional options are provided when a project is set to automatically be created:
-
Mark Online - If enabled, uploaded files will instantly be marked for online translation.
-
Create Jobs - If enabled, jobs will be created for the new project based on the chosen Project Workflow, but not started.
-
Start Jobs - If enabled, the job proposal will be automatically sent to the appropriate translator. Please note that this does not mean they have accepted, started, or are working on the sent job.

For example, you might want all uploaded files to be marked for online translation and the related jobs created but not started . In this instance the jobs will be created, but not started. To do so, you would tick the checkbox next to the first two options, as shown below:

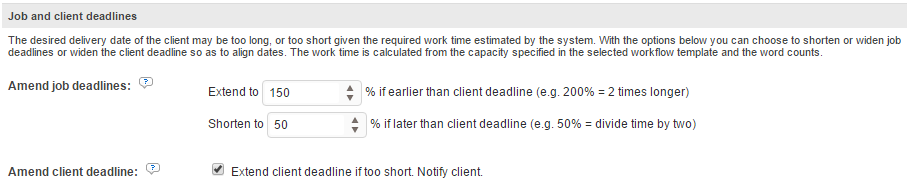
When ticking 'Start jobs', additional sub-options are displayed on the page. These options, (visible in the screenshot below) are aimed to adapt jobs and client deadline. Indeed, the desired delivery date of the client may be too long, or too short given the required work time estimated by the system. With the options below you can choose to shorten or widen job deadlines or widen the client deadline so as to align dates. The work time is calculated from the capacity specified in the selected workflow template and the word counts.
An additional tab appears within the option configuration for the project settings when a project will automatically be created in the system. These settings are covered in more detail on the Project Settings page.

Costing
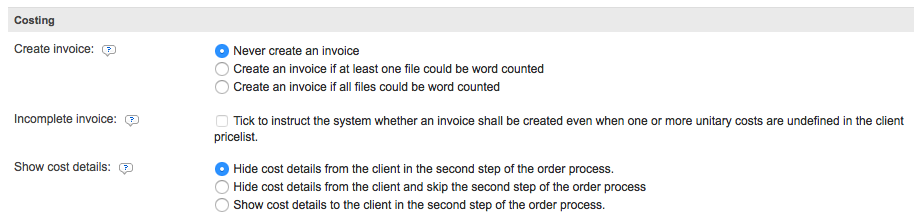
The Costing section is used to configure invoice creation, handling of incomplete invoices, pricing, and additional settings for the submitted order.
Create Invoice
For the Create Invoice setting, you have the option to:
-
Never Create an Invoice - When chosen, an invoice will not be created for the submitted order when the user option is chosen by the client. This choice should be selected when the Skip Counts & Costs Step setting has been enabled (click here).
-
Create an Invoice - An invoice will be created based on one of the following conditions:
-
When One File Can be Word Counted - This is the recommended setting when an invoice should be created, as an error would prevent invoice creation when the alternative setting is used. If one uploaded file can be successfully word counted, then an invoice will be created.
-
When All Files Can be Word Counted - All files must be properly word counted in order for the invoice to be created. This can prevent the invoice from being created if a file cannot be word counted.
-

To make a selection, tick the radial next to the appropriate description. For this example, the invoice will be created when at least one uploaded file can be word counted. This selection has been made because the Skip Counts & Costs Step setting has been disabled (unticked). For more information about this configuration setting, click here.

Incomplete Invoice
The Incomplete Invoice setting may be used to ensure that an invoice is created even if one or more costs have not been defined in the pricelist. If this option is disabled (unticked), as it is by default, then a single undefined unitary cost will prevent invoice creation.
This setting is helpful in instances where say the costs are defined for French translations, but not for another translation such as German. Even though the costs are not defined for one type of translation, the invoice will be created with all possible cost values automatically filled in.

To enable this setting, tick the checkbox to the right of the it's name. When enabled, the setting will have a check-mark in the box with a blue background.
Show Cost Details
The Show Cost Details setting contains three options and your selection will be determined from additional settings for the new user option. By default, "Hide cost details from the client in the second step of the order process" is the chosen setting.

If you have enabled the Skip Counts & Costs Step setting, then the default selection choice will not work as the entire second step of the order process should be skipped. Instead, you will need to select this option "Hide cost details from the client and skip the second step of the order process". This means the second step of the order form will be bypassed when completing a request.

However, you also have the choice of hiding the cost details without skipping the second step of the order process or simply showing the cost details to the client. Both options are applicable when the Skip Counts & Costs Step setting has been disabled (unticked).

When the above option is selected in the configuration settings, Step 2 will appear as shown below:
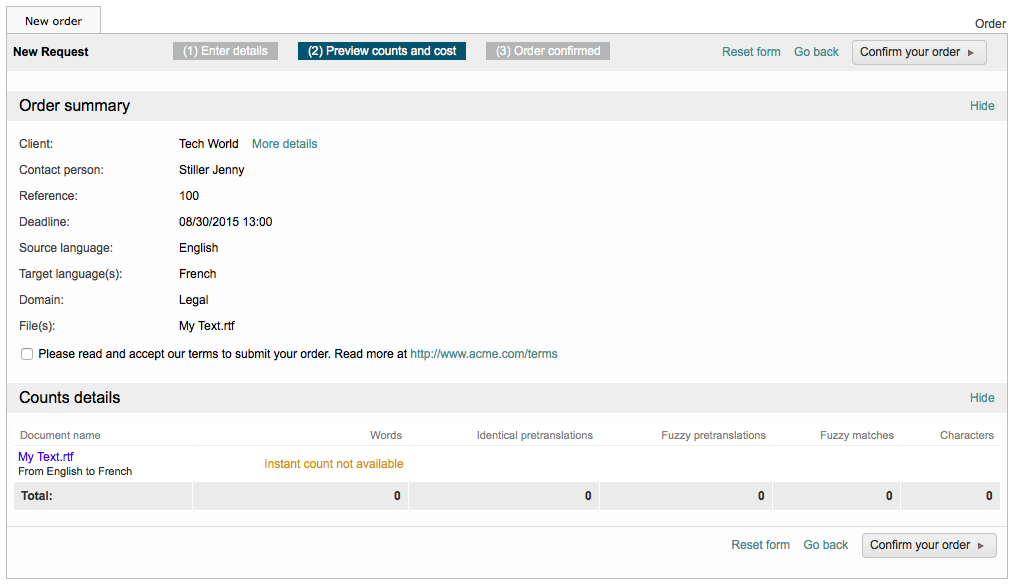
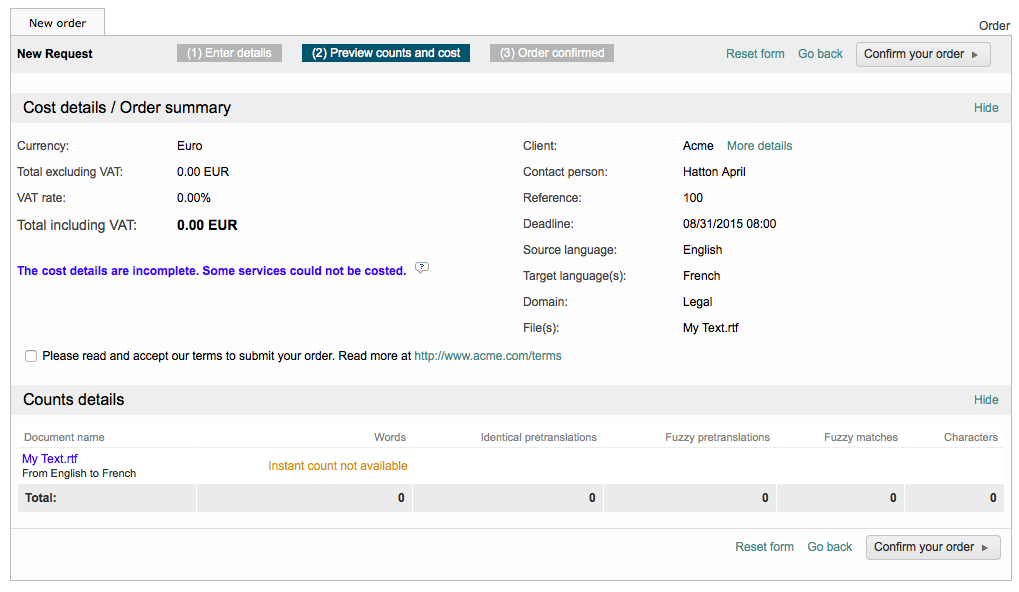
If the cost details are displayed, the client will see the word counts and all cost information. If they are hidden, this information will not be displayed during the second step of the ordering process. To change this setting, simply tick the radial for the desired selection to the right of the setting's name. In this example, we will be showing the cost details to the client.

The second step will appear as shown below, when these details are not hidden from the client on the order form:
Price List & Services
Finally, you will need to select a Price List and configure Services for this option when chosen on the order form by a client. By default, the Standard Pricelist is chosen in the configuration.
However, you may have pre-defined price lists based on each client and this is where they should be selected. If you want to view current pricelists or need to create a new one, click on View Pricelists.

To select a Price List, click on the drop-down menu and make a selection. For this example, Acme Pricelist has been chosen:

In the Services configuration setting, one or more tasks may already be selected by default depending on other selections you have made throughout the configuration. For example, this specific option already has a "Translation" Task.

To add another service, click on Add Services:

A popup window will appear where you may use the drop-down menu to select one or more Services and may enter a Product Code for each chosen service.
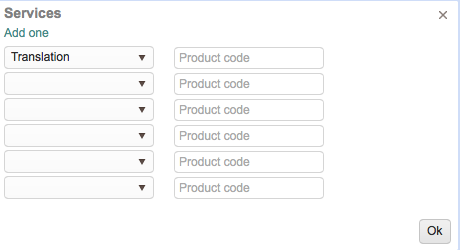
When finished, click on OK and the chosen services and entered products codes will appear in the Services setting.
Since this option is for Translation Only, only a product code is needed (if required). However, let's say an option will be created for Translation + Revision, then you might want to add Revision to the list with a product code, as shown below:
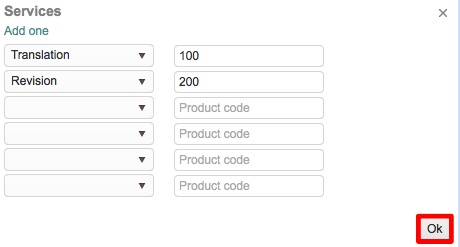
As you can see, the Translation Task now has a Product Code on the configuration. If additional tasks were added, they would appear on a seperate line below the first task with their own product code (if entered).

Congratulations! You have made it through the most detailed parts of the order form configuration. Next, you will need to configure the Order Details for the user option.
After the initial configuration of these settings, the configuration settings for the previous user option will be automatically copied to the new option to ensure that completing the rest of the user options for the order form is an easy and fast process. If you create a new option from the previous, be certain to make the necesary text, workflow, project, and manager selection changes for the new option.