Add concepts and terms
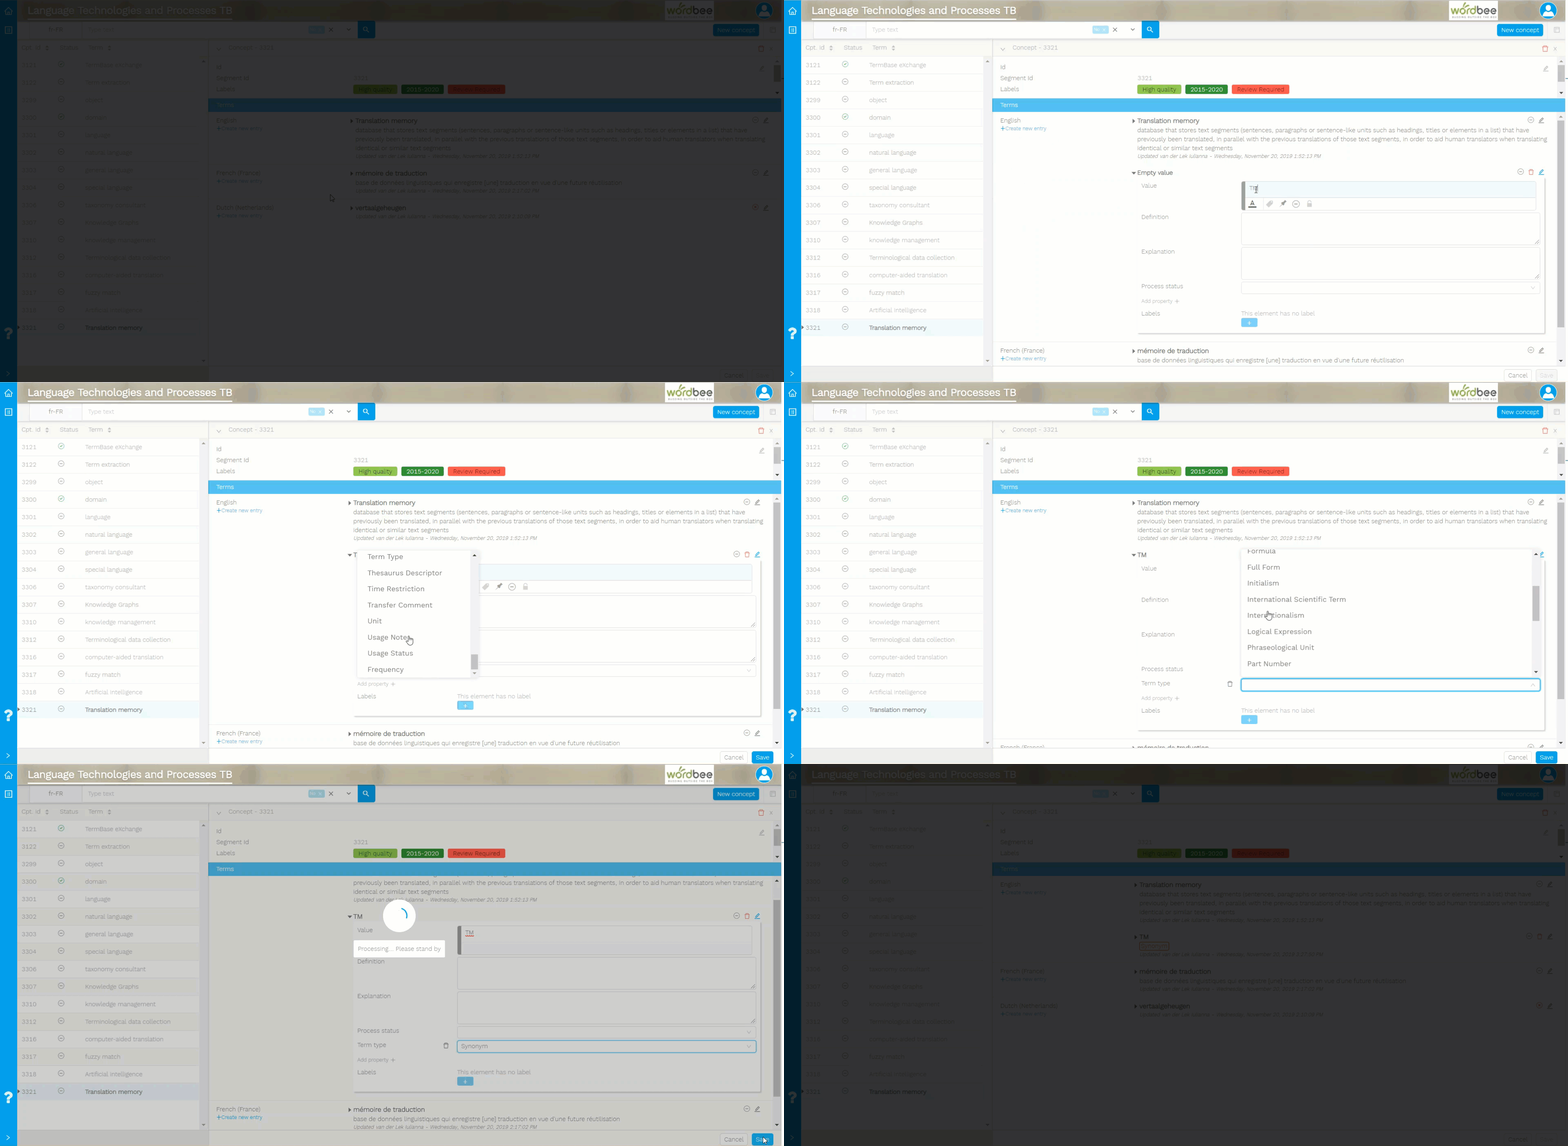
Create a new concept
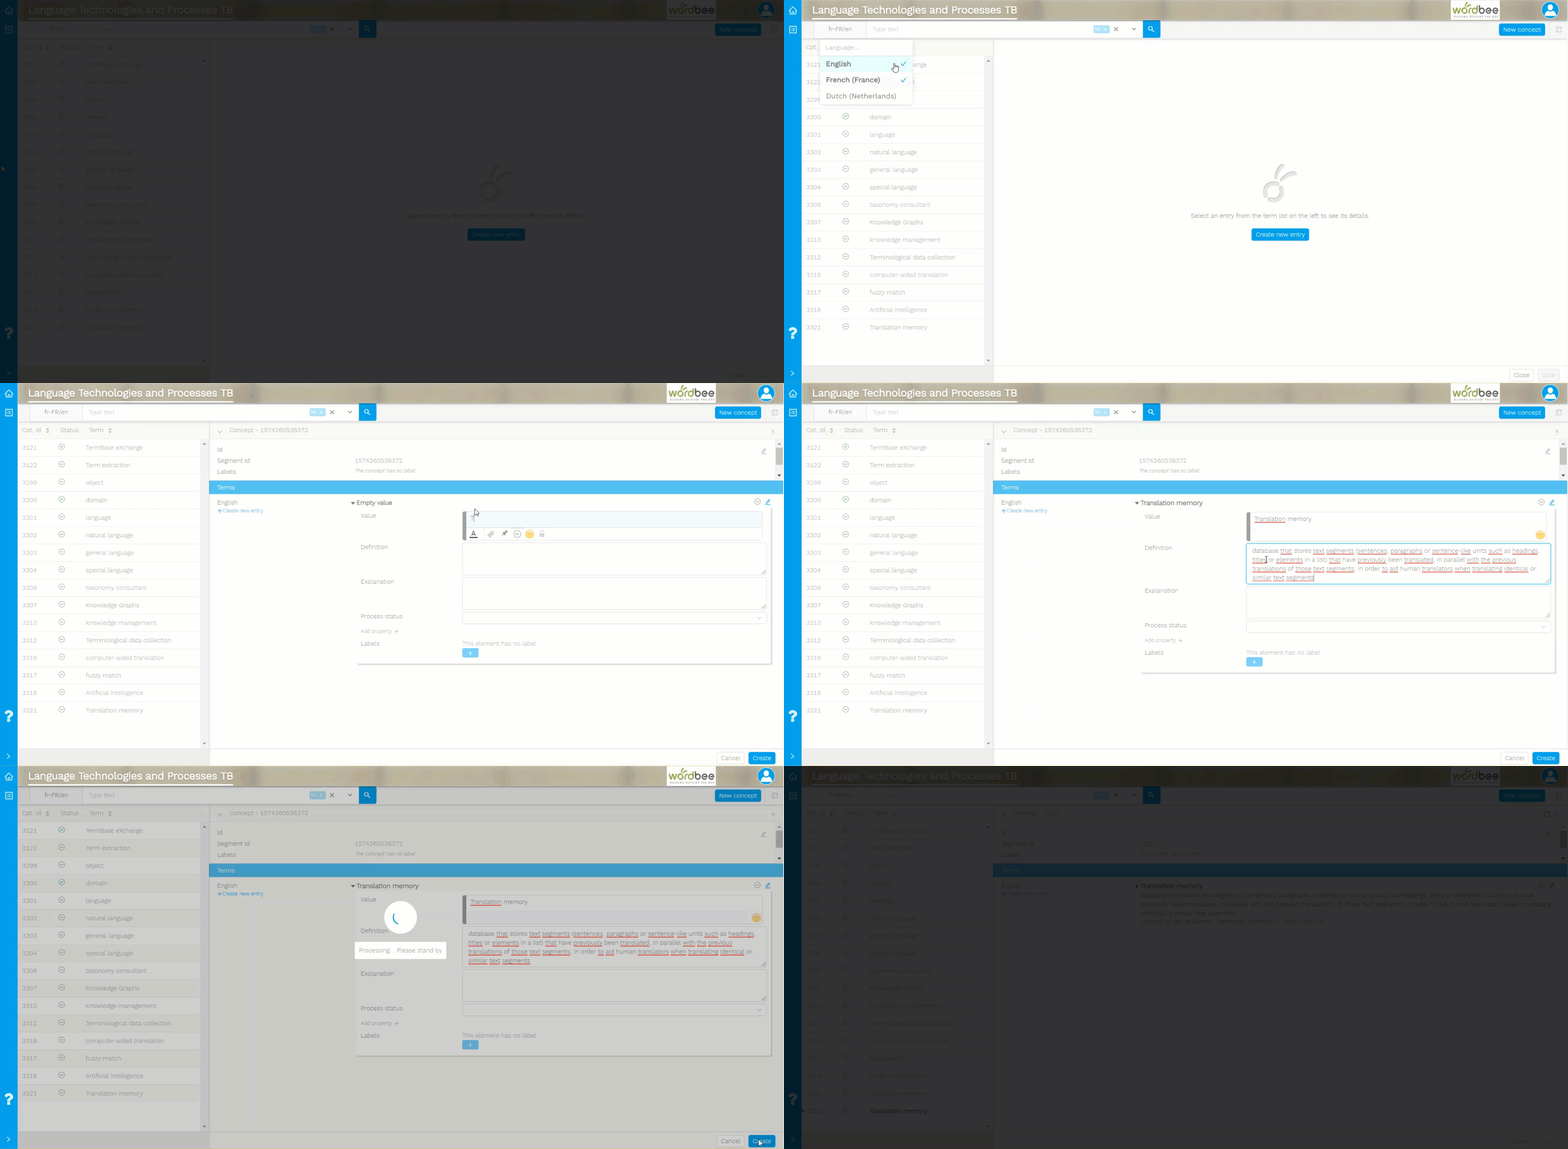
Select your source language.
Click on New concept.
In the Value box, enter your concept.
Add additional information about the concept, for example, a definition.
Save entry.
Watch the short GIF video as an example.
Add term
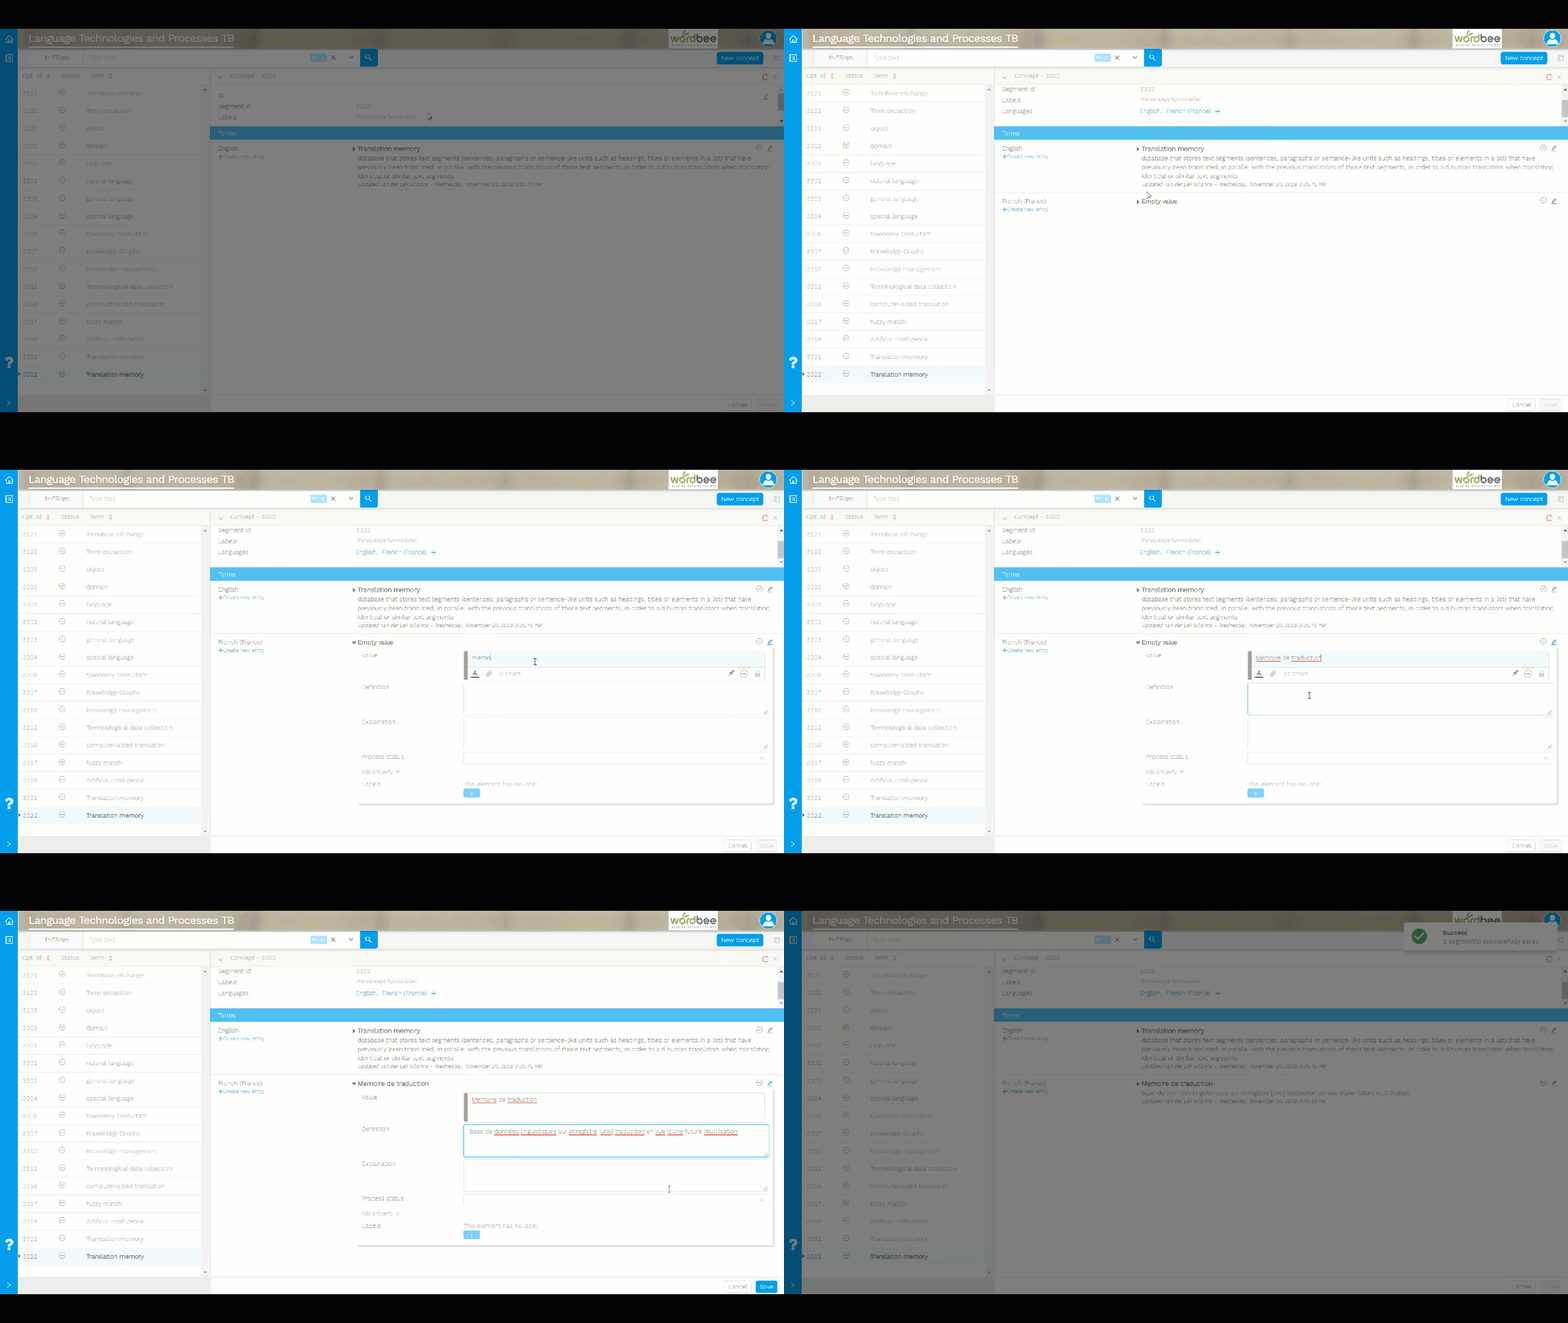
Add a target language-equivalent to the concept you just created:
Go to the concept level > Languages and click on the + sign to Add another language.
At the term level, go to the new language.
Click on the pencil icon to edit the term.
Type the target-language equivalent in the Value box.
Add additional information about the term, for example, a definition.
Save entry.
You may add as many terms you want to one language but they all need to relate to the same concept. Learn more Database structure.
Add additional term information
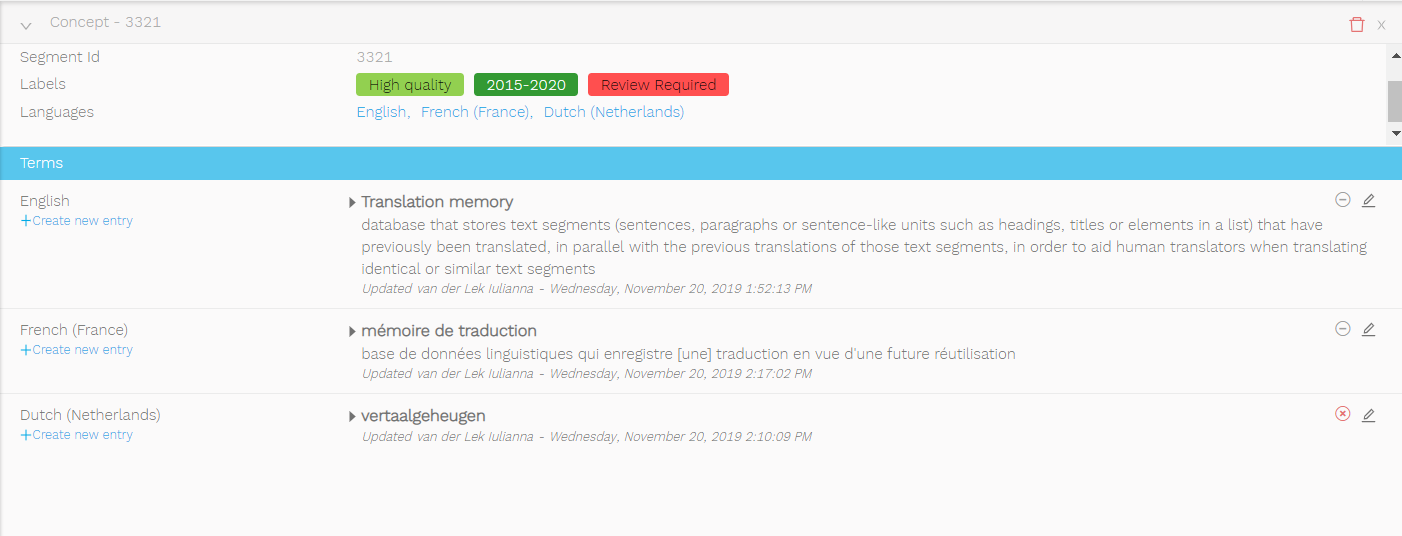
You can add additional terminological information both at the concept and term level by clicking on the pencil icon. Here is an overview of the fields available by default.
Concept level
At the concept level, the following fields are available by default:
Concept nr
Each concept is automatically assigned a unique ID when it is entered into the database.
Definition
Here you can add a definition about the source concept that applies to the entire entry.
Explanation
Here you can add information about the concept.
Subject field
Here you can indicate the field of special knowledge to which the concept belongs to.
Labels
Click on the + sign to activate the drop-down and select the appropriate option::
Usefulness: high quality, medium quality, low quality, do not use
Creation date: you can select the year range
Status: validated, invalidated, review required
Languages
Click on the + sign to add a new language
Term level
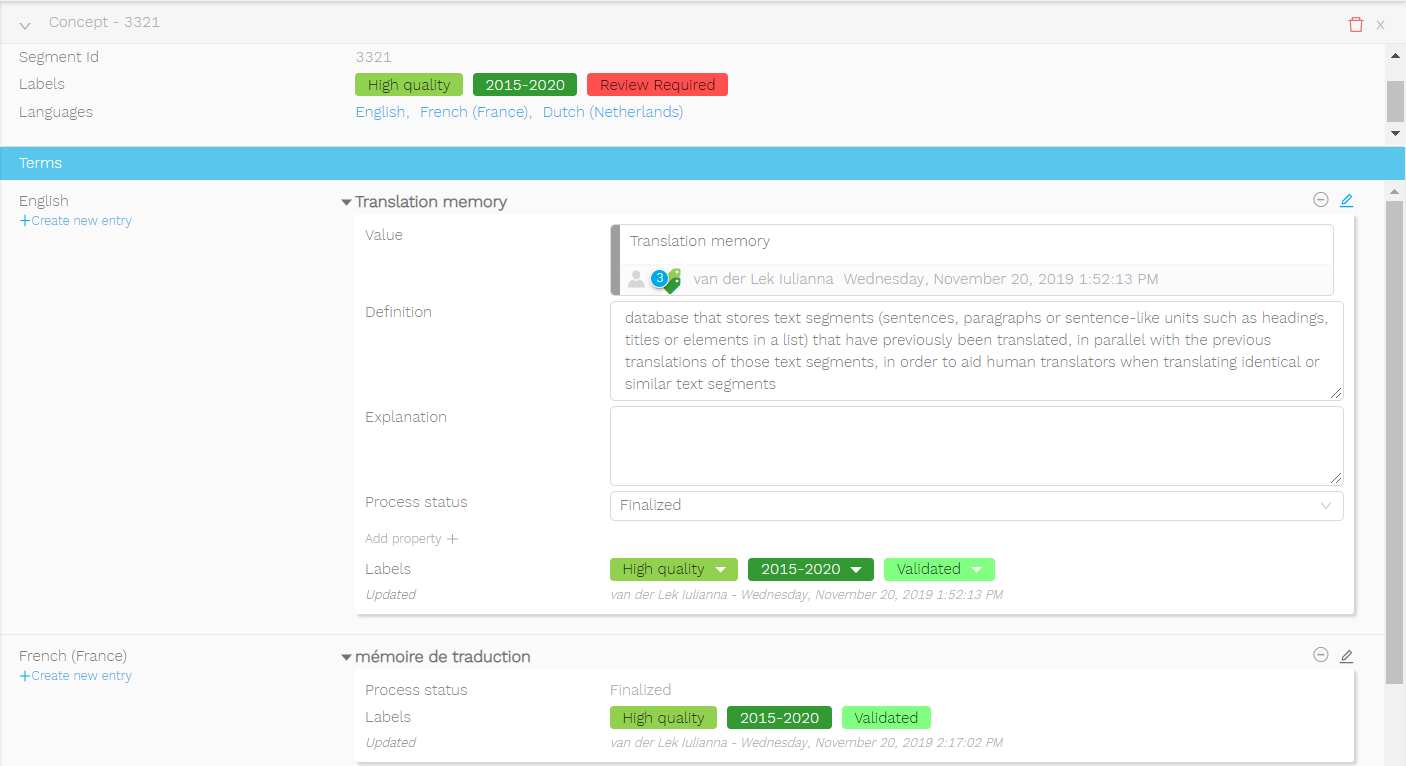
At the term level, the following fields are available by default:
Value
Enter your term.
Definition
Here you can add a definition about the term.
Explanation
Here you can add information about the term.
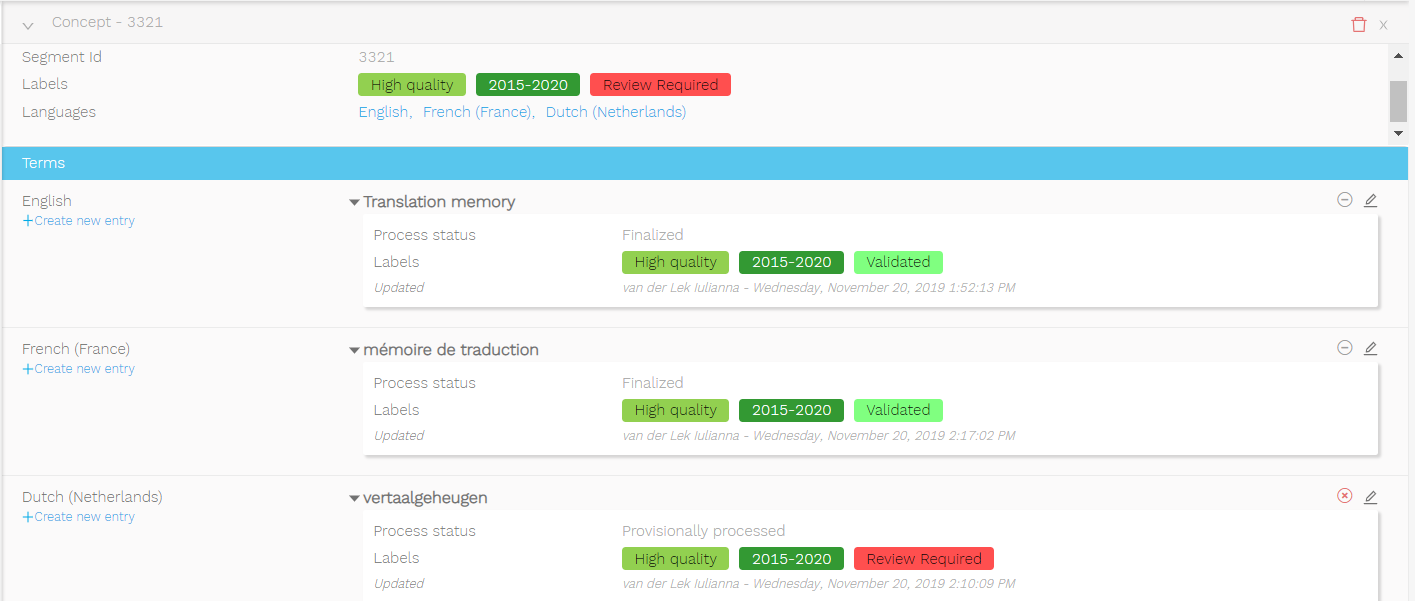
Process status
Click in the box to activate the drop-down and select the appropriate option:
Unprocessed
Provisionally processed
Finalized
Labels:
Click on the + sign to activate the drop-down and select the appropriate option::
Usefulness: high quality, medium quality, low quality, do not use
Creation date: you can select the year range
Status: validated, invalidated, review required
At each level, you can add additional fields by using the Add property button. Click on the + sign to activate the drop-down and select the desired field from the list. See How to add a synonym. These additional fields are taken from the Basic TBX specifications.
Change term status
You can change the status of each term you entered: None, Success, Error.


