The Segments

Each row represents a segment. Anytime you open one segment, it would pop up from the editor letting you know that you are in editing mode. Then you can modify the text or leave comments to other users, for instance.
Trick!
Change status without entering editing mode
If you are performing a revision and just want to make changes to the status, click directly on the column gap between source and target. By default is gray (which indicates that the status of the translation is neutral).
Each segment is divided in different parts. In this case, we will take the example above, which has 4 parts.
| Part 1. Column Zero | Part 2. Source text | Part 3. Language status (for working target) | Part 4. Language text (for working target) |
Part 1. Column Zero
This section always refers to the source segment.
| Icons | Description |
|---|---|
 | Segment number |
 | Labels |
 | Split |
Reminder
Split is only possible if you have specific rights.
Part 2. Source text
Contains the source text. Locked. Only editable if user has specific rights.
Part 3. Language status (for working target)
Below you can find the color codes and name codes for the statuses (which you will find useful when working in offline mode).
| Values | Description |
|---|---|
 | NEUTRAL (default) |
 | OK |
 | PROBLEM |
Remember
Follow-up status updates in the segment
The user updating the status of a segment will be registered in the Revisions column or tab (in the Translation Finder widget). These updates can be done:
- manually or
- upon a batch action (triggered by the user)
Any status changes done during a full QA check are not registered, since they require further attention and editing from the supplier.
Part 4. Language text (for working target)

This is how a full segment would look like while you are working on it. Now lets take a look at the specific elements in the working language (displayed by default on the right).
These are the features available when inside a segment of your target language:
| Icons | Values / Options | Description |
|---|---|---|
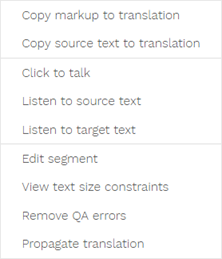
 |  | Segment panel (advanced) |
 |  | Segment formatting Remember This menu is only supported in the following file formats: Ω: list of special characters. Find how to enrich your personalized list here. Text formatting: B: bold text I: italic text U: underline ⤒ : subscript and superscript |
|
| One or several labels can be applied to language segments. As soon as you start adding them, their color value will be reflected in the related icon
Only when you have more than 3 labels attached to the segment, a counter will be displayed.
Also, a global count on the labels in use are available in the statistics panel. Learn more on how to apply labels to segments or languages by using batch actions |
 |
| Comments will be displayed in the Timeline widget |
 |
| Pin segments to highlight something |
 |
| Indicates the possibility to make modifications in a segment.
|
 |
| By default: NEUTRAL |
| Displays pre-translation hits (if any) | |
 | Warning | When the smart Assistant is on, this is the mark to highlight segments with problems. |
 | QA Errors | QA problems are marked with the PROBLEM status icon. Other possible outputs of the QA check are :Info and Warning |
Remember
Follow-up text updates in the segment
The changes in the text of any language are registered in the "Last editor" column, available in the Properties Widget, as well as in the Revisions tab of the Timeline.
The "Last editor" field will let you know if the text has been translated by a user, using MT or if it has been retrieved during the pre-translation phase. Further details about who and when are also available in the widgets named above.
Speed-up your editing
Note you can use customizable shortcuts to edit and validate your segments. For example, the shortcut (CTRL+D) can be used to delete all content after the cursor position on the translated segments.


