
Autocorrect speeds up typing and applies the right typography for each language as you work: French guillemets, Spanish opening ¿ and ¡, curly quotes, and your own text replacements. You set it up once, and the Editor applies it automatically as you type in the target cells.
-
Turning autocorrect on and off: use the master switch and quick options in the Edit menu.
-
Configuring autocorrect: open the dedicated Preferences tab.
-
Language-specific replacements: set quotes, punctuation, and text replacements per language.
Turning Autocorrect On and Off
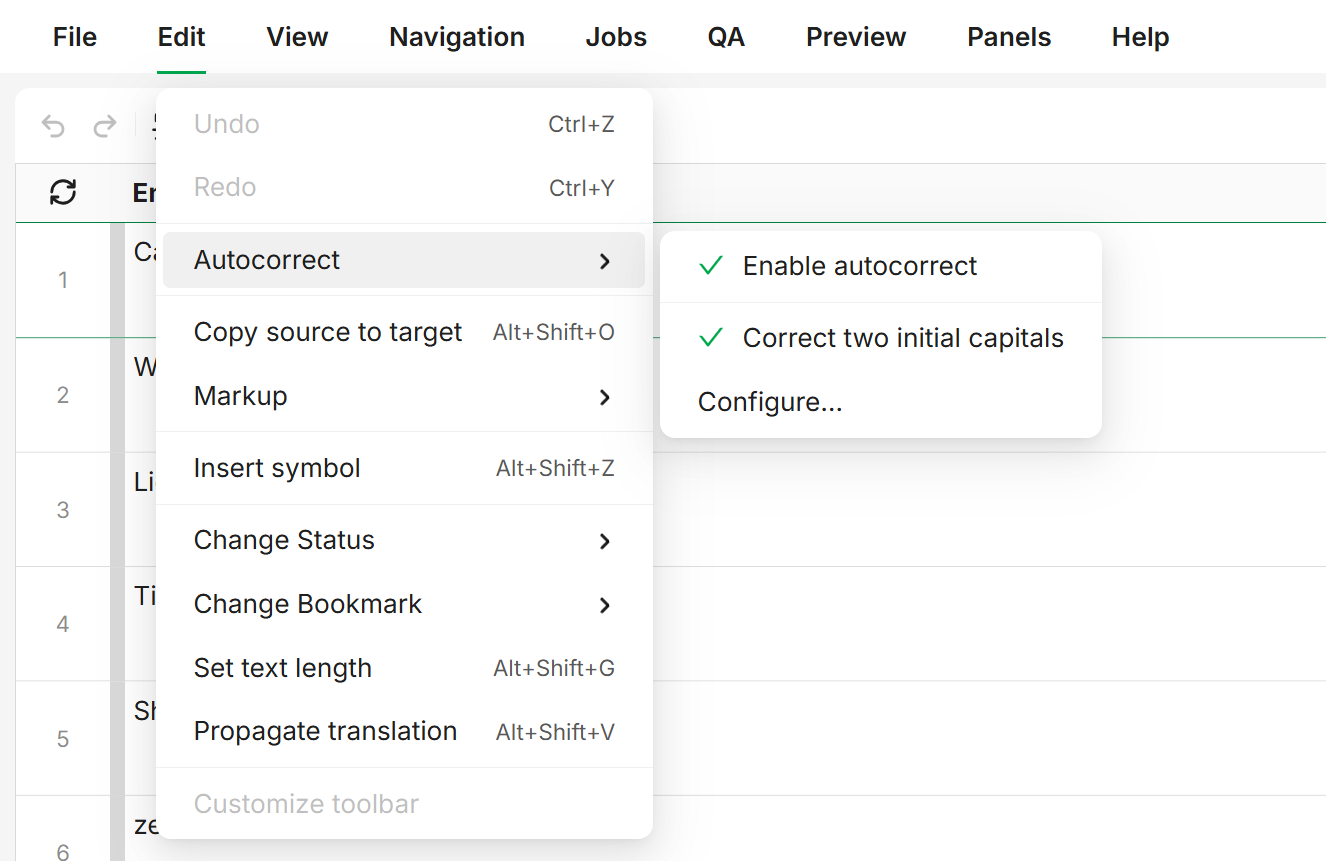
Open the Edit menu and point to Autocorrect:
-
Enable autocorrect: the master switch for the whole feature. When it is off, your saved rules are kept but nothing is corrected.
-
Correct two initial capitals: when enabled, fixes words typed with two leading capitals (for example, “THe” becomes “The”).
-
Configure…: opens Preferences > Autocorrect & autocomplete for the full settings.
Configuring Autocorrect
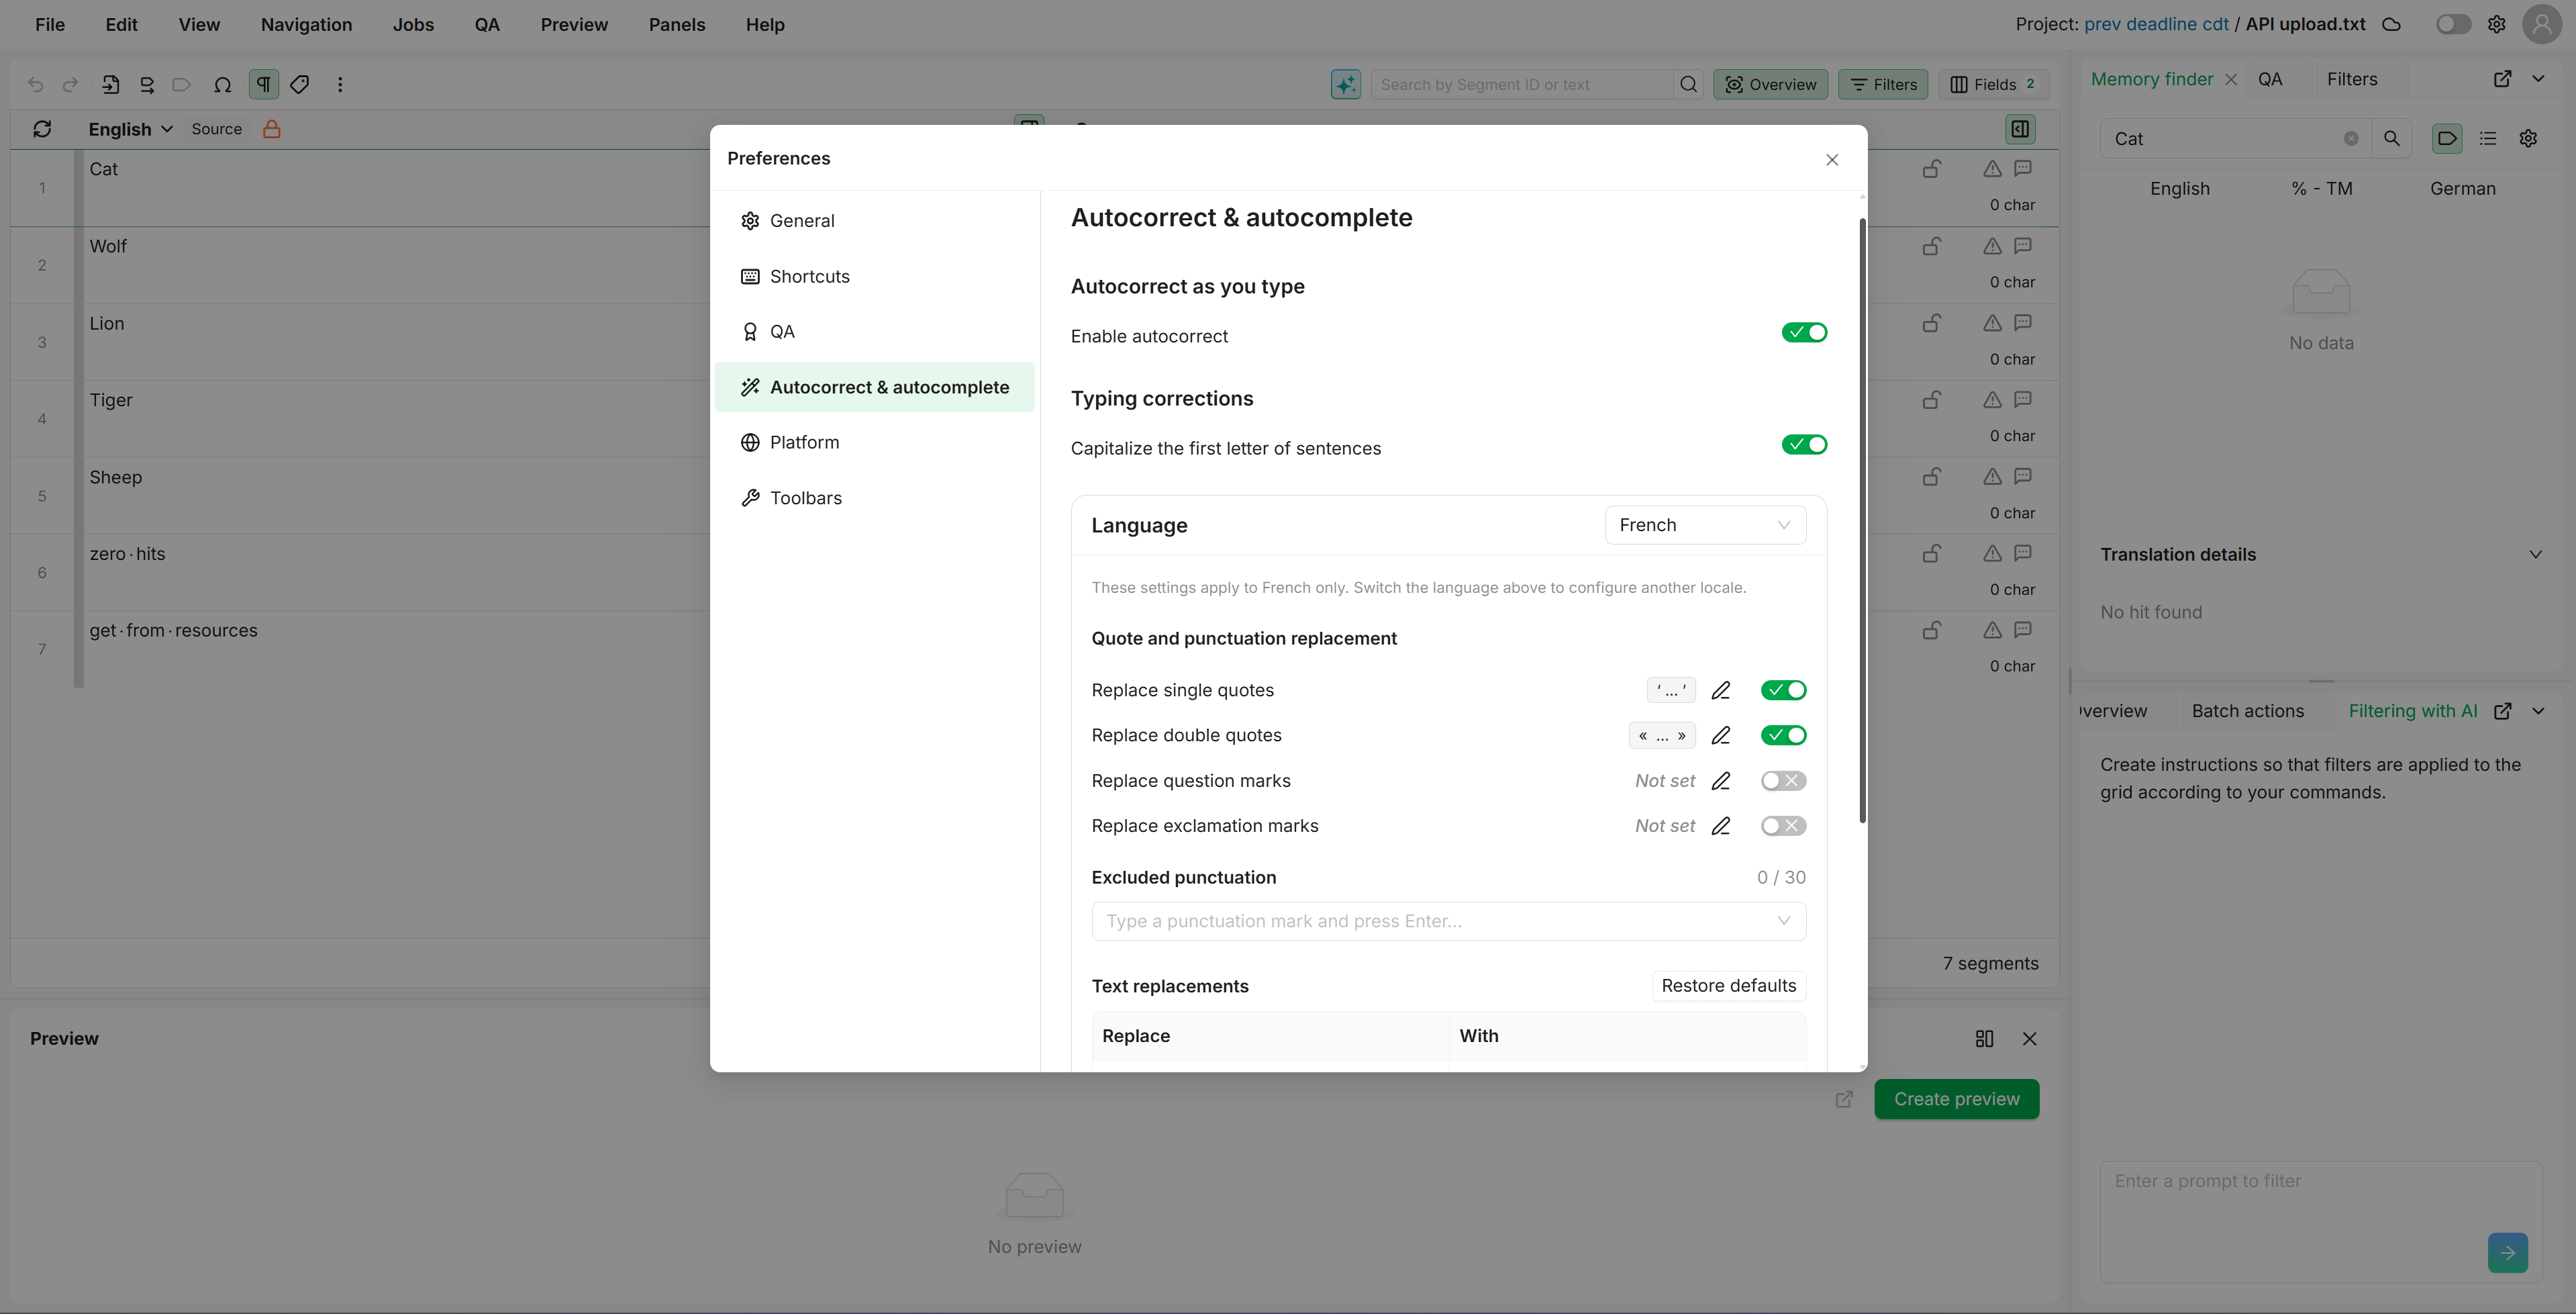
To open the settings, click the gear icon in the top-right corner of the Editor and select the Autocorrect & autocomplete tab. The tab is organized from top to bottom:
|
Setting |
Description |
Default |
|---|---|---|
|
Autocorrect as you type |
The master switch for the feature. When off, the sections below are dimmed and inactive, and your saved values are preserved. |
On |
|
Capitalize the first letter of sentences |
When enabled, capitalizes the first letter after a sentence ends (for example, “hello. the” becomes “hello. The”). |
On |
Autocorrect applies only in editable target cells. It never changes source text or content inside tags.
Language-Specific Replacements
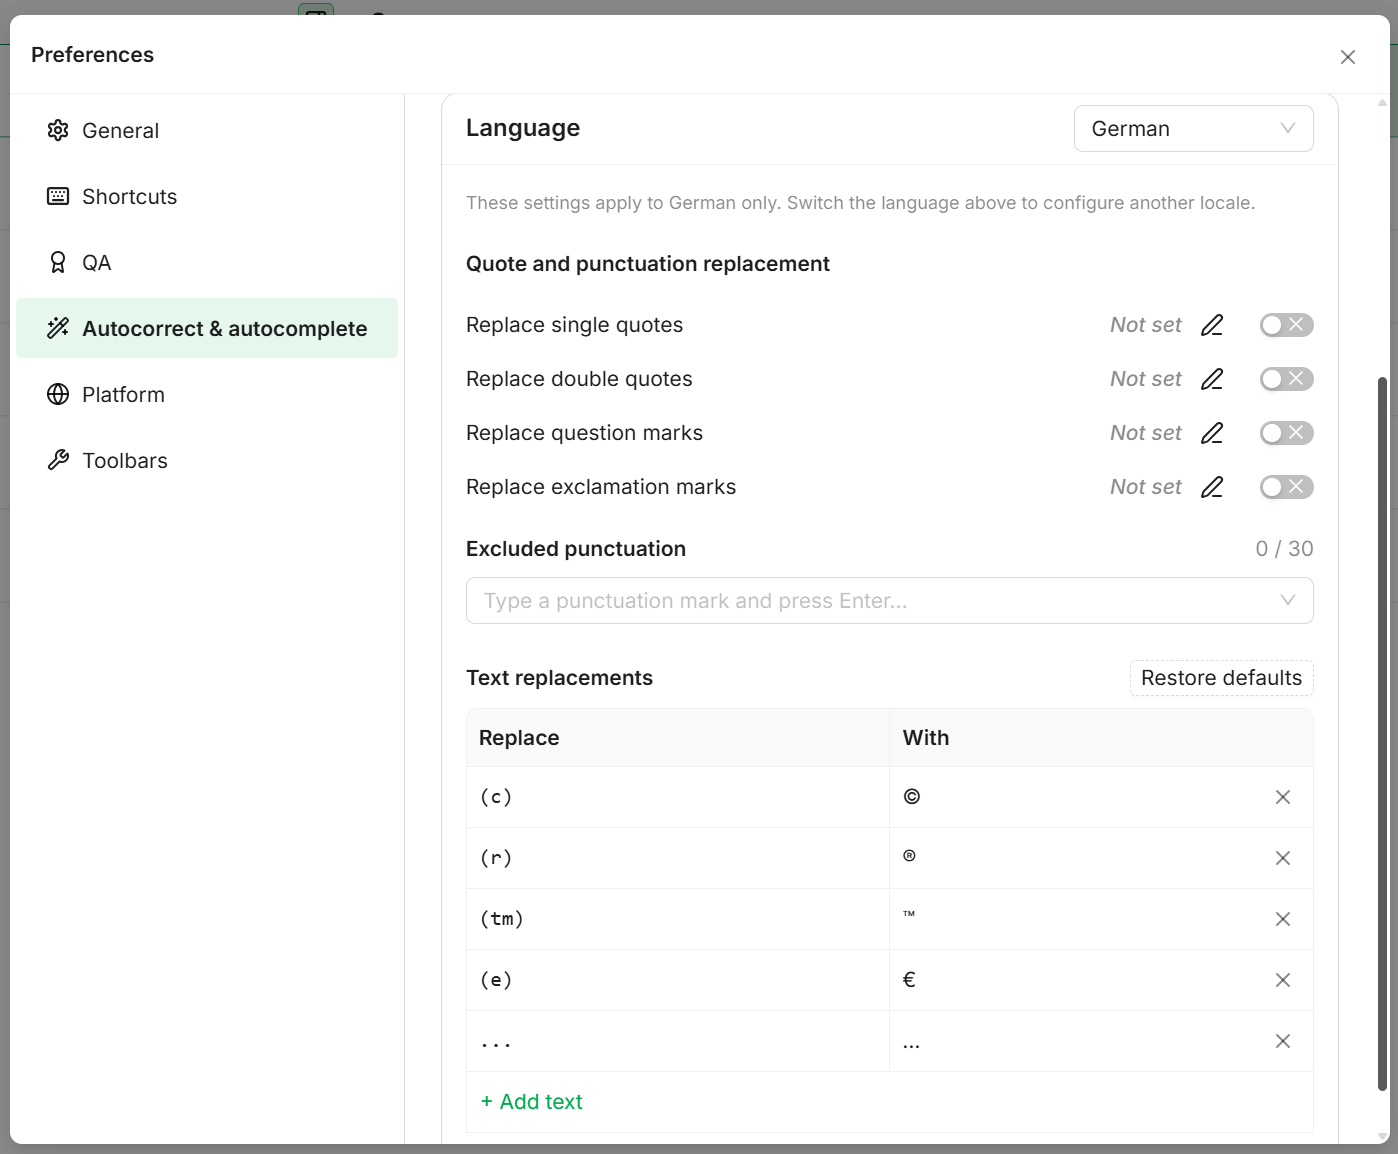
Select a language at the top of the language card. The settings below apply to that language only; switch the language to configure another one.
Quote and Punctuation Replacement
Four rules are available: Replace single quotes, Replace double quotes, Replace question marks, and Replace exclamation marks. Each rule shows the characters it inserts before and after the text, or Not set when none are defined.
Follow these steps to change a rule:
-
Click the pencil icon on the rule. The character fields open for editing.
-
Enter the characters to insert before and after.
-
Click the check icon to save, or the cross icon to cancel.
-
Use the rule’s switch to enable or disable it.
Excluded Punctuation
List the characters that should never be replaced for this language. Type a punctuation mark and press Enter to add it. You can add up to 30 characters, and remove any by clicking its cross.
Text Replacements
Create text replacements that expand into longer text as you type. Enter a short code in the Replace column and the full text in the With column, then type the code followed by Space to insert the replacement.
|
Replace |
With |
|---|---|
|
(c) |
© |
|
(r) |
® |
|
(tm) |
™ |
|
(e) |
€ |
|
… |
… |
Click + Add text to create a new entry. Click Restore defaults to return the list to the built-in replacements.
Example Scenarios
|
Use Case |
How To |
|---|---|
|
Apply French guillemets automatically |
Select French in the language card and enable Replace double quotes. |
|
Add Spanish opening punctuation (¿ ¡) |
Select Spanish and enable Replace question marks and Replace exclamation marks. |
|
Stop all corrections without losing your rules |
Turn off Enable autocorrect in the Edit menu. |
|
Insert a recurring phrase from a short code |
In Text replacements, click + Add text, then enter a code in Replace and the full text in With. |
|
Keep a specific character from being replaced |
Add it under Excluded punctuation for that language. |
|
Reset your text replacements to the originals |
Click Restore defaults in the Text replacements section. |
Learn More
-
Smart Assistant: The equivalent autocorrect settings in the classic editor.
-
Preferences: Other personal settings for your Editor workspace.