
The Editor lets you handle a job from start to finish without going back to the project pages. A single popup brings together accepting a job, tracking its progress, delivering it, exchanging messages, and reaching its reference files, so you can stay in the grid while you work.
Opening the job popup
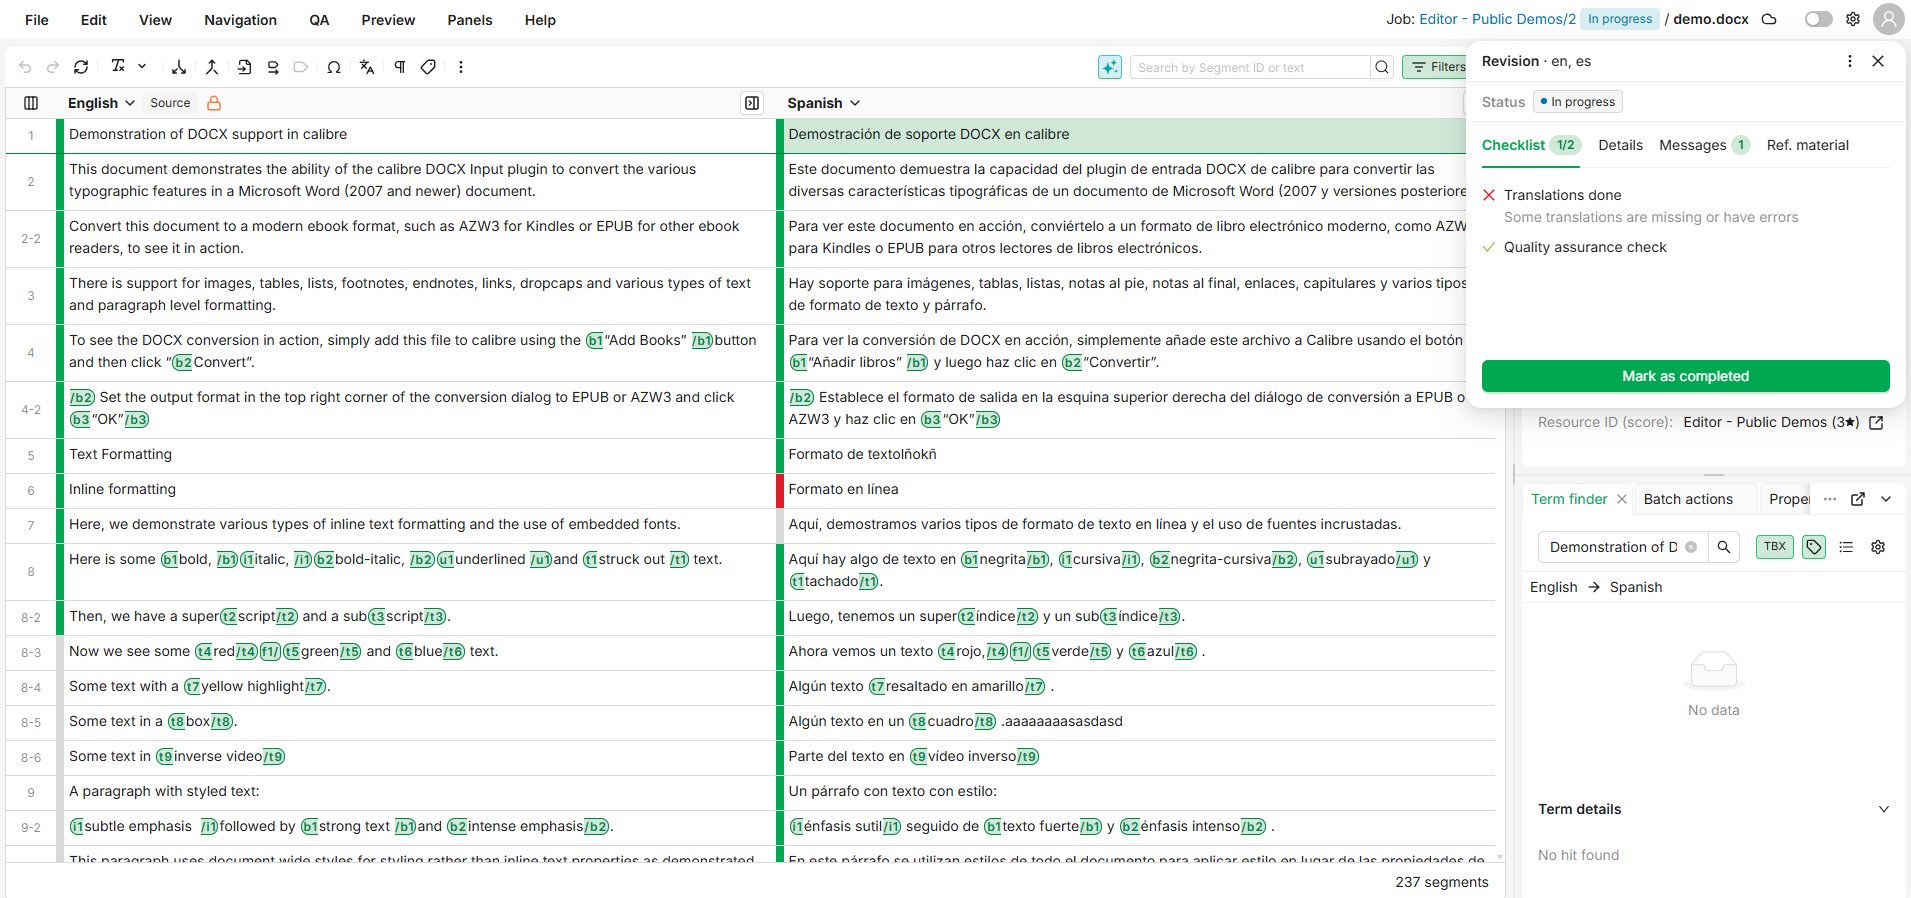
A status chip in the Editor top bar shows the current state of your job and whether it needs your attention. Select the chip to open the job popup on the right side of the Editor.
The chip reflects the job's situation, for example:
-
Action required: the job is waiting for you to accept or start it.
-
In progress: you are working on the job.
-
Ready to deliver: every checklist item has passed and you can mark the job as completed.
-
QA needed: a required checklist item still fails and must be fixed before delivery.
-
Not ready: the job is waiting on an earlier step in the workflow.
The popup has up to five tabs: Checklist, Details, Messages, Ref. material, and Attachments. The Attachments tab appears when you can edit attachments or when files already exist for the job.
Accepting and starting a job
Follow these steps to take on a job:
-
Select the status chip to open the job popup.
-
In the footer, select Start for a job assigned directly to you, or Accept for a job proposed to a group of suppliers.
-
To turn the job down, select Decline.
If your profile does not allow you to change the job status, the popup tells you to ask your manager instead. See If you cannot change the job status.
Some jobs require you to accept the Terms & Conditions first: the popup shows them with an I accept the Terms & Conditions checkbox. Once you have accepted, that section is replaced by a link in the Details tab.
For some jobs, segments stay locked for editing until you start the job or accept the proposal. When that applies, the popup shows a short notice and the segments become editable once you start or accept.
Job details
The Details tab shows the job's main properties: Project, Supplier, Assignee, and Ref. material. It also has an Open job details link for the job's full details.
Once you have accepted a job, the tab keeps an Accepted: Terms & Conditions row. Select Terms & Conditions to reopen the terms for the assignment you accepted, without leaving the Editor. Select Close to return to the popup.
The row appears when all of the following are true:
-
You have accepted the job. It stays available while the job is in progress, ready to deliver, waiting on QA, not ready, completed, approved, or closed.
-
The job required Terms & Conditions for you and the project.
-
You are the assigned supplier, or a manager who can edit the job's details.
The terms are generated from the current template and the job's data each time you open them. This is a way to re-read the terms that apply to your assignment, not a stored copy of the page you saw when you accepted.
Tracking progress and delivering
The Checklist tab lists what must be done before delivery, such as Translations done, Quality assurance check, and All editable segments confirmed. The progress bar shows how much of the work is edited and validated. When all required items pass, the status chip changes to Ready to deliver.
Follow these steps to deliver your work:
-
Open the job popup and go to the Checklist tab.
-
When the job is ready, click Mark as completed in the footer.
-
In the confirmation dialog, optionally add a message for the project manager.
-
Confirm to deliver the job.
If an optional checklist item is still failing, the dialog warns you but does not block delivery. If a required item fails, Mark as completed stays disabled until you fix it.
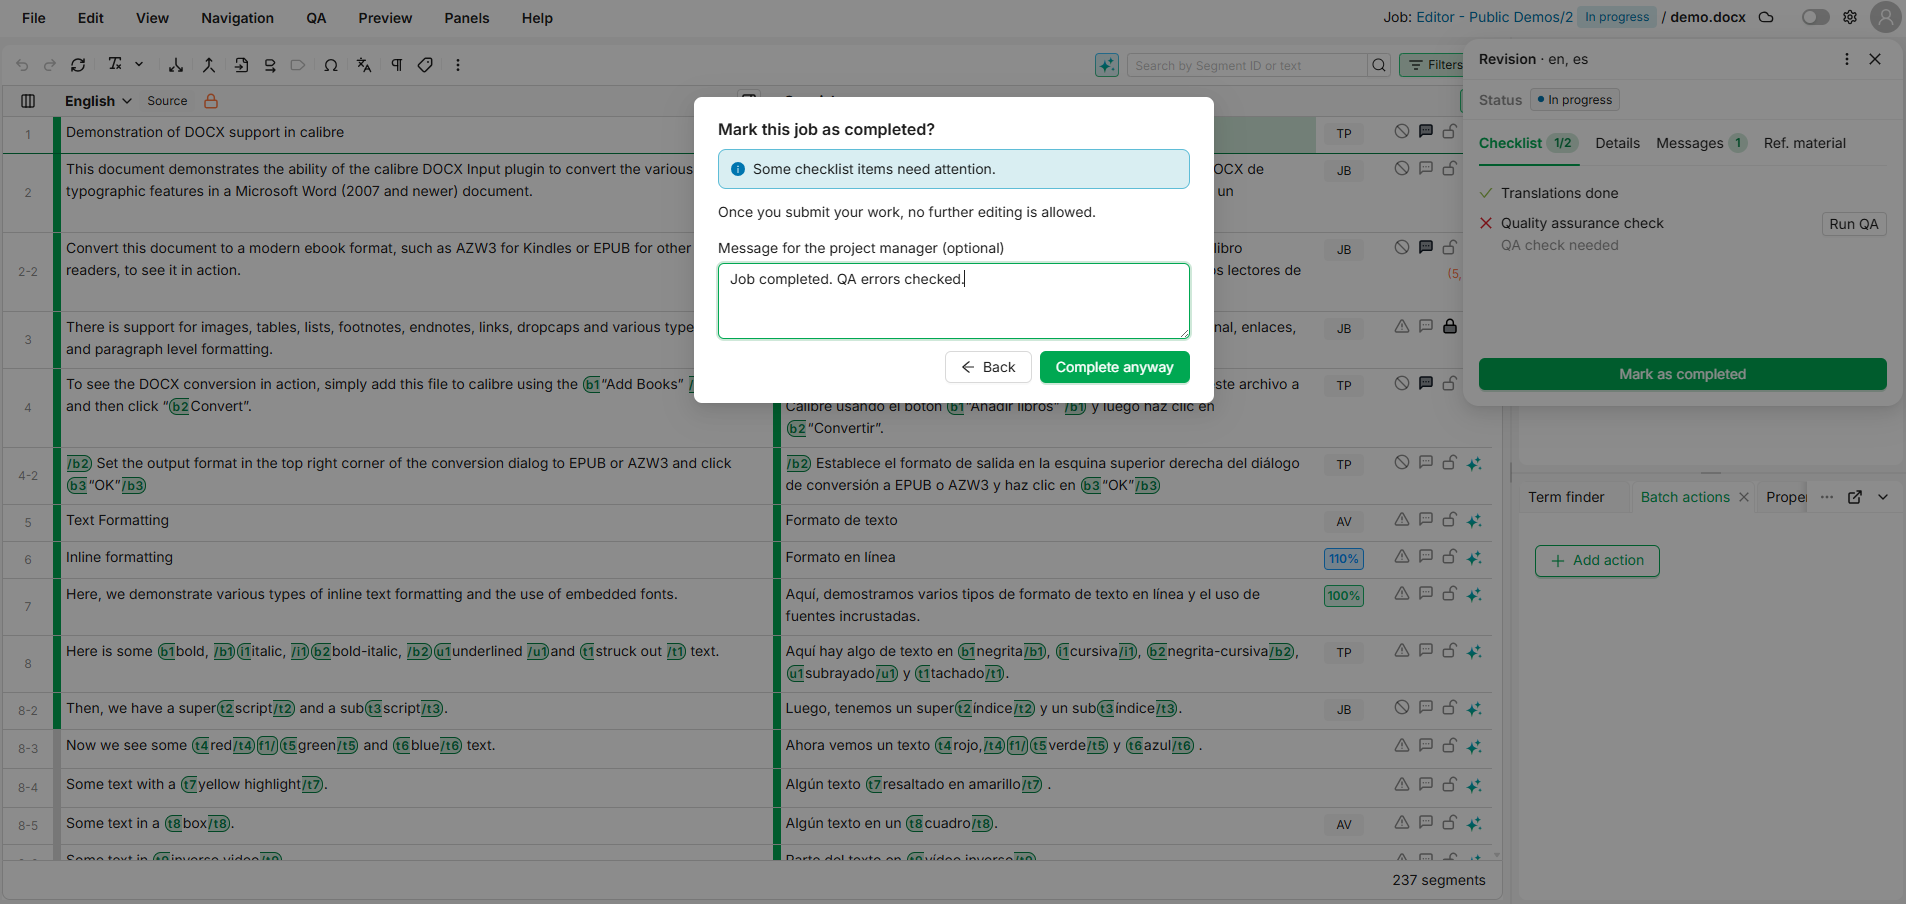
The Quality assurance check item shows when QA last ran for this job and how many segments still have QA errors, for example "There are 3 segments with QA errors". This reflects the job you are working in, so the count matches what you see on the segments.
When the Translations done item is failing, it shows an Apply filter link. Selecting it filters the grid to exactly the segments that still need work for the job's language, so you can go straight to them. The link appears only when there is something to fix.
The All editable segments confirmed item appears when your project requires every segment you can edit to carry the green (confirmed) status before the job is delivered. It shows how many segments are still unconfirmed, for example "12 segments not confirmed", and an Apply filter button that filters the grid to exactly those segments so you can work through them in one pass.
A segment counts as confirmed only when its status is green. A segment that is gray still fails even if you have already translated it, so confirm your translations as you go. Segments that are locked for you are never included in the count.
This item does not appear for every job: it is shown only when the project uses this rule, and never for users with the Administrator profile, who are not subject to it.
If you cannot change the job status
Some user profiles cannot change a job's status, for example external suppliers with limited rights. You still see the Checklist tab with the same items, so you know exactly what is left to do, and you can use Run QA if you have QA rights. The Mark as completed button does not appear.
Instead, a message above the tabs tells you to ask your manager to accept, start, or complete the job, depending on its current state.
The status chip shows the job's current status, for example In progress. It does not change to Ready to deliver or QA needed, because you cannot deliver the job yourself.
Manager actions
If you manage the job, the ⋮ menu next to the close button gives you extra actions. Each one appears only when you are allowed to perform it:
-
Reassign to colleague: hand the job to another member of your company.
-
Drop personal assignment or Drop company assignment: release your own claim or the whole company's assignment.
-
Change status: move the job to another status.
-
Cancel job: cancel an external supplier's job entirely.
When a job is declined or dropped, the Editor shows a full-screen card explaining what happened, with a link back to the Jobs page.
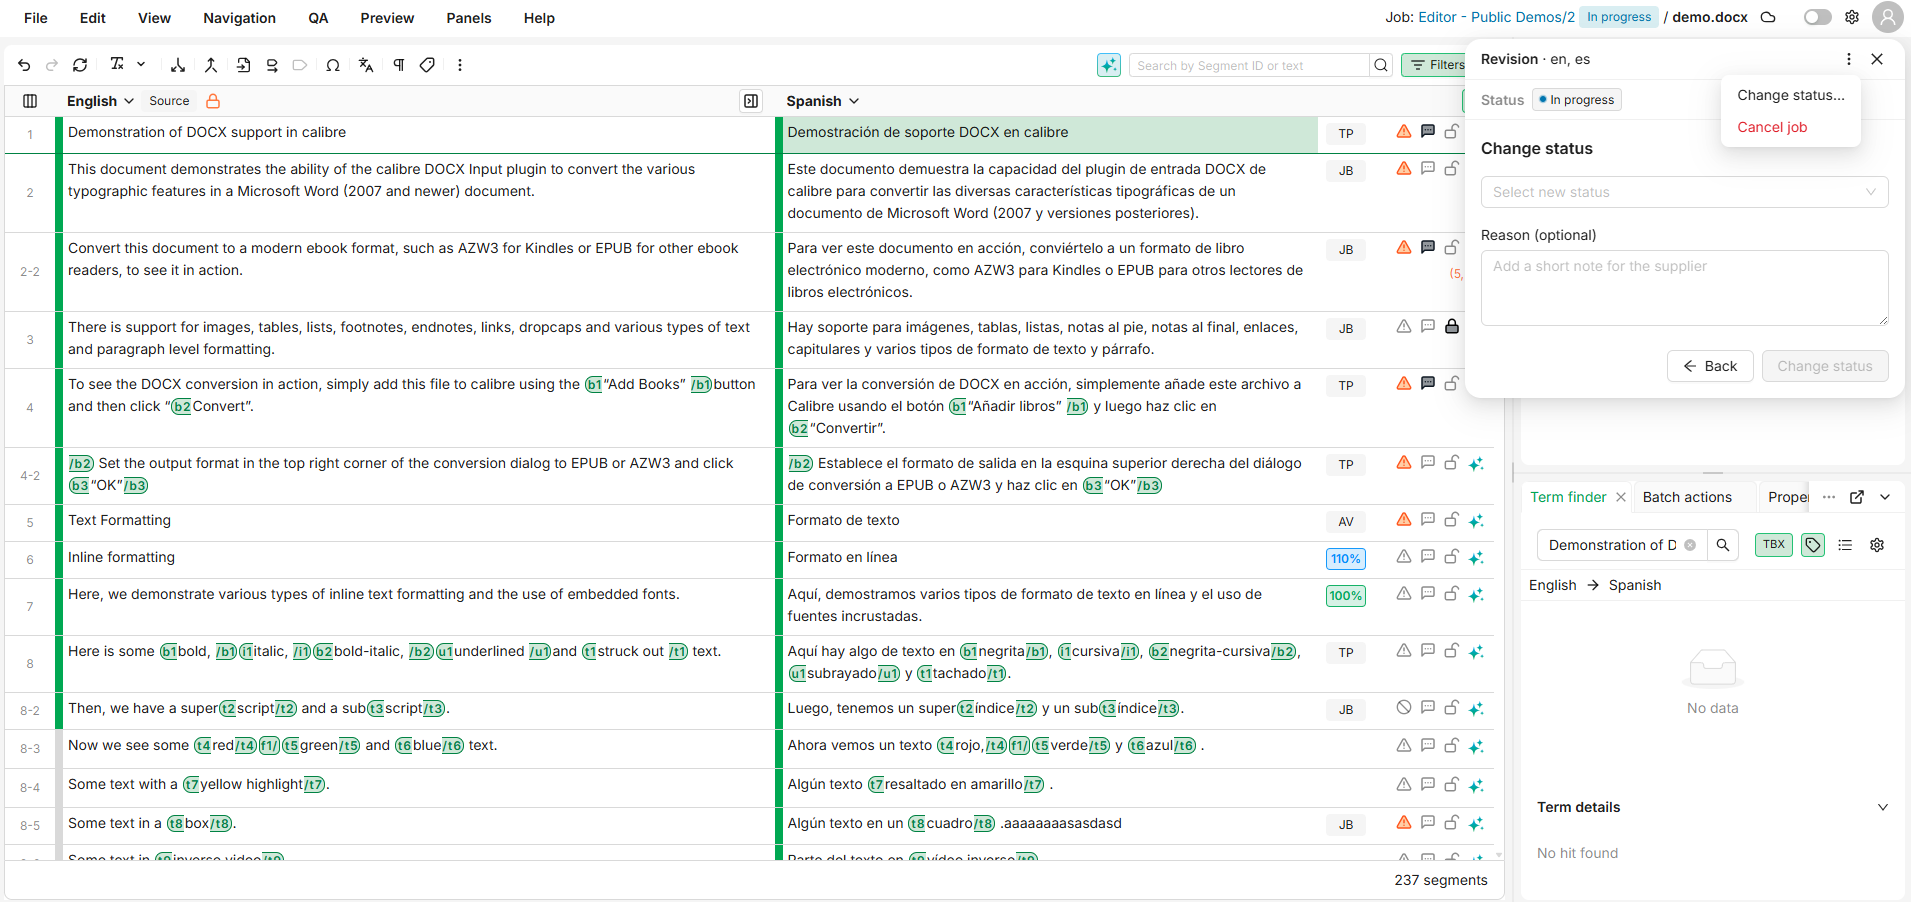
A cancelled job opens read-only with a Cancelled badge: its content cannot be changed while the job stays cancelled. Blocked actions: editing segments in any version of the Editor, re-importing translated XLIFF or Word files (exporting still works), editing word counts, adding or editing job attachments and library files, editing the Codyt job details popup, and applying automatic corrections through a QA batch run. To work on the job again, an administrator or in-house manager has to move it to a status where editing is possible, for example Proposal or Draft.
Messages and reference material
Use the Messages tab to send and read messages about the job, when messaging is available for it. Use the Ref. material tab to open the reference files attached to the job.
Attachments
The Attachments tab lets you exchange job files (briefs, glossaries, clarifications, screenshots) without leaving the Editor. For each document and language you can view, upload, download, rename, and delete files. A segmented control switches between source and target, and each side shows a file count. The tab is permission-aware: on a language you can edit, you can upload, rename, and delete; on a read-only language you can only download. It appears only when a language is editable or files already exist.
Learn More
-
The Editor: Overview of the Editor and its panels.
-
Create and Assign Jobs: How project managers create and assign jobs.